
How to set up a direct cable connection in Windows 95 and 98
Updated: 06/30/2020 by Computer Hope
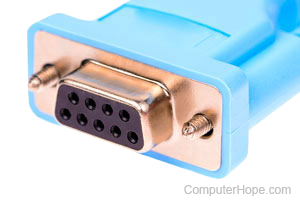
Below are step-by-step instructions for setting up a direct cable connection in Windows 95 and Windows 98. For these steps to work properly, you must have a null modem cable, which can be purchased at a local retail store.
- Your null modem cable must connect directly to each of the computers you are connecting, which means no other serial devices can connect to either computer.
- Make sure serial ports are enabled in BIOS setup.
- For Direct Cable Connection to work, you must first install the software used for the communication. To install Direct Cable Connection, click Start, Settings, Control Panel, and double-click Add Remove Programs. Then click the Windows Setup tab, double-click the Communications icon, check the Direct Cable Connection box. If this box is already checked, we recommend you uncheck the box and then check it again to ensure the complete program is installed on the computer. Once completely installed, reboot the computer.
- Once back in Windows click Start, Settings, Control Panel, double-click Network, and click File and Print Sharing. In File and Print Sharing, check the box next to "I want to be able to give others access to my files," and enable Print sharing. Click OK, if Windows cannot locate the drivers, reboot the computer again to ensure these settings are updated.
- Once back into Windows, double-click My Computer, right-click the drive you want to share your information on (e.g., C: drive) and click Properties. Once in Properties click the Sharing tab, click the option for Shared As, enter a Share Name, click the Apply, and then reboot the computer.
- Once the above steps are completed, you must then decide which computer hosts and which computer is the guest. Once this is determined, first set up the host computer by clicking Start, Programs, Accessories, Communications, Direct Cable Connection. In Direct Cable Connection choose the option for host, select the port, if so desired specify a password, and click Next. Your computer should then wait for the guest computer to send signal to the host computer.
- Once the above steps are completed, on the second computer, follow the above steps 1-5 again. Once done, click Start, Programs, Accessories, Communications, Direct Cable Connection. In the Direct Cable Connection box choose Guest, choose the communications port, click Next to have the computer start searching.
- Once the Host and Guest are set up, establish a connection and browse the hard drive that was shared through Network Neighborhood.