
How to adjust the Windows background

There are a lot of ways to customize your Windows desktop, such as changing the background or wallpaper. The following sections show you how to do so in the various versions of Windows. To proceed, select your Windows version from the list below and follow the instructions.
Windows 11
- Press the Windows key, type Settings, and press Enter.
- In the Settings window, select the Personalization option from the left navigation menu.
- On the right side of the window, click the Background option.
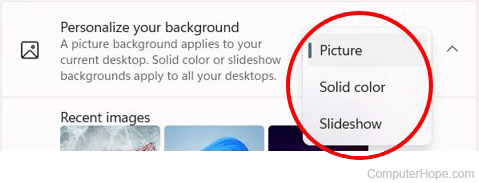
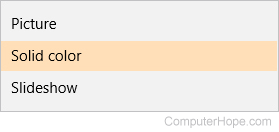
- In the Background settings, click the drop-down menu for the Personalize your background option and select a type of background to use.
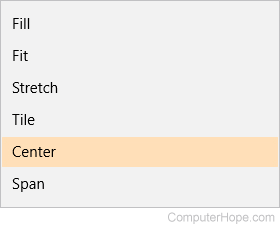
- If you choose Picture as the background type, select a picture from the Recent images section or click the Browse photos button and locate a picture file on your computer. After selecting a picture, click the drop-down menu for the Choose a fit for your desktop image option and select how you want the picture displayed as the background.
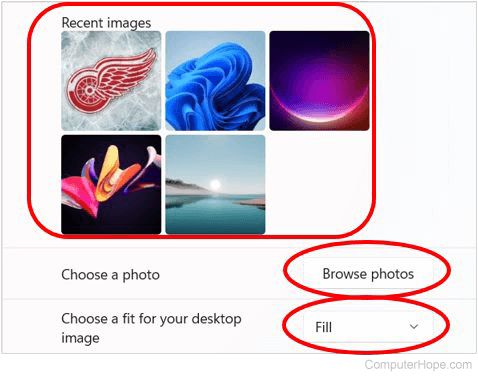
The Fill option increases or decreases the picture's width to fit the computer screen. Fit increases or decreases the height of the picture to fill the computer screen. The Stretch option makes the picture fit the entire computer screen, which may result in the image being distorted.
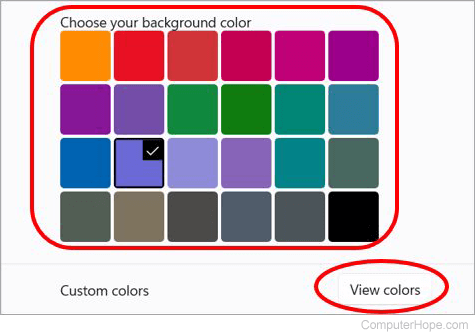
If you select Solid color as the background type, select a color in the Choose a background color section. If you prefer a different color, click the View colors button, select the desired color in the color chart, and click Done.
If you select Slideshow as the background type, click the Browse button and select a picture album on your computer to use for the slideshow. Select any additional slideshow settings, if desired. A brief description of each setting is below.
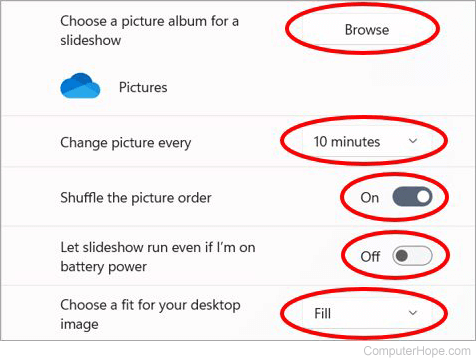
- Change picture every - Set the time interval for how long each picture is displayed in the slideshow.
- Shuffling the picture order - Enable or disable picture shuffling in the slideshow.
- Let slideshow run even if I'm on battery power - Allow the slideshow to run when it's using battery power, or turn the slideshow off to conserve battery power.
- Choose a fit for your desktop image - Select an option, like Fill, Fit, or Stretch, for how the slideshow pictures are displayed as the background.
The Fill option increases or decreases the picture's width to fit the computer screen. Fit increases or decreases the height of the picture to fill the computer screen. The Stretch option makes the picture fit the entire computer screen, which may result in the image being distorted.
Windows 10
- Press the Windows key, type Background image settings, and press Enter.
- On the left side of the window, make sure Background is selected.
- In the Background window, in the Background section, click the
 button.
 - From here, you can choose to use a picture, color, or slideshow as your background.
- Choose a color, or if you want a picture or slideshow as your background, click the
 button and navigate to the image(s) location.
If you're using multiple displays, you can right-click one of the pictures under the Choose your picture section and assign it to a specific monitor.
- If you selected an image, you could customize where and how the picture sits in the Choose a fit section.
- When you're finished with your selections, click the close
 button in the window's upper-right corner.
The Fill option increases or decreases the picture's width to fit the width of the computer screen. The Fit increases or decreases the height of the picture to fit the height of the computer screen. The Stretch option makes the picture fit the entire computer screen, which may result in the picture being distorted.
Windows Vista, 7, and 8
- Right-click any open part of the desktop screen.
- Click Personalize.
- Click Desktop Background.
- Click Browse.
- Find the location of the picture you want to use and click OK.
- Put a checkmark in the picture you want to set as the Windows background.
- Choose from Center, Tile, Fit, Fill, or Stretch for the Picture position option, to select how the picture is displayed as the background on the desktop.
The Fill option increases or decreases the picture's width to fit the width of the computer screen. The Fit increases or decreases the picture's height to fit the height of the computer screen. The Stretch option makes the picture fit the entire computer screen, which may result in the picture being distorted.
- To do a picture slideshow on your desktop, either choose Select all or hold down Ctrl and choose each picture you want to use. Also, you must choose how often the picture changes. The time range can be anywhere from 10 seconds to 1 day.
- Click Save changes to set your selected picture(s) as the new Windows desktop background.
If you have Windows 7 Home Basic or Windows 8 Basic on your computer, the "Personalize" option may be greyed out or unavailable. To change the desktop background, click the Start menu button and type change desktop background in the Search box. In the returned search results, click the "Change desktop background" option. You can then use the steps above, starting with step 3, to change the Windows background.
Windows XP and earlier versions
- Open the Control Panel.
- Open Display Properties in the Control Panel.
- Windows 95/98/ME/NT/2000 users click the Background tab. Windows XP users click the Desktop tab.
- After selecting a new background picture, click OK to save the changes.
Microsoft Windows has a list of default Windows backgrounds. To change the background to a different picture (e.g., your dog or family), click the Browse button and select the desired picture from your computer.
Windows 95 users can only set BMP (bitmap) images as their desktop background. If you have a different image format, it must be converted to a .BMP image before it can be the background. All other Windows users should be able to set a .BMP, .JPG, or .GIF image as their background.
Why do I have no background image?
In the list of the available backgrounds, the first choice is None. Selecting this option disables any background image on the desktop. It is important to note that the background is a solid color when you change the background to None.
Windows XP users can change this color from the same window where they change their desktop. All other users need to change their desktop color through the Appearance tab.
How do I make a small image tiled or not tiled across the background?
In the desktop or background properties window, a user can customize the layout of their image by selecting Center, Tile, or Stretch. Below is a brief explanation of each of these settings.
- Center - Centers the image in the middle of the desktop. Centering enables the user only to have one image set as their background instead of having it tiled. If the image is smaller than your computer resolution, you may have a solid color border around it.
- Tile - Tiling an image uses a smaller image and duplicates it across the desktop instead of centering or stretching it to fit the screen.
- Stretch - Stretches a single image across the whole screen. The smaller the image size, the more distortion you notice when stretching an image. An image that is smaller than your monitor's resolution results in pixelation of that image.
Why am I unable to see my background?
Your desktop background might not display if the image file was deleted or if active desktop is enabled on the computer.
- Verify the image used as the background is still available on the computer and can be viewed.
- Disable Active Desktop.