
How to convert Windows into a different language

Many users speak more than one language, with one language being preferred the most. Also, some users who purchase their computers or Windows software from a different country may find that Windows uses a different language when installed. Whichever is the case, you can change the language displayed in Windows on your computer.
To learn how to change the language displayed in Windows, select your version of Windows from the list below and follow the instructions.
Windows 11
- Press the Windows key, type language settings, and press Enter.
- In the window, click the Add a language button.
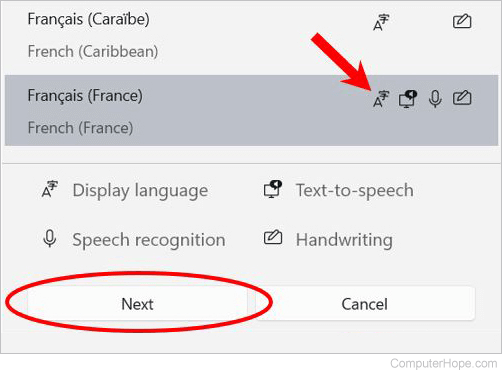
- Select the language you want to install and use, and click Next.
Make sure the language you select has the ![]() icon next to it. If that icon is missing for the selected language, Windows utilities like File Explorer and Settings are not displayed in that language.
icon next to it. If that icon is missing for the selected language, Windows utilities like File Explorer and Settings are not displayed in that language.
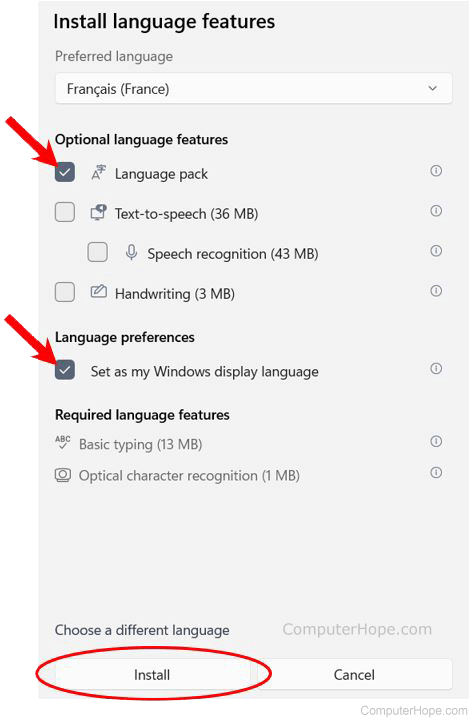
- Under Optional language features, check or uncheck language feature boxes. Make sure Language pack is checked at a minimum.
- Under Language preferences, check the box next to Set as my Windows display language.
- Click the Install button to install the selected language.
- For the new language to take effect and be used, log out and log back in to Windows, or restart your computer.
Windows 10
- Press the Windows key, type language settings, and press Enter.
- In the window that opens, click the Add a language option.

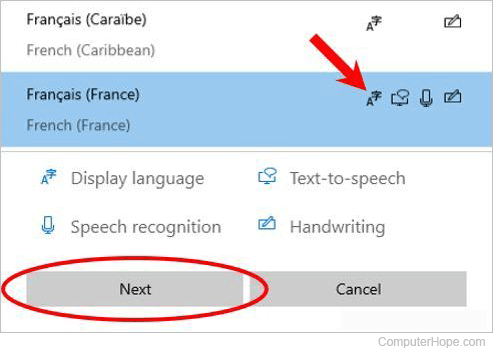
- In the next window, locate and select your preferred language, and click Next.
Make sure the language you select has the ![]() icon next to it. If that icon is missing for the selected language, Windows utilities like File Explorer and Settings are not displayed in that language.
icon next to it. If that icon is missing for the selected language, Windows utilities like File Explorer and Settings are not displayed in that language.
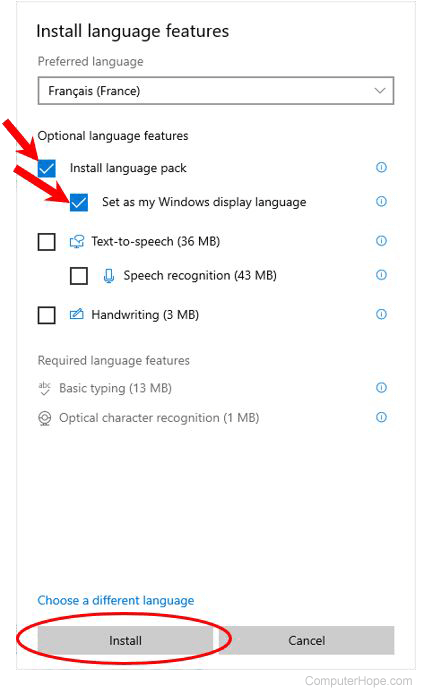
- Under Optional language features, check or uncheck language feature boxes. Make sure Install language pack is checked at a minimum.
- Under the Install language pack option, check the box next to Set as my Windows display language.
- Click the Install button to install the selected language.
- For the new language to take effect and be used, log out and log back in to Windows, or restart your computer.
Windows 8
If you already have your preferred language downloaded
- Open the Windows Control Panel.
- Under the Clock, Language, and Region section, select Add a language.
- In the language window, select the language of your choice.
If you don't have your preferred language downloaded
- Open the Windows Control Panel.
- Under the Clock, Language, and Region section, select Add a language.
- Under the Change your language preferences section, select Add a language.
- In the new window, locate your preferred language, and click Open.
- You should now be back in the Change your language preferences section; select Options next to your preferred language.
- Select Download and install language pack.
- In the language window, you may select the language of your choice.
- In the new window, select Download and install language pack.
Windows 7 and Vista
Only the Ultimate versions of Windows 7 and Vista allow users to switch languages.
- Open the Windows Control Panel.
- Under the Clock, Language, and Region section, click Change display language.
- Under the Keyboards and Languages tab, click Install/Uninstall languages.
- Select Install display languages, and then Launch Windows Update.
- In the Windows Update section, click XX updates are available.
- Check the box or boxes next to your preferred language(s), then click OK.
- Click the Install updates button.
- Once your language(s) have finished downloading, close your current window.
- In the Region and Language window, under Choose a display language, click the drop-down arrow.
- Select a language, click Apply, and click Log off now.
- Log back in to Windows and your selected language should appear.
Windows 2000 and XP Professional
Microsoft Windows 2000 and Windows XP Professional users can utilize the MUI (multi-user interface) utility or muisetup.exe to change the language of the display menus, dialogs, and text within their operating system. MUI is sold through MOLP (Microsoft Open License Program) or with an enterprise agreement. It is not available through the standard retail versions of Windows.
Microsoft Windows 2000 and Windows XP MUI supports the languages below
English, French, Spanish, Italian, Swedish, Dutch, Brazilian, Finnish, Norwegian, Danish, Hungarian, Polish, Russian, Czech, Greek, Portuguese, Turkish, Japanese, Korean, German, Chinese, Arabic, and Hebrew.
Windows XP also has support for the following languages
Slovak, Bulgarian, Estonian, Lithuanian, Thai, Slovenian, Croatian, Latvian, and Romanian.