How to connect to a network printer
Setting up a network printer is beneficial as it allows multiple devices to print without connecting to it directly. The following sections contain steps on connecting to a network printer once it's set up. To proceed, select your operating system from the list below and follow the instructions.
Windows 11
- Turn on your printer and make sure it is connected to the network.
- Open the Control Panel.
- Click the Devices and Printers icon or View devices and printers link, depending on the view type you are using in the Control Panel.
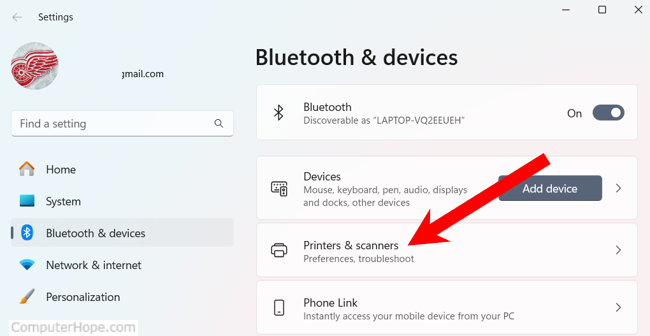
- In the Settings window that opens, on the right side, click the Printers & scanners entry.
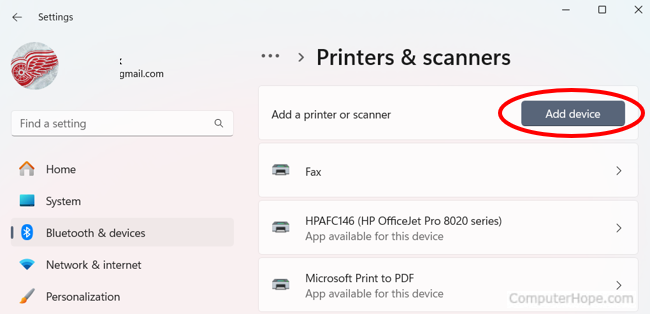
- In the next window, click the Add device button.
- Let Windows scan for the printer. If detected, next to the printer name, click the Add device button again. If the printer is not listed, click the Add manually link next to The printer that I want isn't listed and skip to add the printer by name or TCP/IP address.
If you know the printer's name, choose Select a shared printer by name and enter the path to the printer. For example, with a network named hope and a printer named hp, the network path would be \\hope\hp.
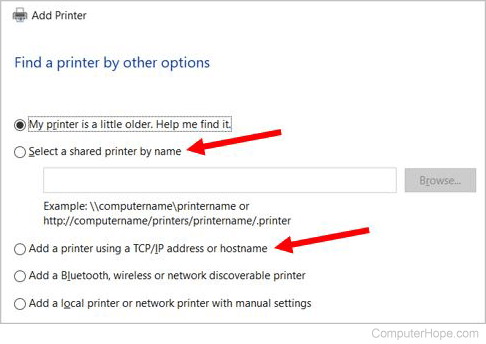
If you do not know the printer's path, but have the printer's IP address, select Add a printer using an IP address or hostname.
Click Next.
- If, during the installation, Windows asks for drivers, point to their location. If you do not have drivers, visit our printer drivers section to find links to help find them.
Windows 10
- Turn on your printer and make sure it is connected to the network.
- Open the Control Panel.
- Click the Devices and Printers icon or View devices and printers link, depending on the view type you are using in the Control Panel.
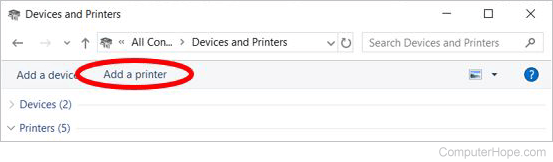
- In the Devices and Printers window, click the Add a printer link in the menu bar at the top.
- Let Windows scan for the printer. If detected, select the printer and click Next. If the printer is not listed, click The printer that I want isn't listed and skip to add the printer by name or TCP/IP address.
If you know the printer's name, choose Select a shared printer by name and enter the path to the printer. For example, with a network named hope and a printer named hp, the network path would be: \\hope\hp.
If you do not know the printer's path, but have the printer's IP address, select Add a printer using a TCP/IP address or hostname.
Click Next.
- If, during the installation, Windows asks for drivers, point to the location of your printer drivers. If you do not have drivers, visit our printer drivers section to find links to all printer drivers.
Windows 8
- Turn on your printer and make sure it is connected to the network.
- Open the Control Panel.
- Click Hardware and Sound.
- Double-click the Add a printer icon.
- Select Add a network, wireless or Bluetooth printer and click Next.
- Let Windows scan for the printer. If detected, select the printer and click Next. If the printer is not listed, click The printer that I want isn't listed and skip to add the printer by name or TCP/IP address.
If you know the printer's name, choose Select a shared printer by name and enter the path to the printer. For example, with a network named hope and a printer named hp, the network path would be: \\hope\hp.
If you do not know the printer's path, but have the printer's IP address, select Add a printer using a TCP/IP address or hostname.
Click Next.
- If, during the installation, Windows asks for printer drivers, point to the location of your drivers. If you do not have drivers, visit our printer drivers section to find links to all printer drivers.
Windows Vista and 7
- Turn on your printer and make sure it is connected to the network.
- Open the Control Panel.
- Click Hardware and Sound.
- Double-click the Add a printer icon.
- Select Add a network, wireless or Bluetooth printer and click Next.
- Let Windows scan for the printer. If detected, select the printer and click Next. If the printer is not listed, click The printer that I want isn't listed and skip to add the printer by name or TCP/IP address.
If you know the printer's name, choose Select a shared printer by name and enter the path to the printer. For example, with a network named hope and a printer named hp, the network path would be: \\hope\hp.
If you do not know the printer's path, but have the printer's IP address, select Add a printer using a TCP/IP address or hostname.
Click Next.
- If, during the installation, Windows asks for printer drivers, point to the location of your drivers. If you do not have drivers, visit our printer drivers section to find links to all printer drivers.
Windows 2000 and XP
- Turn on your printer and make sure it is connected to the network.
- Open the Control Panel.
- Double-click the Printers or Printers and Faxes icon.
- Double-click the Add a printer icon.
- Once in the printer wizard, click the Next button to get started.
- Select either A network printer, or a printer attached to another computer or Network Printer and click Next. The option depends on what version of Windows you are using.
- Type the name of the printer's network address. The address is the name of the computer and then the name of the printer. For example, with a network named hope and a printer named hp, the network path would be: \\hope\hp. If you are adding the printer on a Windows XP computer, click the Browse icon to browse your network and locate the printer. If you're unable to connect to the printer or browse and see the printer, make sure you have network rights and that any installed firewall is temporarily disabled.
- Once the network path to the printer is typed in, click Next.
- If the computer doesn't have the printer drivers, you must install them from a driver's disc or a download on the Internet. If you no longer have the software or drivers for your printer, locate the drivers for your printer through our printer drivers section.
Windows 95, 98, or Me
- Turn on your printer and make sure it is connected to the network.
- Open the Control Panel.
- Double-click the Printers icon.
- Double-click the Add a printer icon.
- Click Next to start the Add a printer wizard.
- Select Network Printer and click Next.
- Type the network path for the printer. For example, with a network named hope and a printer named hp, the network path would be: \\hope\hp.
- If the computer doesn't have the printer drivers, you must install them from a driver's disc or a download on the Internet. If you no longer have the software or drivers for your printer, locate the drivers for your printer through our printer drivers section.
macOS
How you connect to a printer in macOS depends on which version you're running. To proceed, select the appropriate entry from the list below and follow the steps. If you're unsure which version is on your device, see our page: How to determine the version of macOS on a computer.
macOS Ventura and Sonoma
Here is how to connect to a network printer in macOS versions 13 and 14.
- At the top-left corner of the desktop screen, click the Apple icon.
- Select System Settings from the Apple menu.

- In the sidebar, scroll down and click the Printers & Scanners selector. Then, in the right section under Printers & Scanners, click the Add Printer, Scanner, or Fax button.

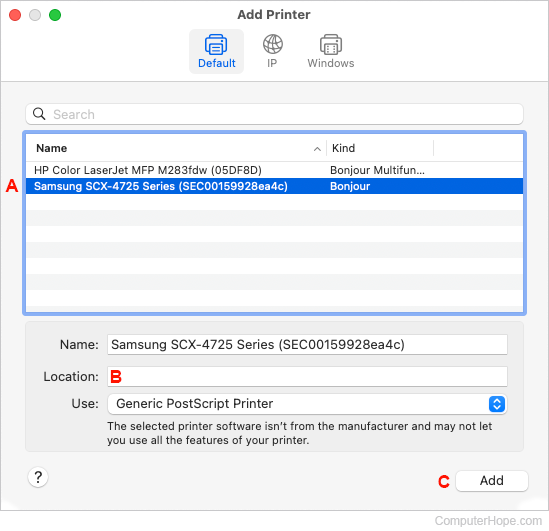
- On the next screen, select a printer (A), type in a location if desired (B), and click the Add button (C).
- Wait a few moments while macOS sets up the new device.
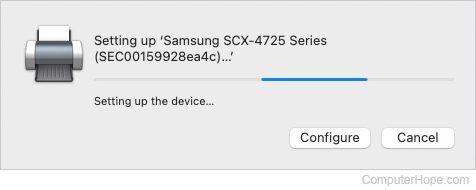
- If successful, a new device appears in the Printers & Scanners section.
macOS High Sierra, Mojave, Catalina, Big Sur, and Monterey
Here is how to connect to a network printer in macOS versions 10 through 12.
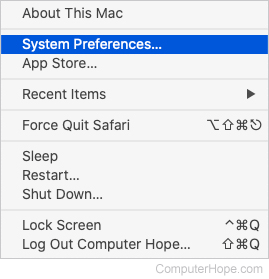
- In the menu bar, click the Apple icon to open the Apple menu.
- In the Apple menu, click System Preferences.
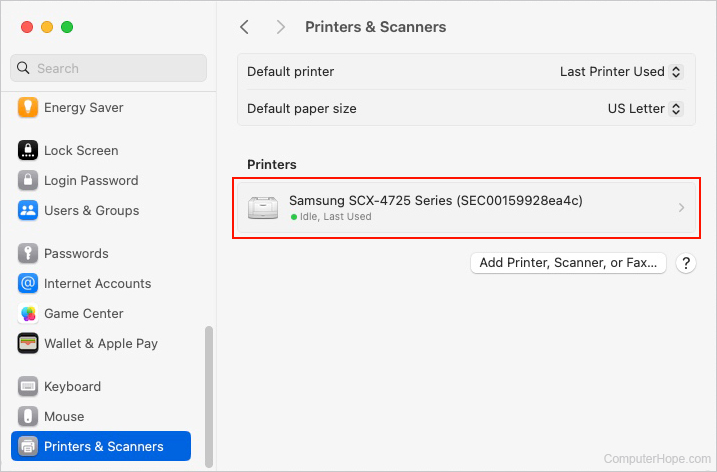
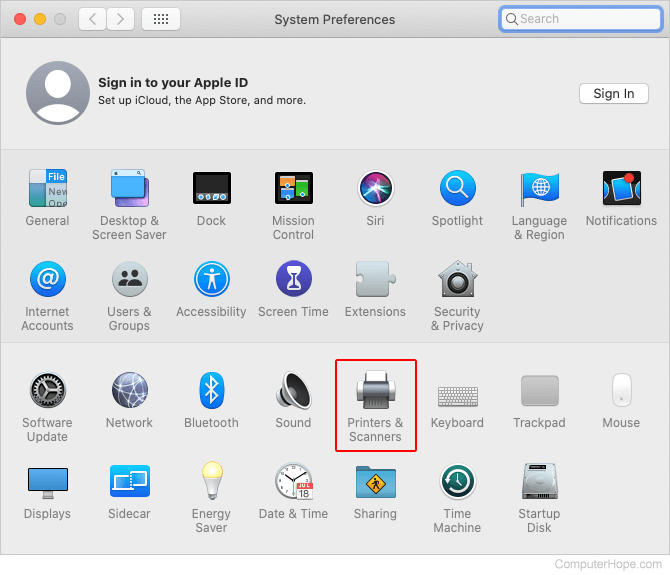
- Click the Printers & Scanners shortcut icon.
- Click the + symbol in the lower-left section of the window.
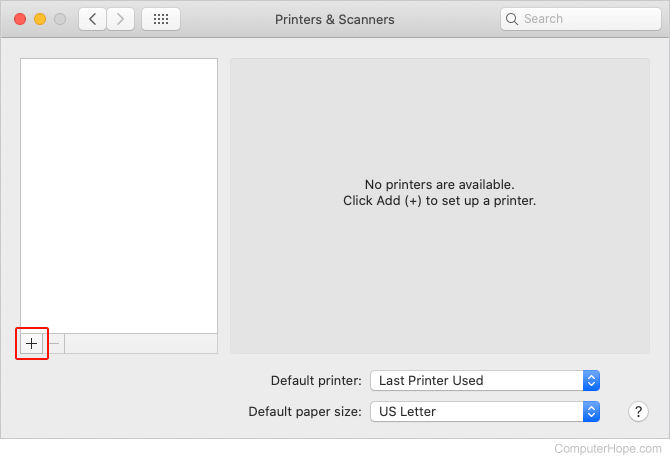
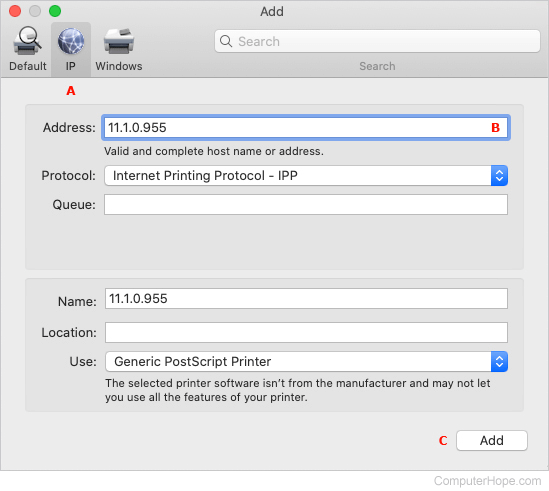
- In the next window, click the IP tab (A), type in the IP address for your printer (B), and then Add (C).
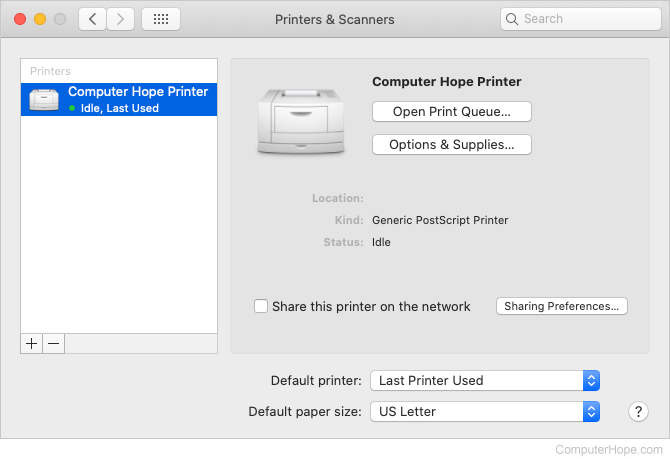
- Once you've added the printer, it is listed in the Printers & Scanners window.