
How to disable the Windows guest and other accounts

In Microsoft Windows, user accounts are often added or removed through the Windows utility Control Panel, but to disable a user account, use the Computer Management utility in Windows. Select your version of Windows below and follow the steps to disable a user account.
You must log in to Windows using an account with administrative privileges to use the Computer Management tool.
Windows 8 and Windows 10
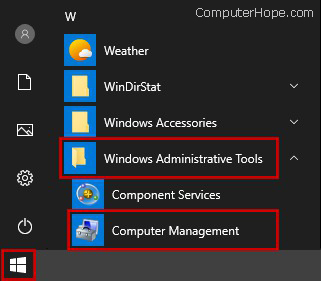
- In the Windows search box for Windows 10, or on the Windows Start screen for Windows 8, type "computer management" and press Enter.
Or, in the Start menu, open Windows Administrative Tools, Computer Management.
The Computer Management window opens, as shown below.
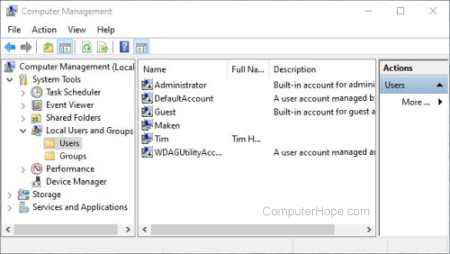
- Click the > next to Local Users and Groups, or double-click it.
If you cannot access this section, you likely do not have administrator rights on the computer.
- Under Local Users and Groups, click Users to show the users accounts in the right pane.
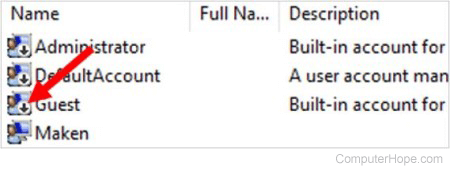
- Double-click the Guest account or the account you want to disable and check the box for "Account is disabled," then click OK.
If successfully disabled, a down arrow is displayed in the bottom-right corner of the user account icon, indicating the account is disabled.
Windows Vista and Windows 7
- On the Windows desktop, right-click Computer and select Manage. The Computer Management window opens, as shown below.
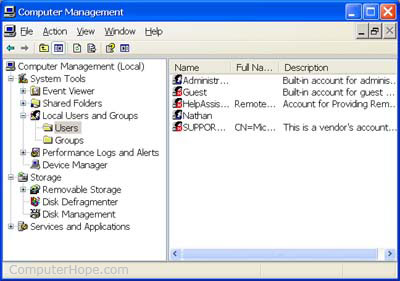
- Click the + next to Local Users and Groups, or double-click it.
If you cannot access this section, you likely do not have administrator rights on the computer.
- Under Local Users and Groups, click Users to see all user accounts in the right pane.
- Double-click the Guest account or the account you want to disable and check the box for "Account is disabled," then click OK.
If successfully disabled, a red X is displayed in the bottom-right corner of the user account icon, indicating the account is disabled.
Windows XP
- On the Windows desktop, right-click My Computer and select Manage. The Computer Management window opens, as shown below.
- Click the + next to Local Users and Groups, or double-click it.
If you cannot access this section, you likely do not have administrator rights on the computer.
- Under Local Users and Groups, click Users to see all user accounts in the right pane.
- Double-click the Guest account or the account you want to disable and check the box for "Account is disabled," then click OK.
If successfully disabled, a red X is displayed in the bottom-right corner of the user account icon, indicating the account is disabled.