
How to hide or delete the Windows desktop Recycle Bin icon
Updated: 12/05/2021 by Computer Hope
To hide or remove the Recycle Bin icon on the Windows desktop, select your version of Windows in the list below and follow the steps.
Tip
Before hiding the Windows desktop Recycle Bin icon, we recommend configuring Windows not to send deleted files to the Recycle Bin. For more information, see: How to make files not go to the Recycle Bin in Windows.
Windows 11
- Right-click the desktop and select Personalize in the pop-up menu.
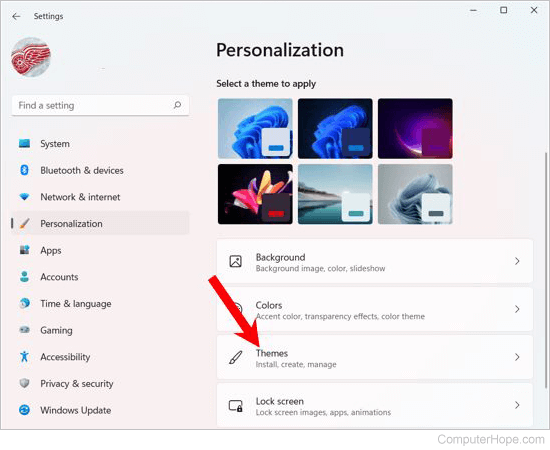
- On the right side of the Personalization window, click the Themes option.
- Scroll down to the Related Settings section and click the Desktop icon settings option.
- In the Desktop Icon Settings window, uncheck the box for Recycle Bin to disable and hide the Recycle Bin icon.
![]()
Windows 8 and 10
- Right-click the desktop.
- Select Personalize in the pop-up menu.
- In the left navigation menu, click Themes.
- Under Related Settings, click the Desktop icon settings option.
- In the Desktop Icon Settings window, uncheck the box for Recycle Bin to disable and hide the Recycle Bin icon.
Windows Vista and 7
- Right-click the desktop.
- Select Personalize in the pop-up menu.
- In the Personalize appearance and sounds window, click the Change desktop icons link on the left side.
- Uncheck the Recycle Bin box and click OK.
Windows XP
The first method to hide Recycle Bin icon in Windows XP is to use the application TweakUI.
- Download and install Windows TweakUI.
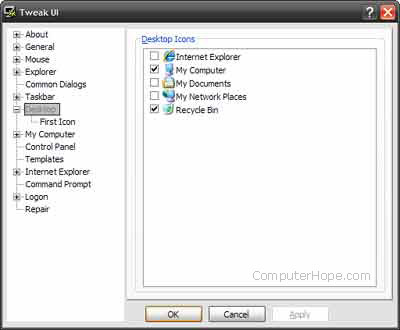
- Open TweakUI and click Desktop in the left navigation menu, as shown in the picture.
- In the Desktop Icons section on the right, uncheck the Recycle Bin box.
- Click OK.
You can also remove the Recycle Bin icon by editing the Windows registry directly.
Caution
Before editing or changing anything in the Microsoft Windows registry, see: How to back up and restore the Windows registry. We also highly recommend anyone new to the registry become familiar with all the Windows registry basics.
- Click Start and select the Run option in the Start menu.
- In the Run text box, type Regedit and press Enter.
- Navigate to the following registry location.
HKEY_LOCAL_MACHINE\SOFTWARE\Microsoft\Windows\CurrentVersion\Explorer\Desktop\NameSpace
- Find and delete the registry key below.
{645FF040-5081-101B-9F08-00AA002F954E}