
How to configure and use Ventrilo

Ventrilo is a great Voice over Internet Protocol (VoIP) service that's available to anybody for free. After the initial download and installation of Ventrilo, set up is required before you can connect to and communicate over a server.
Make sure you download and install the correct version of Ventrilo, based on whether you have a 32-bit or 64-bit version of Windows.
How to create a user name and server
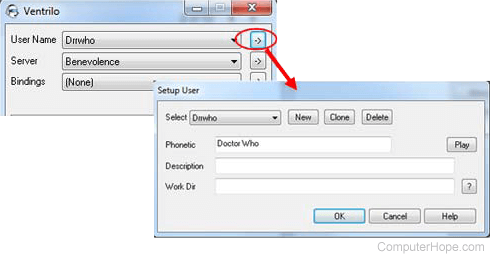
- Create a User Name by clicking the -> button to the right of the User Name drop-down list to open the Setup User window.
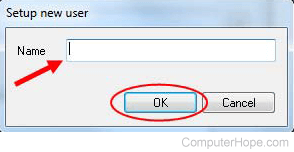
- Click the New button and enter your desired User Name in the Name text field, then click the OK button.
Back on the Setup User window, you can type in how you want your name to sound to other people when you join a server. Click the OK button when you are done.
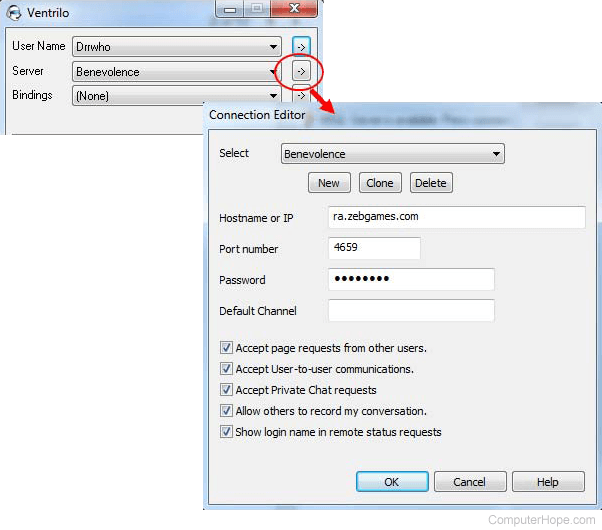
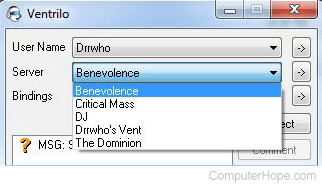
- After creating your User Name, you must add the server to connect to for voice chat. Click the -> button to the right of the Server drop-down list to open the Connection Editor window, as shown below.
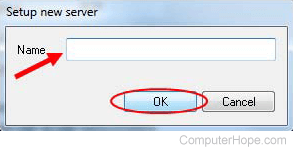
- Click the New button, enter a name for the server, and click the OK button.
- Back on the Connection Editor window, enter the Hostname or IP (Internet Protocol), Port Number, and password (if any) for the server. Once you have entered that information, click the OK button. If you have multiple servers, enter the information for each one, as detailed above. After setting up the servers, you can select which one to connect to from the Server drop-down list.
Setup options and configuration
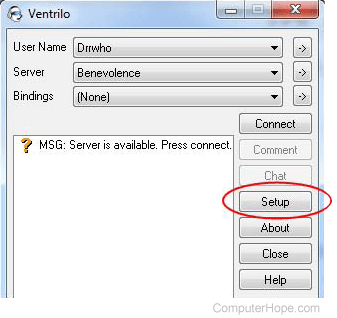
After setting up your User Name and Server(s), configure additional Ventrilo settings to optimize your experience. To do this, click the Setup button on the main Ventrilo program window to open the Setup window.
Most of the settings can be left at their defaults, but can be configured based on your preferences and the microphone & speakers (or headset) you use. Below are the key settings to check and descriptions of each.
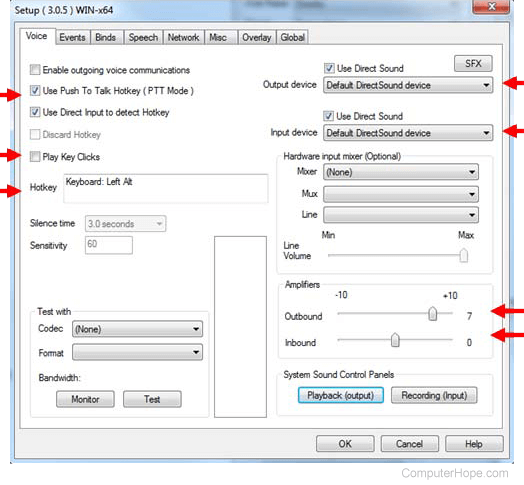
- Enable push to talk hotkey - First and foremost, as a common courtesy, we recommend you enable the Use Push To Talk Hotkey (PTT Mode) option. Using this option requires you to press a key to talk; otherwise, you are muted.
- Set a PTT hotkey - You can configure which key you want to use in the Hotkey box (third arrow down on the left side). Left-click (with your mouse) in the Hotkey box, then press any key or mouse button to set a Push-to-Talk shortcut.
- Play Key Clicks - You can choose whether or not you want to hear a sound when Push-to-Talk activates and deactivates.
- Output device and Input device - These drop-down lists (top two arrows on the right side) allow you to choose which device Ventrilo uses to "hear" you talk, and which device to use for playing sound. The default option is Default DirectSound device and usually works fine; however, you may find better sound quality by specifying an alternate device.
- Amplifiers - The sliding bar values for Outbound and Inbound (bottom two arrows on the right side) can be adjusted for the microphone and speakers/headset you are using. These settings allow you to change the volume of your voice and the voices of others. Adjusting these settings and getting them optimized requires you to connect to a server. It's a good idea to test your mic volume with another person on Ventrilo, so they can provide feedback on the sound level and quality.
Once you've completed making changes, click the OK button on the Setup window and connect to a server to begin talking with others.