How to remove a computer case fan
Removing a case fan from the computer is a relatively simple process and may be necessary to clean or replace a fan. Below, are the steps required for removing most computer case fans.
While inside the computer, make sure it's off and you're familiar with ESD (electrostatic discharge) and its potential dangers.
Disconnect the fan
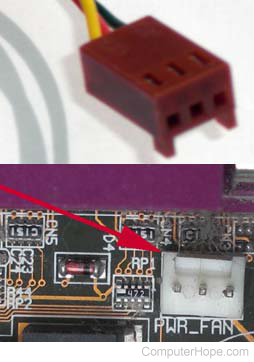
Before the fan can be removed from the computer, it must be unplugged from the motherboard or its power source. A two, three, or four pin power cable should be connecting the fan to the computer motherboard. Locate where this cable connects to the motherboard and disconnect it by grabbing on the connector end and pulling up on the connector.
The picture shows an example of a traditional power fan cable and connector, labeled as PWR_FAN. Computer case fans may also be powered using a Molex power connector.
If the connector is accessible, do not pull the wire by the cable. Instead, disconnect the cable by pulling on the connector end. Pulling on the wires may loosen them from the connector.
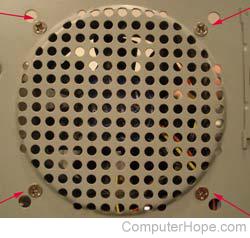
Unscrew or unclip the fan
After the fan is unplugged from the motherboard or power supply, it can be removed from the computer. With many case fans, they'll either be screwed into the case or have small clips that can be pressed or pulled. The picture below is an example of the back of a computer and four screws holding the computer case fan in place.