
How to enable and disable the Ruler in Microsoft Word
This page shows users how to enable or disable the vertical and horizontal ruler in a Microsoft Word document. The steps in this process vary depending on your Microsoft Word version. To proceed, select your version of Microsoft Word from the list below and follow the instructions.
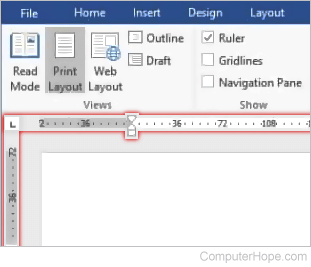
The horizontal ruler is displayed below the menu or Ribbon bar, and the vertical ruler is displayed on the left side of the Word program window.
Microsoft Word Online
In Microsoft Word Online, the web version, click the View tab, then the Ruler option in the Show group.
Microsoft Word 2013 and later
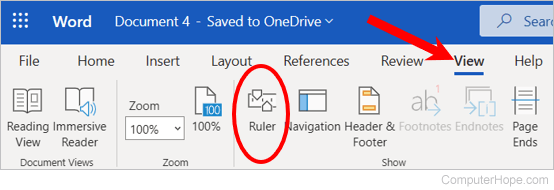
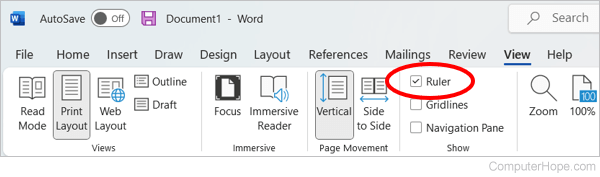
In Microsoft Word 2013 and later, including the Word 365 desktop application, click the View tab, then click the Ruler check box to show the horizontal and vertical ruler.
Microsoft Word 2007 and 2010
Microsoft Word 2007 and 2010 use the Ribbon instead of the file menu. Enabling and disabling the rulers is done through either of the following methods.
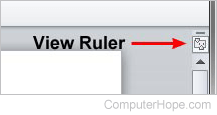
Click the View Ruler icon on the top of the right vertical scroll bar, as shown in the picture.
You can also click the View tab and check the box for Ruler.
Earlier versions of Word, OpenOffice, and other word processors
- Click the View drop-down menu at the top of Word.
- Select Ruler to place a checkmark next to that option to enable the horizontal and vertical ruler. To disable it, select Ruler to remove the checkmark next to that option.
You may need to click the bottom chevrons if you do not see the Ruler option.