Riven walkthrough
Temple Island
|
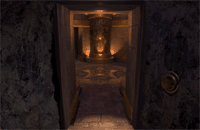
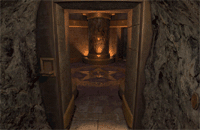
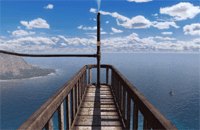
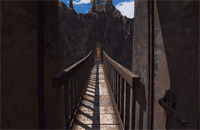
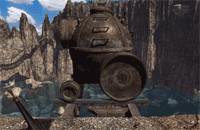
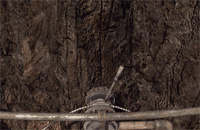
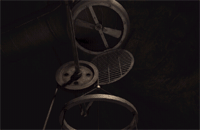
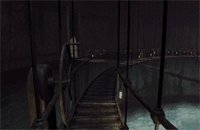
You begin the game where you find out the objective of the game is to capture Gehn and free Catherine to save the five islands from destruction. After you have been given the two books you discover you are in a cage where a strange man will talk to you in a different language. Shortly after he begins talking he takes one of our books, however will not be able to read it for long as he is hit in the head by an unknown individual. As you watch him lay on the ground you begin to notice that he is being dragged around by another strange individual who then breaks a switch and the game begins. You first notice a telescope. However, you are not going to use this telescope until the end of the game. Therefore, continue up the pathway to the first puzzle the Rotating Room. To access the other doors in the Rotating room press the button four times. Once the button has been pressed four times turn around and facing the bridge take a left going down the path way tell you find a locked door look down at the door and go under it. Go through the door to find the steam valve switch the steam valve to activate the telescope that will be used later in the game. Once turned on before exiting the door you should notice a switch and a button. Move the switch to the up position and press the button to the right two times. Another door will now be open with a locked door behind it. Enter the room and turn around to find another switch and button. Move the switch to the up position and press the button an additional two times. The entrance should now be open go back to the original button and press it two more times. Now the door should be open leading to the bridge. Go through the room and follow the path to a steam valve. Turn the first valve to the left moving . Turn around and take a left until you find the other second valve. Turn this valve to the right. Now that these two valves have been activated the switch by the bridge will be able to be activated. The bridge does not need to be in the up position until later in the game. Exit back out of the rotating room across the first bridge and work your way down the tunnel until you find a closed door. In this room locate a big chair. Sitting in this chair to the left you should see a picture of the temple move this switch to the up position to open the door. Once this switch has been moved exit the room and continue to head left until you enter the temple. On the opposite side of the stained glass window you see an exit to a tram. Enter the tram. To move the tram move the switch to the left to the right position to turn around the tram and them press the downward switch to the upward position that moves the tram forward. |
Jungle Island
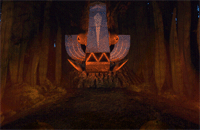
Once on the jungle island you first notice an eye that is an important clue to a puzzle found later in the game. Clicking this eye will revel a number. Any time you locate an eye it is important to remember the number and attempt to locate an animal shape near the eye. In the case of this eye to locate the animal shape take a left and enter the cave entrance. Before going all the way up the stairs if you turn around you notice that this eye represents a frog as the shape of the cave is a frog. Continue up the stairs and begin to familiarize yourself with the island if you take a right from the entrance and work your way through the passage. Next locate the Wahrk shrine, this shrine has a secret entrance that can be accedes by pressing a button that is on top of the right light. Pressing this button opens the fishes mouth that has a small elevator. Going up the elevator and going down the pathway you see a rotating dome on this dome is a character that is yellow it is important to remember this character for a puzzle found later in the game. Continuing down the path find the throne room. Sit in this chair and move the switch to your left, which takes you to a great view of the village looking down you see the lake, now press the right switch to close the door that needs to be closed to allow you to have access to a room later in the game. Next, exit the fish where you see a small girl who falls as she runs away. Continuing down that path and taking all rights you come to the entrance of the village were if you look closely you see a man working on a submarine on the top left side of the screen in addition you see a small child who is playing, scared the man takes this child and run away. Continue down the path until you get to one of the small houses in the village. Follow the path to the left of this house that will lead you to the submarine. Lower this submarine into the water. By pressing the switch to the left. Exit the village head back to the entrance leading back to the tram. From this entrance head down the stairs and follow the path all the way down to the submarine. Remember to also look at the eye that you find during the way to the submarine. Once in the submarine familiarize yourself with the switches. There are a total of three switches the one to the far right makes the submarine move forward the switch in the middle will turn the submarine around and finally the switch in the bottom middle allows the submarine to know to go left or right when at a cross section on the tracks. To begin press the forward switch that takes you to a cross section, take the track to the right. This takes you to a location to that you can exit the submarine. Once you have exited the submarine follow the path until you reach 5 switches move the three switches in the down position to the up position. Once these switches have been moved return to the submarine. Back in the submarine turn it around and head forward until back at the cross road now take a left to head to the school. In the school play the hang man game to get an understanding on how the D’ni number system. Once you have familiarized yourself with this exit out of the school to return back to the submarine. Turn the submarine around and once back at the cross section on the tracks take a left to get to the trapeze. Before going up this ensure that you have gone to the school as once you have gone up this you are not able to go back down to the submarine. To go up the trapeze pull the one chain to move down the other. Use this to go up to the top. Once at the top you find what appears to be a prison with a man inside sitting. To the right of this cage is a switch that can be used to open the prison wall. However, when entering this room you notice that the man has disappeared. Looking at the floor you notice a grate. Open the grate and pull the switch within the grate to open the secret door. |
 Wahrk Shrine
|
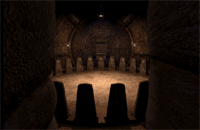
Through the secret door is a tunnel, which mostly black. However, continue down the tunnel and find an opening to the water with a light switch on the left hand side of the tunnel. Turn this light switch on and turn around. Now wiith the other switch turn it on and continue to turn each switch on as you walk down the tunnel. Once all the lights have been turned on, if you turn around, you see a door in the tunnel wall. Going through this door leads you to the Moiety Gateway room. In this room, locate the 25 stone slabs with animals on each of them.
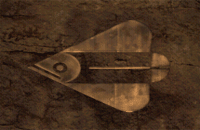
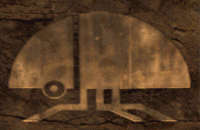
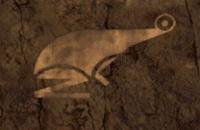
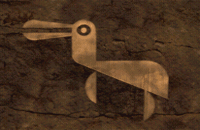
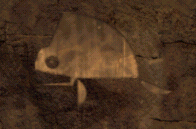
To open the gate, you need to click the below stones in this order; fish, beetle, frog, sunner, and finally the warhk. Once this has properly been done find a page that allows you to access to the Moiety Age.
 Fish |
|
 Beetle |
 Frog |
 Sunner |
 Warhk |
The Moiety Age
 Moiety Age Page
|
Once here, locate a large structure (like the structure on the Riven box), however notice there is no other option but to turn around once you turn around and walk towards the book you are shot by guards on their rounds. You later wake up in a small cell that has no exit. After some time snooping around, a female Moiety gives you Catherine's journal and the trap book you need to trap Gehn. This the same book that was given to you at the beginning of the game. After reading Catherine's book and then looking at the other (dont enter the other book, as it is a trap and the game ends), the lady re-enters the room and gives you the portal back to the Moiety Gateway. |
Crater Island
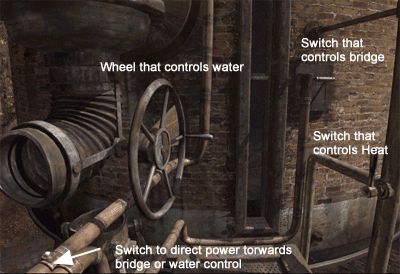
Exit out of this room and get back to the trough the pathway (not the shut door). Once you are back out on the trail you should get to a location to where you can see a hole in the ground that has a cart. Get in this cart to get to the boiler. Once at the boiler you are faced with a puzzle, begin by going into the middle of the lake and changing the switch to be in the middle. Next head towards the boiler and follow the path to the left. Once at the main controls first turn off the heat, next use the switch to direct the power towards the bridge, then switch the switch to direct power towards the water control and finally move the wheel to empty the water.
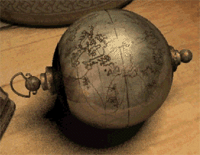
If done properly you should be able to go into the boiler through the hole in the ground and out the tunnel. Once through the tunnel look down and follow the pathway to a closed door with a hatch next to it. Open the doors and go into the room. Once in the room close the doors behind you to reveal a secret entrance. Go down the secret entrance to the right as you are walking down the pathway switch the lever on the right hand side of the pathway to turn off the ventilation system. Once this has been switched go back to the room you just came from that has the bean machine. Now that you have switched the lever look up and crawl through the ventilation system. Which will get you into Gehn's lab. In Gehn's lab make sure to make a note of the six symbols on page nine (like the ones on the Fire Marble Domes) and the five-figure D’ni numeric code on page 13 (the code for getting to the linking books inside the Fire Marble Dome. Also, notice an eye that will reveal another number. Once you have Explored the lab exit back through the pipe and head to the Golden Globe. In the Golden Globe make your way around the area until you reach the wheel. Rotate this wheel to extend the bridge. Once this has been done locate the lever next to the bridge that goes to the rotating room and switch the lever to move the bridge back into its up position. Next turn around and go to the other doorway where there is a hole in the pathway. Next to the doorway is a small button that when pressed will move up a small section of the missing pathway. Once this has been completed you are unable to do anything additional in this area. Return to Gehn's lab again through the ventilation system. Once back at Gehn's lab go through the back door. Which is the door that does not have the blue-lit button in front of it. If the tram is not there return to the lab and press the blue button on the opposite door and then return back to the tram location. The tram takes you to the plateau island. |
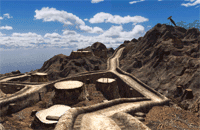 Pathway to entrance
|
Plateau Island
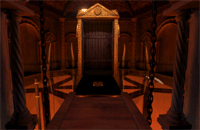 Second Elevator |
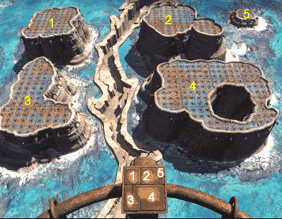
Once out of the tram follow the pathway to the elevator and press the button to go up the elevator once at the top walk forward to the Map Table Puzzle. When looking down at the overview of the pathway you just walked through you notice that its an overview of Riven and these are the five islands on Riven. The object of this puzzle is to find the location of the five Marble Domes located on each of the islands.
1 = Crater Island Once one of these buttons is pressed the island gets a liquid substance above it. Once one is selected turn around and notice a pathway has now been extended to the building in front of you. In this building look for another section of the Map Table Puzzle. This section allows you to distinguish more exactly to where the Marble dome is located on the island. |
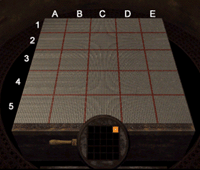
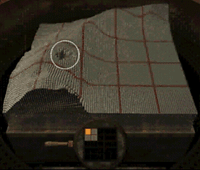
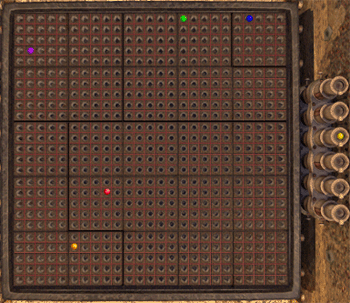
As shown in the above picture the map is mapped by letters going across and numbers going down to get a better sense of where each of Marble Domes are located. Keep in mind in the game you do not have these letters or numbers. Pressing the dot on one of the lit squares below the table gives a layout of the island as shown below. In the other example you can notice on the section that is circled that this the location of the Marble Dome. Now knowing the coordinates we can determine that this on B4.
Below is the solution for each of the islands.
| Island | Panel Square | Location |
|---|---|---|
| Crater Island | 1 | B4 |
| Plateau Island | 4 | A2 |
| Temple Island | 2 | A1 |
| Jungle Island | 5 | D2 |
| Prison Island | 1 | B1 |
Once each of the locations have been discovered go back to the tram car. Get in the tram car and turn it around. Once it is facing the correct direction do not move the switch to cause the tram to move forward instead exit the car to get to the other side. Once on the other side enter the door and press the lever on the left hand side of the draw bridge to get to the elevator. Once you go down the elevator and begin going down the trail you see a man who sees you and runs off and you are unable to follow him.
Going back in and up the stairs you find another puzzle the Underwater-viewing chamber. Pressing the lever on the right hand side will get the below illustration.
Each of the shapes found on this puzzle represents the yellow symbol on each of the Fire Marble Domes that was found on each of the islands. Pressing on the button surrounded in the red outline will turn on a light (one of these buttons as you may notice is broken however). Later you must match the color represented here with the symbol later on the Marble Puzzle.
Pressing the lever on the left-hand side will pull down another sphere with two pentagonal buttons. The left button allows you to peer into a room and the right button gives you a view of the lake on jungle island . If you keep clicking the loops you should locate one more animal symbol corresponding to the D’ni number 1, you should locate the fish that will now allow you to know the number corresponding with the animal shape.
Gehn's World
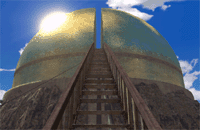
Once you have completed obtaining all the needed information off of Plateau, head back to the golden globe. At the top of the golden globe, you find the Marble puzzle. Knowing the information that you have gathered on the plateau island. you should be able to complete the marble puzzle.
Once completed successfully this will restore the power to all the Fire Marble Domes around Riven. Open any of the Marble Domes and enter the 5 D’ni numbers you have obtained from Gehn's book (these are always different therefore if you have not obtained these you need to go back to his lab on Crater Island and get them). Once you have successfully entered the number the dome will begin to rotate and a book will be uncovered. Using this book you are transported into a cage where you meet Gehn who will discuss his and Catherine's situation. When he asks you to go first through the trapped book accept the offer and go through the book, you switch places making him the trapped individual. First locate the switch on the side of the wall to remove the cage for access to the books. Then go down the small man hole leading to Gehn's chamber here you find a small ordainment clicking it makes a unique notice as it opens and then closes, remember this noise. It is extremely important to solving Catherine's Prison Door lock to free Catherine. This noise is unique each game therefore if you did not memorize this noise the first time you need to restore an old saved game to hear the noise in Gehn's room. |
|
Prison Island
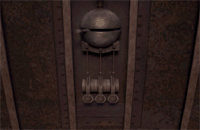 Catherine's Prison Door |
Now head to Prison island by returning back upstairs from Gehn's room if you are following the walkthrough or head back through one of the Marble Domes to Gehn's World if you are elsewhere on Riven. Upstairs you find an assortment of books, go through the book with a single box on it to get to Prison Island. Once at the Prison Island following the path you reach a door. Hear is where you must play back the noise the ordainment made when listening to it earlier. This unique each time the game is played therefore there is not an easy solution you must have listened to the ordainment to pass this section of the map. If you did not listen to this noise earlier you need to re-load a saved game. Previous going to Prison Island as returning to Gehn's world you are back in the cage. Once you have opened the door you meet Catherine, in a very quite voice (you may have to turn up the speakers) she will explain her situation and implore you to go back to the Telescope that you found at the beginning of the game and activate it using the code in her journal you should have obtained at The Moiety age. |
Final Stage of the Game
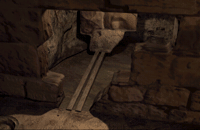
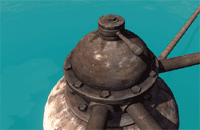
To complete the game you must have completed all of the above steps to get to where you find out that you must activate the telescope using the code that Catherine explained was in her Journal. Once back at the telescope that you first saw at the beginning of the game. First open the manhole at the bottom using the code in Catherine's Journal. The code is in the D'ni format and should have a total of five numbers. In our case the number was 34545 keep in mind the number changes each time. To enter this number imagine the numbers 1 2 3 4 5 going across left to right to enter 34545 we pressed the 3 button, 4 button, 5 button, 4 button and then finally the 5 button. Once this completed you should be able to use the had to pull the man hole open. Once the hole is open Lower the telescope as far down as possible using the lever to the right of the telescope. Once the telescope is close to the man hole you notice it cannot move down any farther because of a small latch on the bottom left rail of the telescope. Looking down at this portion of the telescope you notice the latch, remove the latch and them move the telescope down further to break the telescope and complete the game. |
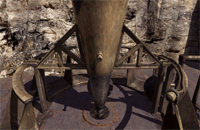 Telescope
|

