
How to install fonts on my computer
Installing a new font lets you use that font to change the appearance of text in your documents. The following sections contain details on how to add or import new desktop fonts to your computer. To proceed, select your operating system from the list below and follow the instructions.
If you have not already downloaded a new font, there are thousands of fonts available online. Installing a program that deals with fonts may add additional fonts on your computer too.
Installing a font in Windows 11

Install a font
- Download a new font from the Internet.
- Open the folder containing the new font you want to install.
If the fonts are contained in a .zip file, decompress the file before installing the fonts. For help with decompressing a file, see: How to extract or decompress a compressed file.
- Right-click the font file and select Install or Install for all users.
After right-clicking the font file, you may need to select Show more options to see the install options.
View available fonts
- Open the Control Panel.
- Select Appearance and Personalization, and then Fonts.
If using the Small icons or Large icons view in the Control Panel, click or double-click the Fonts option.
- In the Fonts window, view or delete the fonts currently installed on Windows.
Installing a font in Windows Vista, 7, 8, and 10

Install a font
- Download a new font from the Internet.
- Open the folder containing the new font you want to install.
If the fonts are contained in a .zip file, decompress the file before installing the fonts. For help with decompressing a file, see: How to extract or decompress a compressed file.
- Right-click the font file and select Open.
- In the window, click the Install button in the top-left corner.
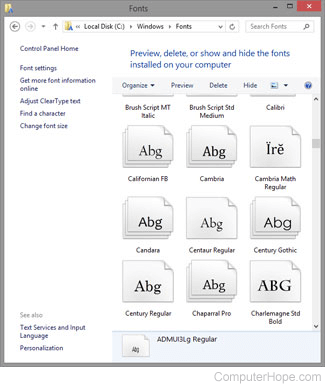
View available fonts
- Open the Control Panel.
- Select Appearance and Personalization, and then Fonts.
If using the Small icons or Large icons view in the Control Panel, click or double-click the Fonts option.
- In the Fonts window, view or delete the fonts currently installed on Windows.
Installing a font in Windows 95, 98, Me, NT, 2000, and XP

- Open the Control Panel
- Double-click the Fonts icon.
- In the Fonts window, view the currently installed fonts and install new ones. To install a font, click the File menu and select Install New Font from the drop-down menu.
- Locate the directory containing the fonts you want to install.
If the fonts are contained in a .zip file, decompress the file before being able to install the fonts. For help with decompressing a file, see: How to extract or decompress a compressed file.
- Highlight the fonts you want to install and click OK.
Users may also install fonts on their computer by opening the Fonts folder through Windows Explorer. Usually, this folder is the C:\WINDOWS or C:\WINNT\FONTS folder. Once this folder is open, select the fonts you want to install from an alternate folder, and then copy and paste them in the Fonts folder.
Installing a font in macOS

- Click the Finder icon in the Dock at the bottom of the screen.

- On the left side of the window, under the Favorites section, click the
 selector.
 - Click the Font Book icon to launch the program.
![]()
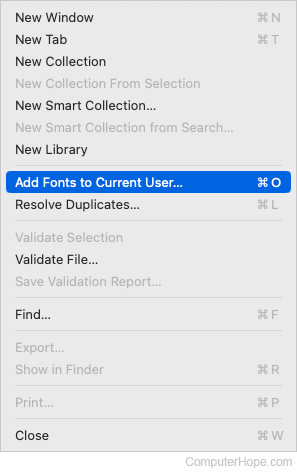
- At the top of the screen, in the Apple menu bar, click the File selector.
![]()
- Select Add Fonts to Current User in the drop-down menu.
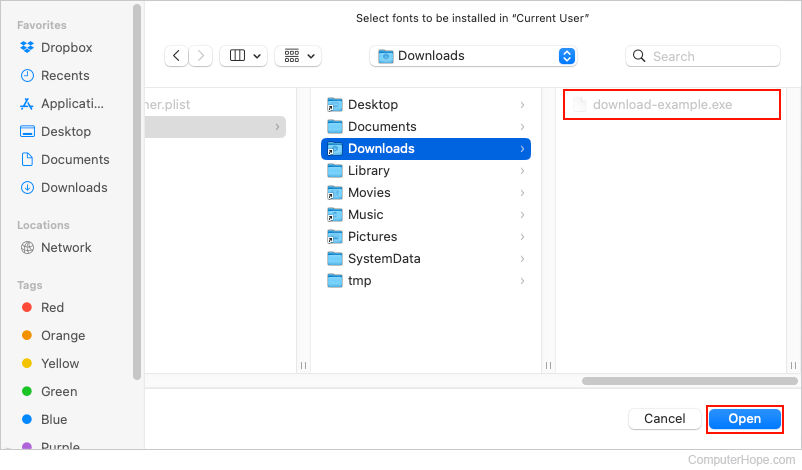
- Locate the font file you want to add and click the Open button.
If you've recently used Font Book or have the program pinned, fonts can be installed by dragging and dropping them on the Font Book icon in the Dock.