How to set up a hard drive and partition in Windows

Unlike earlier versions of Windows, such as Windows 98, the fdisk command is no longer used to set up partitions. If you've installed a new hard drive on a computer that's running Windows and want to change its partitions or divide the disk, use the Windows Disk Management tool. However, if you still prefer a command line interface to set up drives, you can use the diskpart command.
Users may also set up partitions during the Windows installation process. For further assistance with installing Windows, see: How to install the Microsoft Windows operating system.
To set up a new hard drive or partitions in Windows, you must have administrative rights.
To partition an external USB (universal serial bus) hard drive, you must be running Windows 10 Creators Update or later.
How to open Disk Management
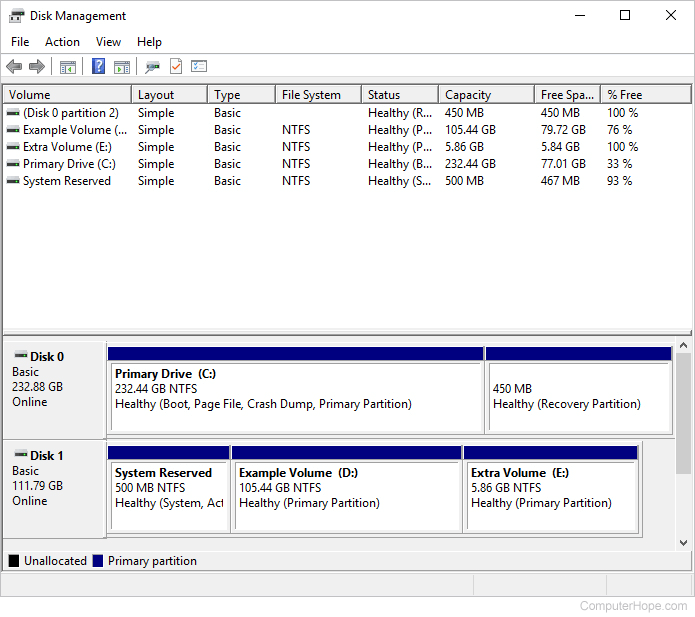
Once Windows Disk Management is open, you'll be able to view the partitions.
Windows 11, 10, 8, and 7
From the Windows desktop, press the Windows key, type Create and format hard disk partitions, and press Enter.
Windows XP and 2000
How to set up a new drive
- The Windows Disk Management tool should look similar to the image above. Any disks not yet set up are shown as Not Initialized and Unallocated.
- Right-click the disk you want to set up and select Initialize Disk. If you are working with a disk already set up, skip to the next section.
If you're running a more recent version of Windows that supports GPT (GUID partition table), you are prompted to select a Partition Style. For most users, leaving as MBR (master boot record) is sufficient. If you're setting up a drive or partition larger than 2 TB, or you want to use the latest partitioning style, select GPT.
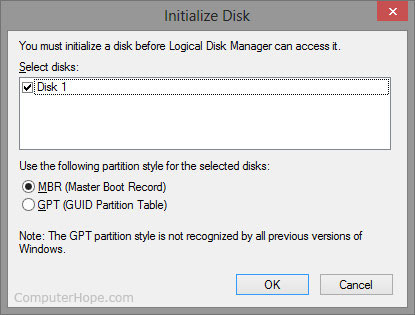
- Click the
 button.
How to create or add a partition
If you are unfamiliar with any of the terminologies in the following steps, the next section should be helpful to you.
- Once the drive is initialized, right-click it.
- Select New Partition or New Simple Volume from the drop-down menu.
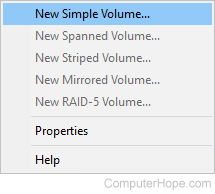
- A New Simple Volume Wizard opens. Click the
 button.
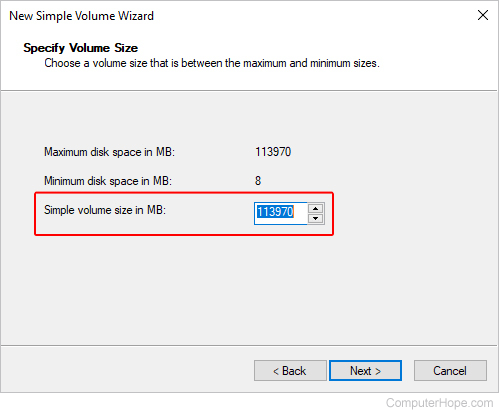
 - Specify the size of the partition you want to create, and click the
 button.
- Select a drive letter for your new partition, and click the
 button.

- Ensure the drive format is NTFS (NTFS file system), change the volume's name (optional), and click the
 button.
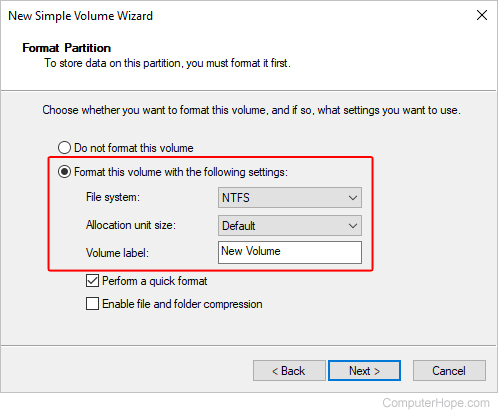
- Click the
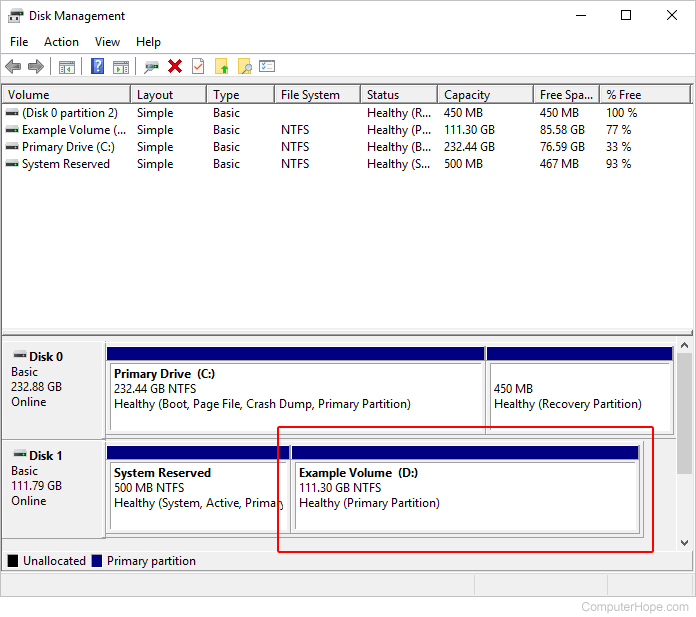
 button, and your new partition appears.
Further information on partitions
Partition or Volume Size - By default, the size is the maximum capacity in MB of the drive. If you want the drive to have multiple partitions, change the size to that which you desire. The remainder of the drive can be allocated later and, if you specify the maximum size, you can also shrink this size later.
Drive letter or Path - Each drive or partition in Windows can be assigned an available drive letter. Most Windows users prefer this setting. However, versions of Windows that support NTFS can also mount a drive to a folder on an existing drive. If you plan on using the drive to store only a specific type of file, such as pictures, music, or programs, this is especially useful.
Format - The format of the drive specifies the type of file system you want to use on the computer. For most users, we highly recommend leaving it at the default NTFS file system. Other options may include FAT32 or exFAT, depending on your version of Windows.
