
How to remove a computer motherboard
Removing the motherboard from the computer is a relatively straight forward process. However, many hardware components inside a computer are connected to the motherboard directly or by way of some type of cable. If you need to remove the motherboard, you need to disconnect all of the hardware connected to it. Below are the steps required for removing most computer motherboards.
Preparation
Before you begin, make sure you reduce, or eliminate, the risk of electrical charge damaging any of the hardware in the computer. The best way to do this is by wearing an anti-static wrist strap. While inside the computer, make sure it is disconnected from power and you're familiar with ESD (electrostatic discharge) and its potential dangers.
Open your machine
First, you need to remove the side panel from the computer case. The side panel is usually held in place by several screws, or held in place with a bracket or clamp of some kind. Remove the fasteners securing the side panel, and carefully pull it off. Once the panel is removed, you'll see the inside of the computer, which look like the image below.
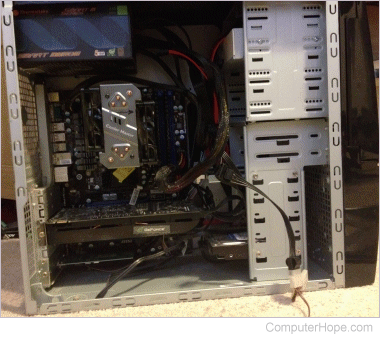
With the side panel removed, lay your machine on its side. The motherboard is the large circuit board on the bottom of the computer case, underneath the other hardware inside the case.
Removal of attached hardware
The most time consuming part of the motherboard removal process is disconnecting and extracting the other pieces of hardware connected to it. You need to remove all of the following pieces of hardware (if present) before attempting to take out the motherboard itself:
- Video card.
- Sound card.
- Network card.
- Hard drive (if sitting over top the motherboard to any extent).
- Memory (RAM).
- Heat sink (fan).
- Processor (CPU).
- CD-ROM (compact disc read-only memory) or DVD-ROM (digital versatile disc read-only memory) drive (if they inhibit motherboard removal).
- Main power connector (20 or 24-in connector) coming from the power supply.
- IDE (integrated drive electronics) or SATA (Serial AT Attachment) cables (connected to motherboard on one end and a piece of hardware on the other end).
Removing the motherboard
After you've disconnected the various cables, and any hardware obstructing motherboard, remove the screws that secure the motherboard to the computer case. Be careful not to let your screwdriver touch the motherboard itself when removing these screws, as it may cause damage. Once you have removed all the mounting screws, you may carefully remove the motherboard from the computer case.
If you are storing the motherboard and other hardware for future use, we strongly recommend each piece of hardware be stored in its own anti-static package.