
How to write-protect files and folders
Updated: 05/21/2018 by Computer Hope
From time to time, users may find themselves wanting to prevent anyone, including themselves, from editing or accidentally deleting a file because it contains important information. Follow the steps below enable or disable write protection on a file(s) or folder(s).
Write protection process
- Open Windows Explorer by pressing the Windows key+E on your keyboard.
- Navigate to the location of the file(s) or folder(s) you want to protect.
- Select and right-click the file, folder, or group of files, and select Properties from the drop-down menu.
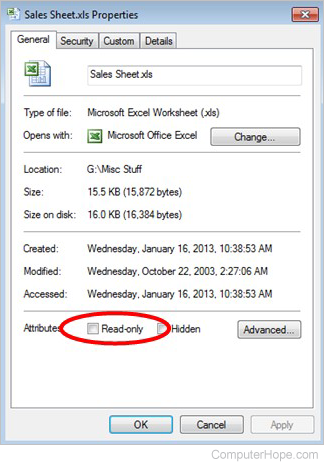
- In the File Properties window, under the General tab, check the box for Read-only or Read-only (Only applies to files in this folder) near the bottom.
- Click the OK button to save the new setting.
Tip
To turn off write protection, repeat these instructions, but uncheck the box in step 4.