
How to perform a system image backup in Windows

If your computer's hard drive crashes or becomes corrupt, a system image backup is essential to restore Windows and its programs to a functional state. The Windows operating system includes a utility to create a system backup. There are also multiple free third-party programs available to create backups as well.
The Windows utility is generally considered the most convenient method. However, some users have reported experiencing failures and errors during restoration. A third-party program can avoid these problems and provide a more reliable and error-free experience.
Select your preferred creation method below and follow the steps to learn how to create a system image backup.
Create a backup using the Windows utility
Click the appropriate link below for the version of Windows on your computer.
Windows 10 and 11
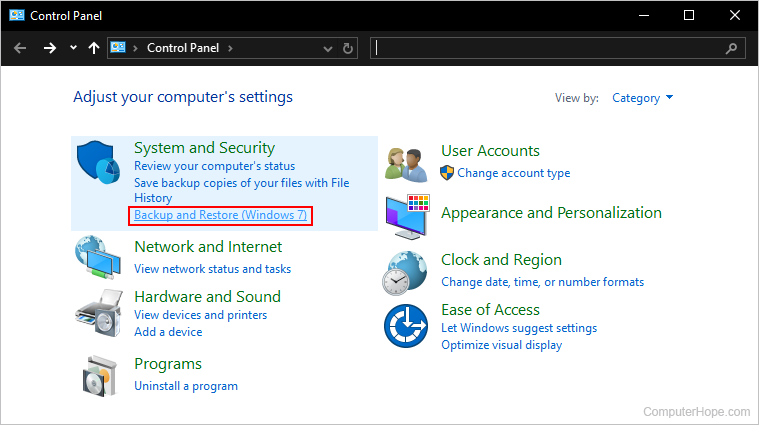
- Open the Windows Control Panel.
- In the Control Panel, under System and Security, click Backup and Restore.
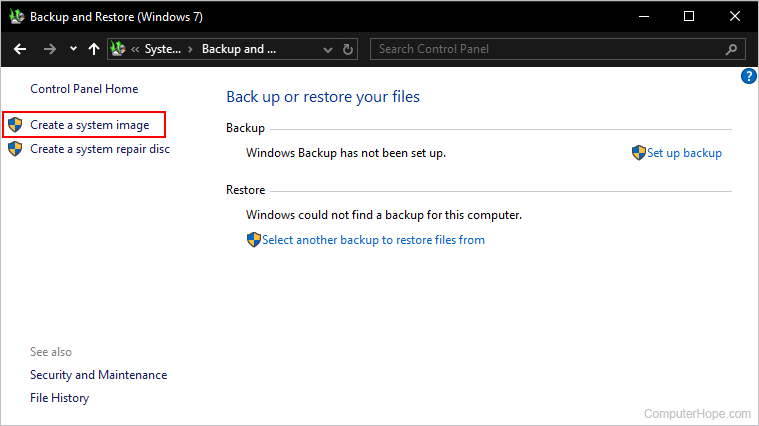
You must set up and configure the backup process before continuing with the steps below. If you see a message stating "Windows Backup has not been set up" in the Backup and Restore window, click the Set up backup link.
- In the left navigation menu, click Create a system image.
- Select where you want to save the backup. We recommend using an external hard drive connected to the computer for most users.
- Once a drive is selected, click Next.
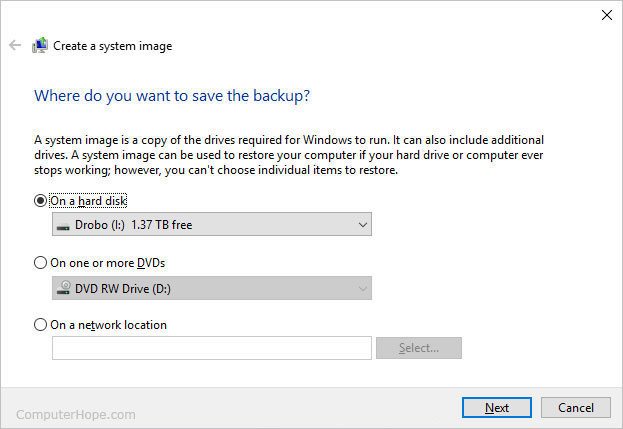
If your computer only has one hard drive and partition, you must use an external hard drive to store the backup. Windows does not let you store a system image backup on the same drive or partition that is being backed up.
- Windows tells you how much disk space is required to create and save the backup. Confirm there's enough space on the drive selected above, and then click the Start backup button to create the backup.
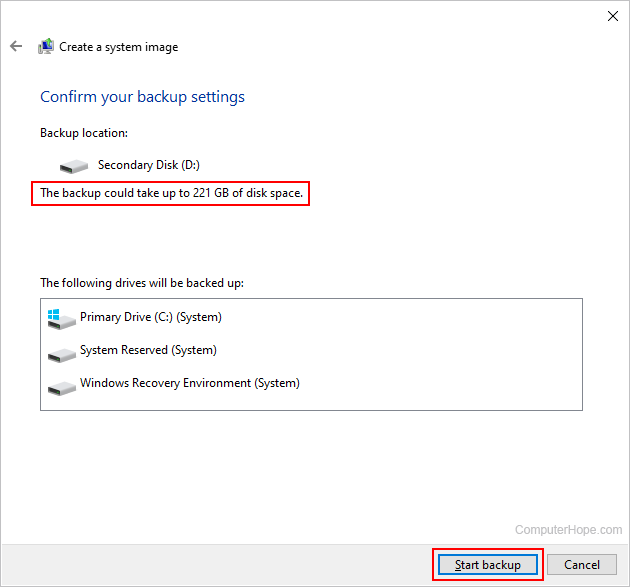
If your backup is larger than 4 GB, you must use a drive with NTFS (NTFS file system), and not FAT (file allocation table) or FAT32.
- After the backup is completed, you are prompted to create a system repair disc. Unless you already have one, we recommend creating this disc to boot your computer and allow you to restore the system image when Windows is inaccessible.
Once the backup is complete, if you saved the backup to a hard drive, there should now be a "WindowsImageBackup" folder on that drive.
Windows 8
- From the Start screen, type File History and select File History settings in the search results.
- In the File History window, click the System Image Backup link in the bottom-left corner.
- Select where you want to save the backup. We recommend using an external hard drive connected to the computer as a backup drive for most users.
- Once the drive is selected, click Next.
- Windows then lets you know how much disk space is required for the backup and the drives to be saved. Once you are ready to start the backup, click the Start backup button.
If your backup is larger than 4 GB, you must use a drive with NTFS, not FAT or FAT32.
- After the backup is complete, you are prompted to create a system repair disc. Unless you already have one, we recommend creating this disc to boot your computer and allow you to restore the system image.
Once the backup is completed, if you saved the backup to a hard drive, there should now be a "WindowsImageBackup" folder on that drive.
Windows 7
- Open the Windows Control Panel.
- In the Control Panel, click Backup your computer.
- On the left column, click Create a system image.
- Select where you want to save the backup. We recommend using an external hard drive connected to the computer as a backup drive for most users.
- Once the drive is selected, click Next.
- Windows then lets you know how much disk space is required for the backup and the drives to be saved. Once you are ready to start the backup, click the Start backup button.
If your backup is larger than 4 GB, you must use a drive with NTFS, and not FAT or FAT32.
- After the backup is complete, you are prompted to create a system repair disc. Unless you already have one, we recommend creating this disc to boot your computer and allow you to restore the system image.
Once the backup is complete, if you saved the backup to a hard drive, there should now be a "WindowsImageBackup" folder on that drive.
Create a backup using third-party program
There are many programs for creating a system backup, including some that don't cost anything. We recommend using AOMEI Backupper Standard, as it's user-friendly, creates and restores backups reliably, and has a free version. The steps below are for using the Backupper Standard program.
- Download the AOMEI Backupper Standard program and install it on your computer.
- After installation is completed, launch the program.
- In the program window, click the New Backup option.
If a smaller window pops up about upgrading to the Pro version, close it for now.
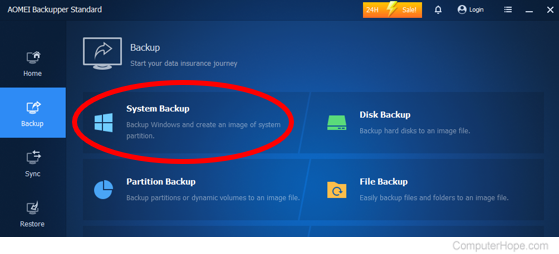
- To create a system backup, including Windows, click the System Backup option.
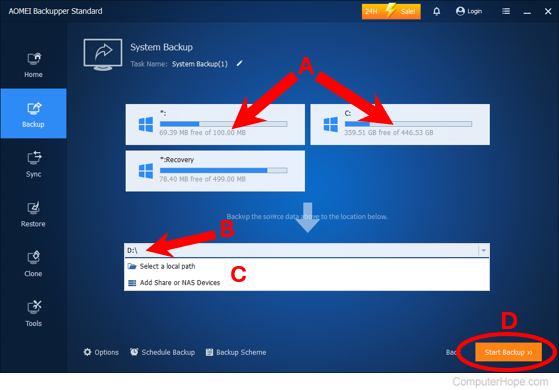
- The partition and drive containing the system files are automatically selected (A). Click the drop-down field (B) below the Backup the source data above to the location below message, and select where to save the system backup (C).
The save location must be on a different partition or hard drive than what is set to be backed up. In other words, if the partition or drive being backed up is the C: drive, you must select another drive, like a D: or E: drive. If desired, An external hard drive or flash drive can be selected and used.
- When ready to begin the backup process, click the Start Backup button (D) in the bottom-right corner.
- The time it takes to complete the process depends on how much data is backed up from the partitions or hard drive. When completed, a small window pops up, stating the backup is completed.
On the backup completion window, the program asks to create a Recovery Environment, a bootable interface for restoring the backup system image if the Windows is unusable or inaccessible. Creating a recovery environment is optional but highly recommended.
To utilize the recovery environment feature, you must upgrade to the Pro version of the program. That feature is not available in the free version.