
How to create an audio file
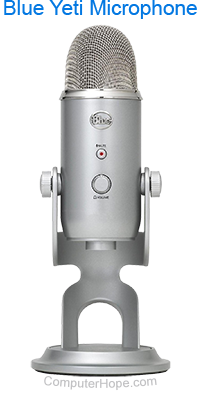
To create an audio file, you must have a microphone or a source of input (e.g., a webcam) and an audio program capable of recording sound. Thankfully, most versions of Windows and other operating systems have a sound recorder. Below are the steps to create an audio file in Windows and macOS.
Creating an audio file in Windows 11
To create an audio file in Windows 11, follow the steps below.
- Connect a microphone to the computer.
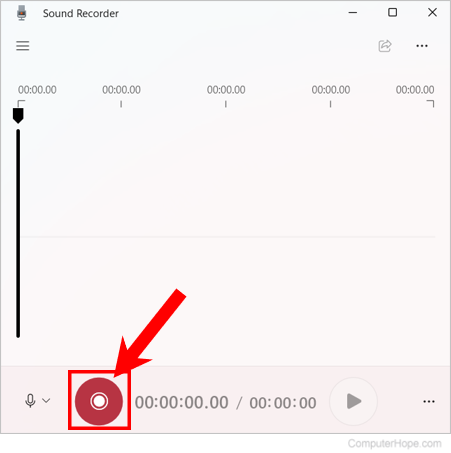
- Press the Windows key, type sound recorder, and then press Enter.
- At the bottom of the Sound Recorder window, click the Start recording button.
- When done recording, click the Stop recording button at the bottom of the program window.

- To listen to your recording, click the Play button near the window's bottom-right corner.

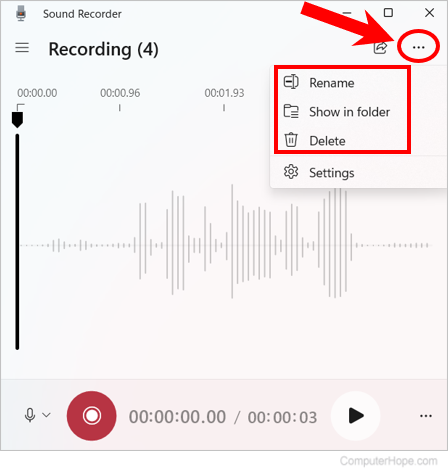
- To rename, delete, or open the folder containing your sound files, click the ellipsis in the top-right corner of the program window. Select the applicable option in the drop-down menu.
Creating an audio file in Windows 8 and 10
To create an audio file in Windows 8 and 10, follow the steps below.
- Connect a microphone to the computer.
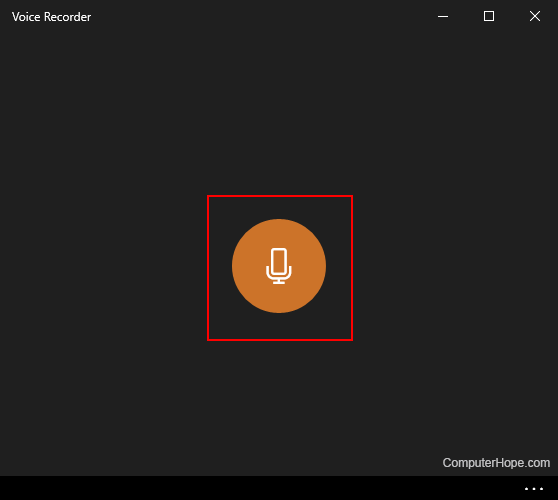
- Press the Windows key, type voice recorder, and then press Enter.
- Click the Microphone button in the middle of the screen and begin speaking. When you're finished, click the button again to stop recording.
- Click your newly-created recording in the Voice Recorder menu.
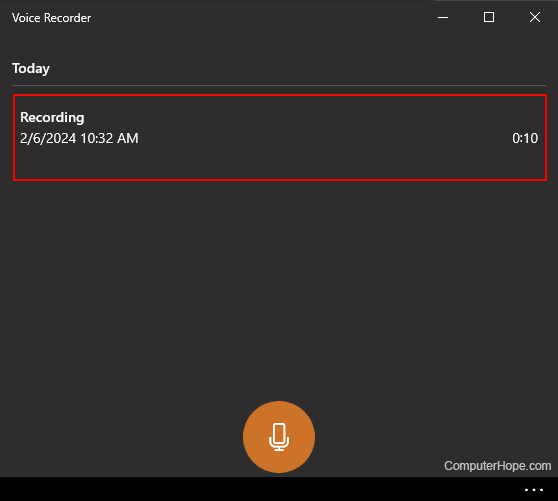
- From here, the recording can be reviewed, shared, or deleted using the menu icons at the bottom of the application window.
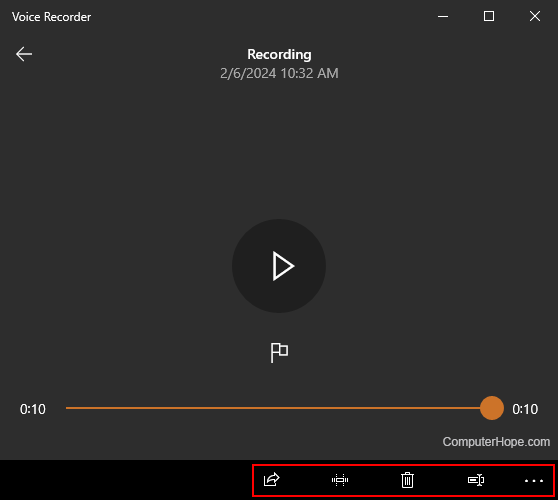
The recording is saved as a .w4a file on your computer. To locate the file, click the ellipsis menu icon at the bottom right corner of the application window and select Open file location.
Creating an audio file in Windows 7 and earlier
To create an audio file in Windows 7, follow the steps below.
- Connect the microphone to the computer.
- Click Start and type Sound Recorder in the search box.
- In the search results, select the Sound Recorder application.
- Click the Start Recording button and begin speaking.
- When the recording is finished, click Stop Recording.
- Once the recording is made, Windows asks you to name the file and where it should be saved as a .wma file.
Once the file is saved, to open the file, browse to its location and double-click the sound file.
Creating an audio file on macOS
To create an audio file on an Apple computer running macOS, follow the steps below.
- Connect a microphone to the computer.
- In the Dock at the bottom of your screen, click the Finder icon.

- On the left side of the screen, under the Favorites section, click the
 selector.
 - In the list of applications, double-click the QuickTime icon.
![]()
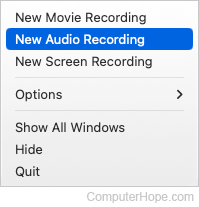
- Once QuickTime is open, right-click its icon on the right side of the Dock.
![]()
- Select New Audio Recording from the pop-up menu.
- Click the red record button and begin speaking.
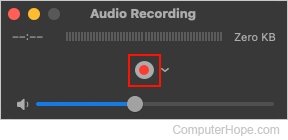
- When done recording, click the stop button.
- At the top of the screen, click the File selector.
![]()
- Select Save from the drop-down menu.

- Enter a file name and choose where you want to save the file. Save the file as a .mov or .m4a file, depending on your macOS version.
Once the file is saved, double-click the sound file to open it in iTunes or your media player of choice.
Example of an MP3 audio file
Below is an example of an MP3 audio file that can be played through your browser.