
How to unmount a volume in Windows
To take one of your drives offline, you can unmount it. In Windows, mounting and unmounting a volume is accomplished by changing the volume's drive letter assignment.
Drive letters and mounted volumes
In Windows, volumes are mounted as drive letters and include drive partitions, removable disks, optical drives, external hard drives, and network drives. For instance, you probably have a partition on your HDD (hard disk drive) or SSD (solid-state drive) mounted to the C: drive letter, which contains your Windows operating system. You may have a DVD (digital versatile disc) drive mounted at D: or E:, and perhaps a secondary HDD or SSD mounted at a letter as well.
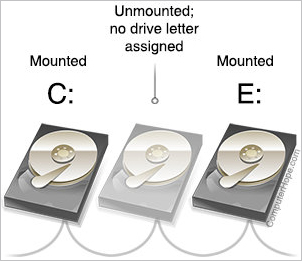
Anything with a drive letter is "mounted": the operating system has made the volume's filesystem available for reading and writing by the user programs and operating system. When a volume is not mounted, its data cannot be accessed or altered by conventional means.
The process of changing a drive from mounted to not mounted is called unmounting. Let's look at a scenario where this operation can be useful, and how it can be done.
The following example is performed using Windows 10, but these instructions should also work for Windows 8.1, Windows 7, and Windows XP.
What happens when a volume is unmounted?
When a volume is unmounted, its drive letter is unassigned and may be used by another storage device. While unmounted, the volume's file system is inaccessible by regular reads and writes.
Example scenario: secondary volume is full
In this scenario, you have a single HDD inside a laptop computer. The drive contains two NTFS (NTFS file system) partitions, mounted as Windows volumes:
- C:, which contains the operating system and all user programs and documents
- D:, which contains automatically created backups of critical files in C:
You can view how much free space you have on your mounted volumes if you open File Explorer (press Win + E), and choose This PC.
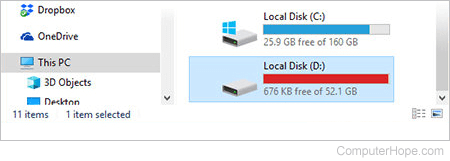
The D: drive is 100% full — it has no more free space. That's OK, because the backups it contains are complete and up-to-date. In this scenario, you know you won't need to make another backup for a few weeks, so nothing on the volume needs to change before then.
However, you're experiencing a problem. Because the partition is very full, Windows 10 continuously notifies you that D: is low on disk space:
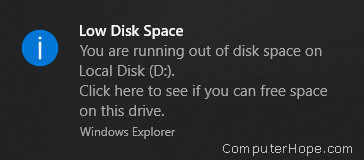
There's no way to selectively disable this warning for individual partitions. The notifications can be disabled only by modifying the registry — but even then, the notifications cannot be selectively turned off.
If you unmount the volume, these notifications stop.
Unmount a volume with Disk Management
Disk Management is part of your Windows 10 system software that lets you make low-level changes to your storage devices. It can create volumes, resize them, and delete them. Here, you'll use it to unmount a volume.
To unmount a volume:
- Open Disk Management. From your Start menu, choose Windows Administrative Tools, then Computer Management. Then, under Storage, choose Disk Management.
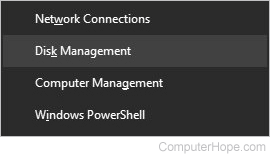
- Or, press Win + X (hold down the Windows key and press X), and choose Disk Management.
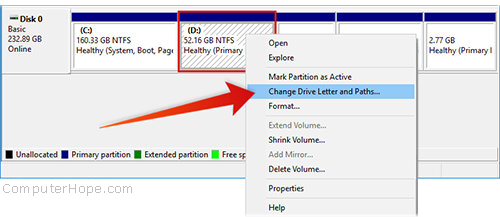
- In Disk Management, locate the block that represents the volume you want to unmount. The blocks are labeled with volume information, including the drive letter. Right-click the volume, and choose Change Drive Letter and Paths.
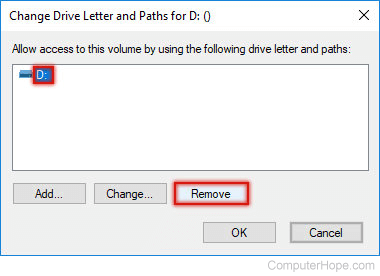
- Select the volume's drive letter, and click Remove.
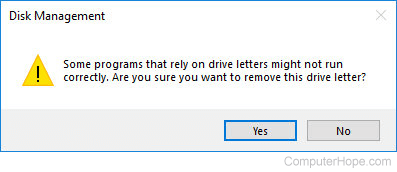
- You'll receive a warning, and the prompt "Are you sure you want to remove this drive letter?" Choose Yes.
- If any of your programs are currently using the volume, you'll receive an additional warning, "The volume is currently in use… Do you want to continue?". Now is a good time to close any programs that are using the volume. If you choose Yes, Windows requires a restart before the volume is fully unmounted.

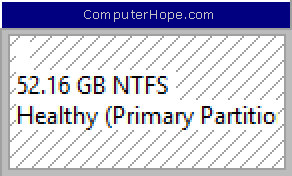
- You'll be returned to Disk Management, and you can see that the partition no longer has a drive letter.
The partition is now protected from accidental writes, and is effectively frozen. As a benefit, the "Low Disk Space" notifications will no longer pop up (incessantly) for a partition you have intentionally filled with data.
Mount the volume again later
In the scenario above, you would mount the volume again when moving the data to a removable disk, for instance.
You can re-mount an unmounted volume at any time in Disk Manager.
- Right-click the unmounted volume and choose Change Drive Letter and Paths.

- Click Add. Choose Assign the following drive letter, then pick a letter from the selector on the right. When you're done, click OK.