
How to add and remove a watermark in Microsoft Word
Updated: 05/01/2023 by Computer Hope
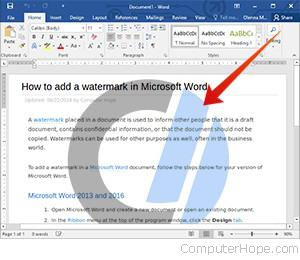
A watermark placed in a document is used to inform other people that it is a draft document, contains confidential information, or that the document should not be copied. Watermarks can be used for other purposes as well, often in the business world.
To add a watermark in a Microsoft Word document, follow the steps below for your version of Microsoft Word.
How to add a watermark in Word 2013 and later
Note
A watermark can only be added in the Microsoft Word desktop application. It is not currently possible to add a watermark in a Microsoft Word Online (the web version) document.
- Open Microsoft Word and create a new document or open an existing document.
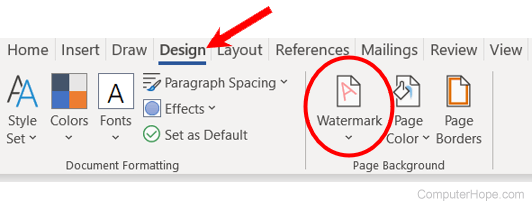
- In the Ribbon menu at the top of the program window, click the Design tab.
- In the Page Background section, click the Watermark option.
- In the drop-down window, find the watermark you want to add and click that watermark option.
To create a watermark, follow the steps below.
- In the drop-down window after clicking the Watermark option on the Design tab, select the Custom Watermark option in the drop-down window.
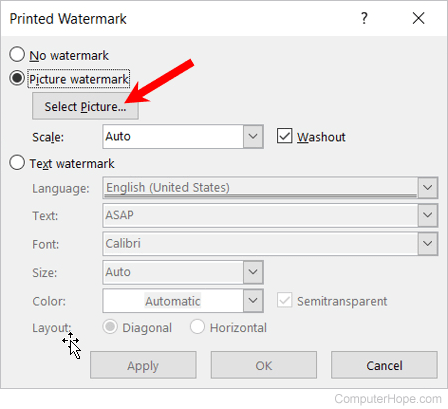
- In the Printed Watermark window, select the Picture watermark or Text watermark option.
- If Picture watermark is selected, find the picture you want to use as a watermark, then click OK.
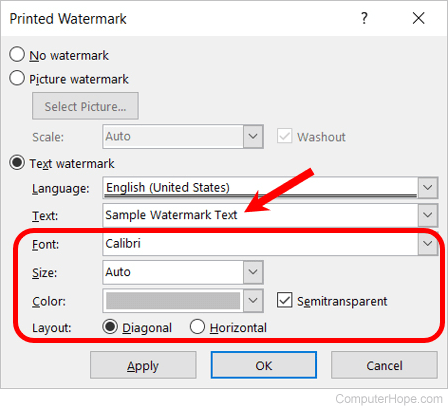
- If Text watermark is selected, enter the watermark text, and select the font, size, and color of the text. Click OK to add the custom text watermark.
How to add a watermark in Word 2007 and 2010
- Open Microsoft Word and create a new document or open an existing document.
- In the Ribbon menu at the top of the program window, click the Page Layout tab.
- Click the Watermark option.
- In the drop-down window, find the watermark you want to add and click that watermark option.
To create a watermark, follow the steps below.
- In the drop-down window after clicking the Watermark option on the Design tab, select the Custom Watermark option in the drop-down window.
- In the Printed Watermark window, select either the Picture watermark or Text watermark option.
- If Picture watermark is selected, find the picture you want to use as a watermark, then click OK.
- If Text watermark is selected, enter the watermark text, and the font, size, and color of the text. Click OK to add the custom text watermark.
How to add a watermark in Word 2003 and earlier
- Open Microsoft Word and create a new document or open an existing document.
- In the menu bar at the top of the program window, click the Format menu.
- In the Format menu, click Background, then select Printed Watermark.
- In the Printed Watermark window, select either the Picture watermark or Text watermark option.
- If Picture watermark is selected, find the picture you want to use as a watermark, then click OK.
- If Text watermark is selected, enter the watermark text, and the font, size, and color of the text. Click OK to add the custom text watermark.
How to remove a watermark in Word
- Open the Microsoft Word document containing the watermark you want to delete.
- In the Ribbon menu at the top of the program window, click the Design tab.
- Click the Watermark option.
- In the drop-down window, click Remove Watermark.