Add, update, or remove a table of contents in Microsoft Word
A table of contents helps readers know what information is in a document and its location. In Microsoft Word, a table of contents can also allow a reader to jump to a specific section of a document by clicking a header. Select from the links below to view the appropriate steps to add, edit, or delete a table of contents in your Word document.
Add a new table of contents
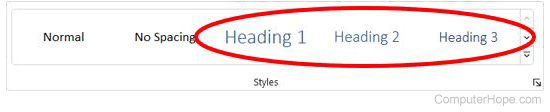
You must have headings in the Word document to add a table of contents. Entries in the table of contents only link to text set as a Heading 1, Heading 2, or Heading 3 text style, configured on the Home tab in the Styles group.
Microsoft Word Online
- Click a page in the document where you want a table of contents added.
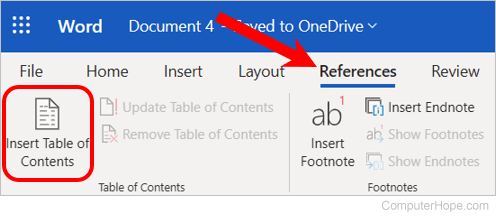
- Click the References tab in the Ribbon.
- In the Table of Contents section, click the Insert Table of Contents option.
Microsoft Word desktop application
- Click a page in the document where you want a table of contents added.
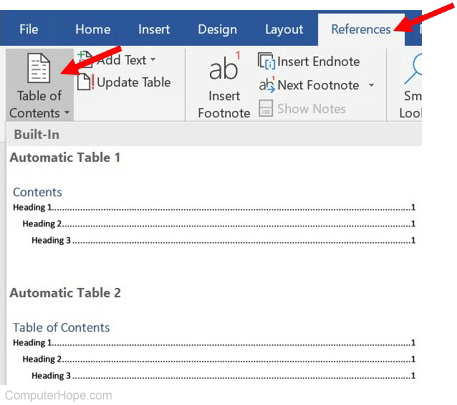
- Click the References tab in the Ribbon.
- In the Table of Contents section, click the Table of Contents option.
- In the dialog box or pop-down window, select one of the available table of contents layouts to automatically insert it into the current page.
In step 4, you can select the Custom Table of Contents option to add a customized table of contents.
Update an existing table of contents
Microsoft Word Online
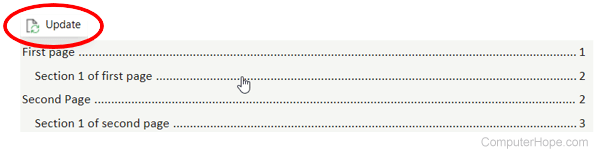
- In the Word Online document, locate the table of contents and move your mouse cursor over it.
- At the top-right corner of the table of contents, an Update option should appear. Click the Update option to update the table of contents.
Microsoft Word desktop application
- Locate and click the table of contents in the document.
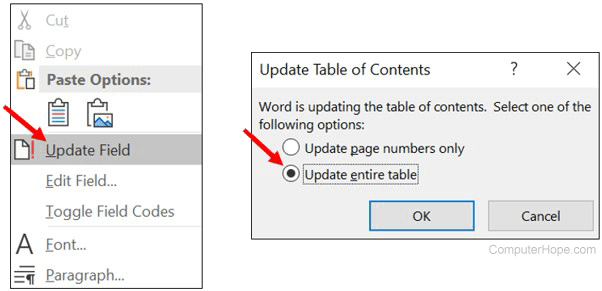
- Right-click the table of contents and select Update Field in the pop-up menu.
- In the Update Table of Contents window, select the Update entire table option and click the
 button.
Format a table of contents
To format a table of contents, set automatic settings or manually format individual entries in the table.
Options to format a table of contents are only available in the Microsoft Word desktop application. Microsoft Word Online (the web version) does not include formatting options for a table of contents.
How to automatically format a table of contents
After creating a table of contents, you can modify the formatting so automatic updates replicate it.
- Click the References tab in the Ribbon.
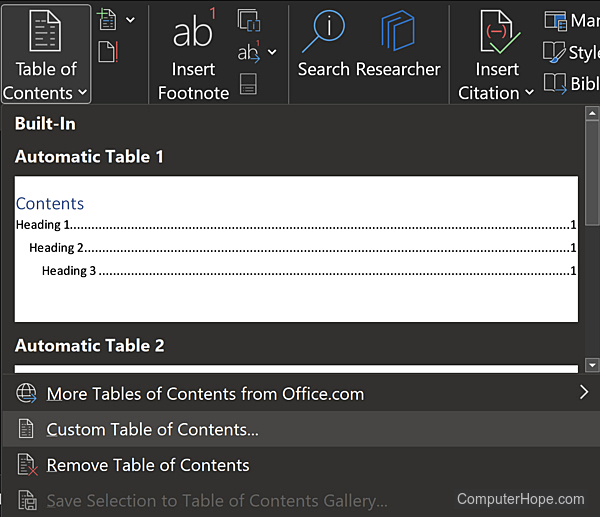
- In the Table of Contents section, click the Table of Contents option.
- In the dialog box or pop-down window, select the Custom Table of Contents option near the bottom.
- In the Table of Contents window, click the Modify button near the bottom-right corner.
- Select one of the table of content styles in the Styles window and click the Modify button.
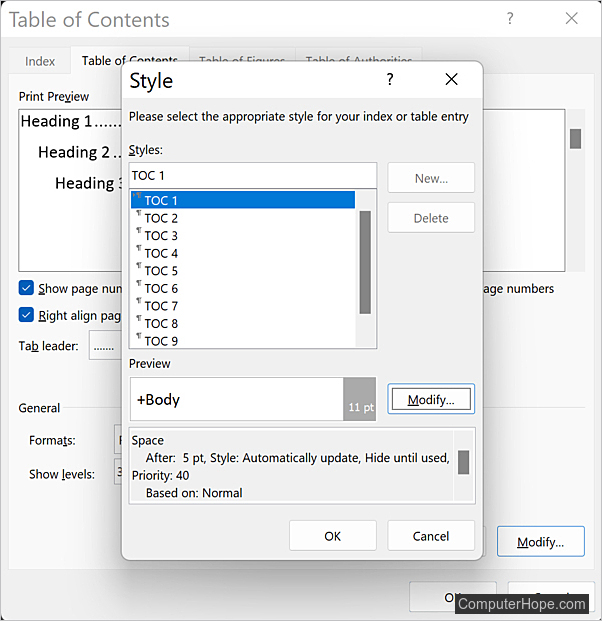
- Click the Format button in the bottom-left corner of the Modify Style window, and select an option to modify. For example, you can select Font and change the font type, size, and color, and set it to bold or italic.
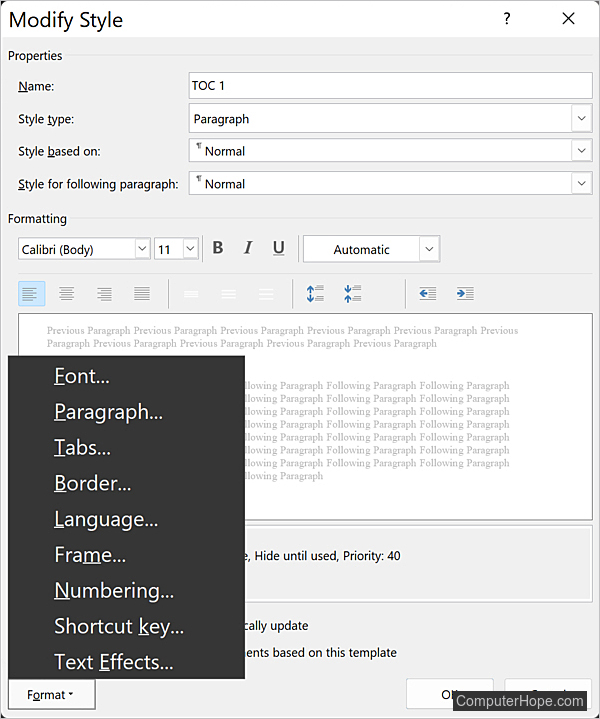
- After making your desired modifications to the table of contents style you selected, click OK on each open window to save the changes.
Now, when updating the entire table of contents, the formatting options you set are automatically applied.
How to manually format a table of contents
After creating a table of contents, you can manually modify the formatting of text and numbers, including text size, text color, bold, and italic.
- Select the text in the table of contents that you want to format.
- In the Ribbon, on the Home tab, select the new font type, size, or color, or click the bold or italic button. All selected text is changed.
Using the steps above, you can select and format each line in the table contents to differ from other lines, if desired.
If you make any manual formatting changes in the table of contents and later use the "Update entire table" option to update entries in the table, your formatting changes are overwritten.
Add entries to an existing table of contents
Add new entries automatically
The most effective way to add entries to a table of contents is to create more content with headings in the document.
The following steps apply to Microsoft Word Online (the web version) and the Microsoft Word desktop application.
- Insert one or more headings in the document using the headings options in the Styles section of the Home tab in the Ribbon.
- Add content below each new heading.
- Follow the steps in the update an existing table of contents section above to automatically add the new heading entries.
Add new entries manually
If preferred, you can manually add entries to the table of contents.
The steps below only pertain to the Microsoft Word desktop application and do not work in Microsoft Word Online (the web version).
If you add a manual entry in the table of contents and later use the automatic "Update entire table" option, your manual entries are dropped from the table.
- Add new content to the document if not already done.
- In the existing table of contents, determine where to add an entry. Then, place the text cursor at the end of the current entry, above where you want the new one.
- Press the Enter key to add a new blank line in the table of contents.
- Type the text for the new entry.
- Type the page number where the new content exists in the document for the new table of contents entry.
- Move the text cursor to the left of the page number. Repeatedly type the character or symbol used to separate the entry text from the page number until it is to the right. The page number should align with the page numbers of other entries in the table of contents.
For example, in the table of contents below, the "New manual entry" text and page number 3 are separated by multiple periods.

Remove entries in an existing table of contents
The following steps apply to both Microsoft Word Online (the web version) and the Microsoft Word desktop application.
- Locate the corresponding header that the entry or list item you want to delete from the table of contents links.
- Select the header text and delete it. If the content under that header is no longer needed, delete that content too.
- Follow the steps in the update an existing table of contents section above to automatically remove the applicable table of contents entry.
Delete a table of contents
Microsoft Word Online
- In the Word Online document, click a blank area in the table of contents that does not link to a header or section in the document. The mouse cursor is an arrow
 or I-beam
  where it is safe to click.
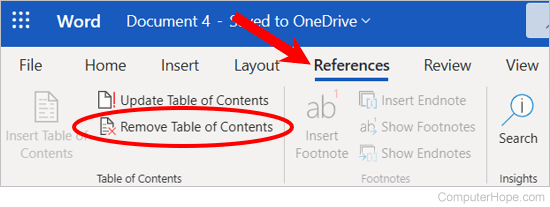
 - In the Word Ribbon, click the References tab.
- In the Table of Contents group, click the Remove Table of Contents option.
Microsoft Word desktop application
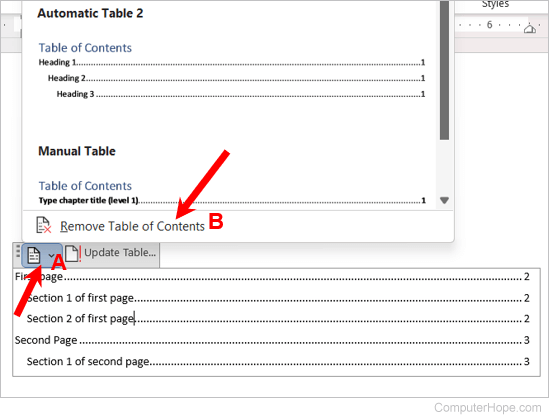
- In the Word document, click anywhere in the table of contents.
- In the mini menu bar at the top of the table of contents, click the Table of Contents style drop-down menu (A).
- At the bottom of the drop-down menu, select the Remove Table of Contents option (B).