
How to select a primary monitor
Multiple monitor setups are quite common these days. They are more or less mandatory for the design industry, and those who code or create websites. When using more than one monitor, you pick a primary one so your main workspace is in front of you, rather than on the left or right monitor. To learn how to select a primary monitor, choose your operating system from the list below and follow the steps.
How to select a primary monitor in Windows
- Press the Windows key, type display settings, and then press Enter.
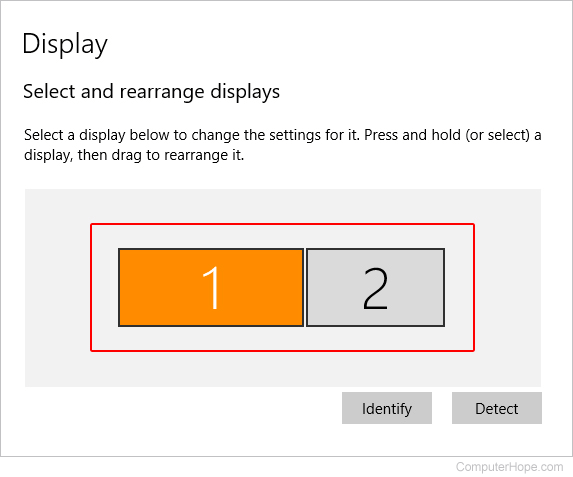
- In the section near the top, select the monitor you'd like to make the primary.
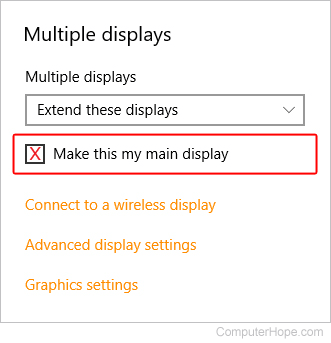
- Once you've made your selection, scroll to the bottom of the page and locate the Multiple displays section.
- Check the box next to Make this my main display.
How to select a primary monitor in macOS
How you select a primary monitor in macOS depends on which version you're running. To proceed, select the appropriate entry from the list below and follow the steps. If you're unsure which version is on your device, see our page: How to determine the version of macOS on a computer.
macOS Ventura and Sonoma
Here is how to select a primary monitor in macOS versions 13 and 14.
- At the top-left corner of the desktop screen, click the Apple icon.
- Select System Settings from the Apple menu.

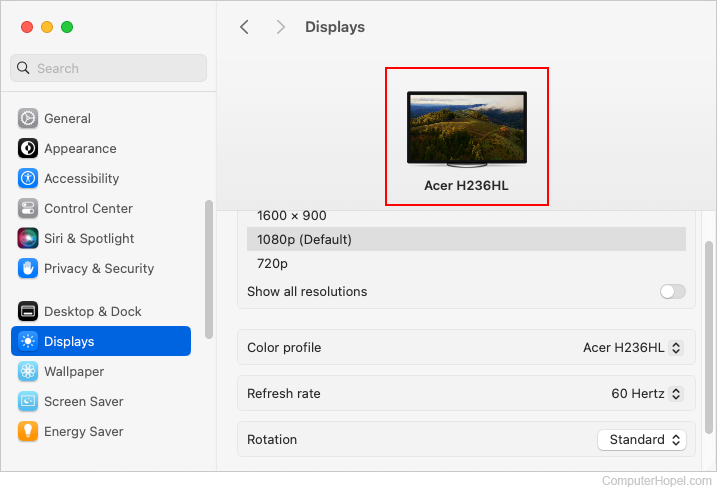
- In the sidebar, scroll down and click the Displays selector. Then, click the device that you want to make the primary display.
macOS High Sierra, Mojave, Catalina, Big Sur, and Monterey
Here is how to select a primary monitor in macOS versions 10 through 12.
- Select System Preferences
 from the Dock.
 - Select Displays near the upper-left part of the System Preferences menu.
![]()
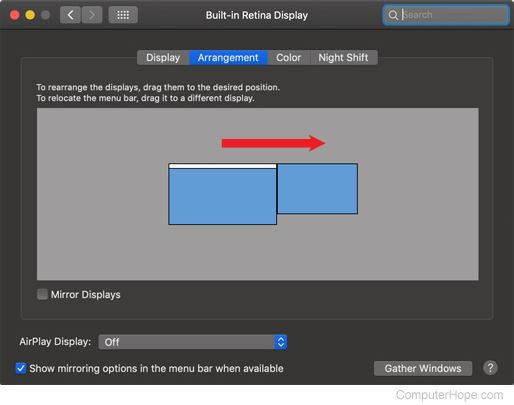
- On the next screen, near the top in the middle, select the Arrangement tab.
![]()
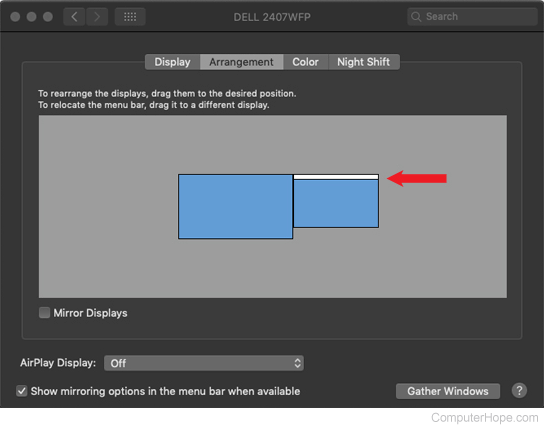
- In the center of the Arrangement window, on the monitor images, click the white bar and drag it to the left or right. The monitor that's moved into the center is now your primary.
- You should now see a white bar over the new primary monitor.
- When you're finished, click the close button (red X)
 in the upper-left corner of the window.