
How to integrate Git with Dreamweaver
Adobe Dreamweaver features Git integration, allowing you to edit files and manage version control in one application, with a unified interface.
When you associate a Dreamweaver Site with a Git repository, you can use Dreamweaver as your Git client - you can pull and push changes, write commit messages, view diffs, and perform merges. You can still use other Git clients, such as Git GUI (graphical user interface) or the git command, and Dreamweaver will cooperate with them seamlessly. If you perform Git operations on your local repository with another client, Dreamweaver detect the updates and automatically update Git status in Dreamweaver.
Follow these steps to associate a Dreamweaver Site with a Git repository. In these examples, the Git server is GitHub.
Configure Dreamweaver to use Git
These instructions cover git configuration for a new Dreamweaver Site. If you have an existing Dreamweaver Site, the steps are slightly different, and Dreamweaver is a little more picky about what configurations it accepts. Those steps are similar, but not covered here.
Create a new Dreamweaver Site
- Open Dreamweaver.
- In the Site menu, choose New Site.
- Enter a Site Name. For example, enter mysite-git.
Create a new local site folder
- For local site folder, select an empty folder. If you type the name of a folder that doesn't exist, it is created. When the site is created, the remote Git repository will be cloned to this directory.
Configuring Git credentials in Dreamweaver
- Select Associate a Git repository with this site.
- Select Clone existing Git repository using URL.
- Enter the https:// URL (uniform resource locator) of your repository.
- For Git Username, enter your GitHub username.
- For Password, if you are using 2FA (two-factor authentication), enter your access token (see below). If you are not using 2FA, enter your normal Git password.
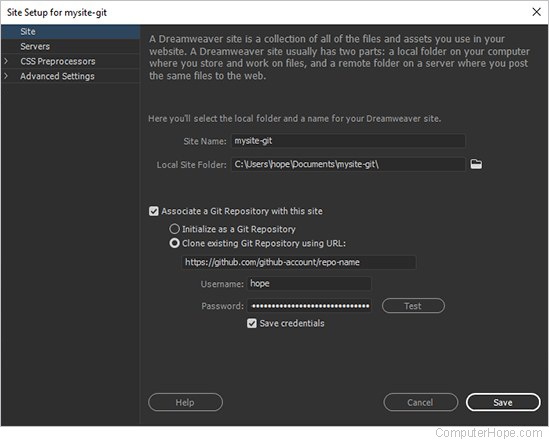
- Click Test to verify that the authentication is working.
- Check the box labeled Save Credentials.
If you don't save your credentials now, you might not be able to do it later.
- Click Save.
The remote GitHub repository is cloned to your local site folder. Now, when you edit any of these files, you can use Dreamweaver as your Git client.
Generate a personal access token for GitHub 2FA
- In a web browser, log in to your GitHub account.
- Verify your e-mail address, if you have not already done so.
- Click your account icon in the upper-right corner of any GitHub page. From the menu, choose Settings.
- On the left, click Developer Settings.
- On the left, click Personal Access Tokens.
- Click Generate New Token.
- For Token Description, enter anything.
- For Scopes, you can use the default options. Make sure Repo and its sub-options are checked.
- Click Generate Token to invalidate any previous tokens you have generated and create a new token. Copy and paste the new token into the private document. This token can never be seen in GitHub again, so save it somewhere safe.
This token must now be used as the password for all GitHub operations that use an https:// URL, including Dreamweaver integration.
Git workflow in Dreamweaver
The following is the general workflow to use when editing a Git-associated Dreamweaver Site.
- If the Git window in your Dreamweaver interface is hidden, in the Window menu, select Git. (You can toggle the side menus, including the Git menu, by pressing F4.)
- Before editing files, perform a Git Pull. A pull will sync your local repository, so you have all new work done by other people since your last pull.
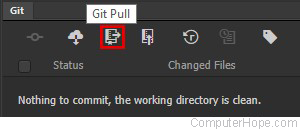
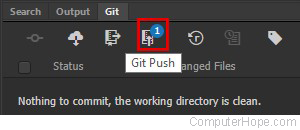
- Before you save changes to a file, Dreamweaver shows "Nothing to commit, the working directory is clean."
- After you save changes to a file, it's listed as an unstaged file. Unstaged files are not being tracked by Git, and are not part of a commit.
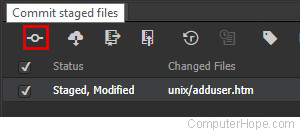
- To stage a file you have modified, check the box next to the file name. The command-line equivalent is git add filename.

- Optional: To unstage a file, so your changes are not included in a commit, uncheck the box next to the file name. The command-line equivalent is git reset HEAD filename.
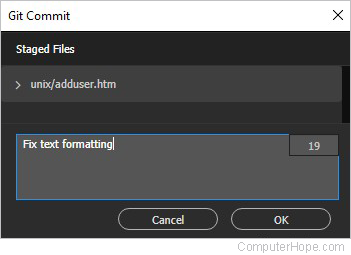
- To commit your changes, click the Commit button.
- Enter a commit message, briefly describing the changes in this group of files. This message is equivalent to the command git commit -m "message". Click OK.
- You may be asked to enter your Git User Details. Enter the full name and e-mail address that will identify you in commit messages. You'll only be asked for this information once. The command-line equivalents are git config --global user.name "Full Name", and git config --global user.email "address".
- To push your commit to the remote repository, click Git Push.
- Unless you have a reason to do otherwise, you can use the default push settings. Click OK. The command-line equivalent is git push origin master.
If someone else changed one of the files in your commit since the last time you pulled, you will be notified that the conflicts need to be merged. In many cases, the changes can be merged automatically. When the merge is complete, you can try to push your commit again.
Troubleshooting
- If your Git window shows no information at all, your site may be improperly configured. Remove the Dreamweaver Site, delete the local site folder (or choose a new one), and start over.
- If Dreamweaver hangs when you first try to test your git credentials, it may be blocked by Windows Defender firewall. To reset Dreamweaver's firewall settings, reinstall Dreamweaver and make sure to grant firewall access the first time you start the application.
- If Git doesn't seem to be working properly with Dreamweaver, you can try reinstalling Git. Dreamweaver uses the Git command line tools under the hood, and you might have stale login information or another configuration. If so, reinstalling Git should reset this info and resolve the issue.