
How to recolor an object in Photoshop
Adobe Photoshop provides several tools for adjusting an object's lighting and color. Individual objects in an image can be selected and adjusted without affecting the rest of the image.
Photoshop offers many tools and methods for adjusting color. The methods listed on this page get you started, and demonstrate what kinds of adjustments you can make.
Adjust hue and saturation
Below are steps for recoloring an object by adjusting the hue and saturation.
- Click the File tab in the menu bar and open an existing project or create a new project.
- In the Layers menu, click the desired layer of the image to recolor.
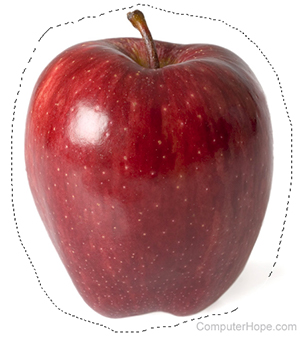
- Select the desired portion of the layer using the marquee, lasso, or quick selection tools.
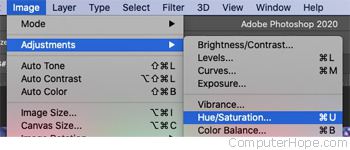
- In the menu bar, select Image, then Adjustments.
- Select Hue/Saturation.
- Adjust the sliders for Hue, Saturation, and Lightness until the preview is to your liking.
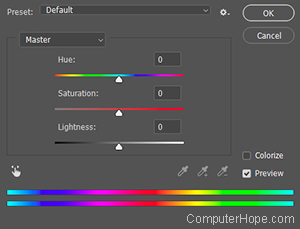
- Select OK to apply your changes.
Adjust a color range
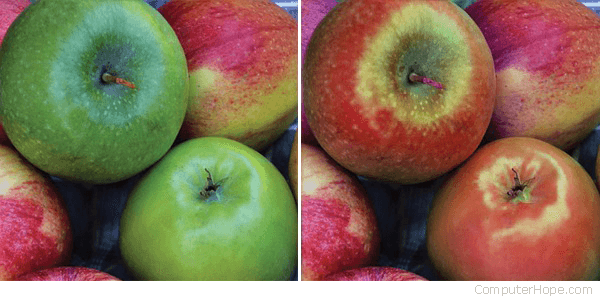
You may want to change only one range of colors in your image. For example, you may want to change all the green apples to look red.
Follow these steps to selectively adjust a range of colors in Photoshop.
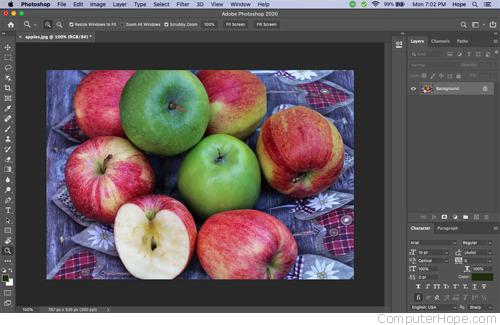
- Open your image in Photoshop.
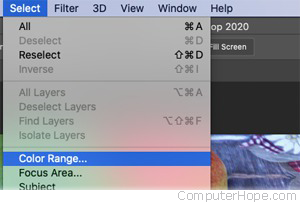
- Open the Select menu, and choose Color Range.
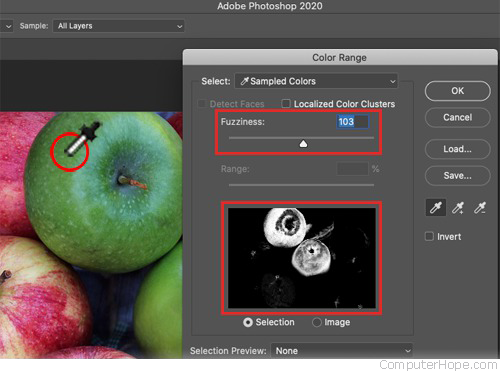
- In the Color Range dialog, you'll see a black and white thumbnail of your image. The white and gray parts represent the range of colors that will be selected. Move your mouse cursor over your image, and it turns into the eyedropper tool. Click a color in your image, and the thumbnail changes to show the new range of colors, based on the pixel you sampled. Adjust the Fuzziness slider to control how broad or narrow the range will be. A "fuzzier" selection will include colors that are further away from the color you sampled. You can click and hold the eyedropper and move the eyedropper to see the range change dynamically. Release the mouse button when the range looks like what you want. Adjust the fuzziness to expand or contract the range. When the white area looks like it corresponds with the parts of the image you want to recolor, click OK.
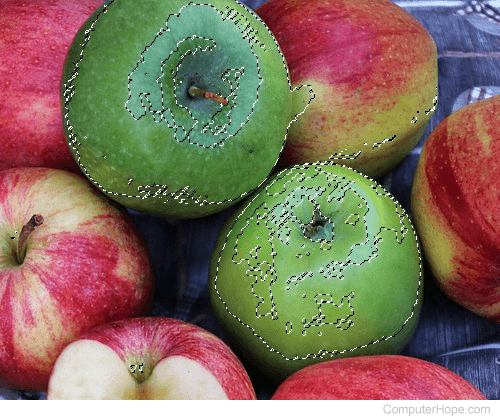
- The color range is now selected in your image. Any changes you make affect only this area.
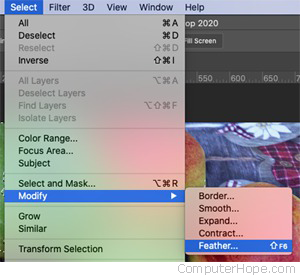
- However, the selection edge is probably too "hard." You don't want your color changes to have an obvious edge to them. So, next, we will feather the selection. When you feather a selection, the edge of the selection is gradually smoothed on either side. Any changes you make to this part of the image will "ease in" and "ease out" at the selection edge, by a specified radius of pixels. To feather your selection, from the Select menu, choose Modify, Feather.
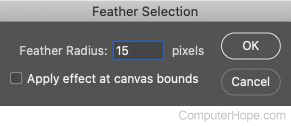
- Choose the feather radius (the distance to smooth on either side of your selection edge). In this example, we choose 15 pixels. Click OK.
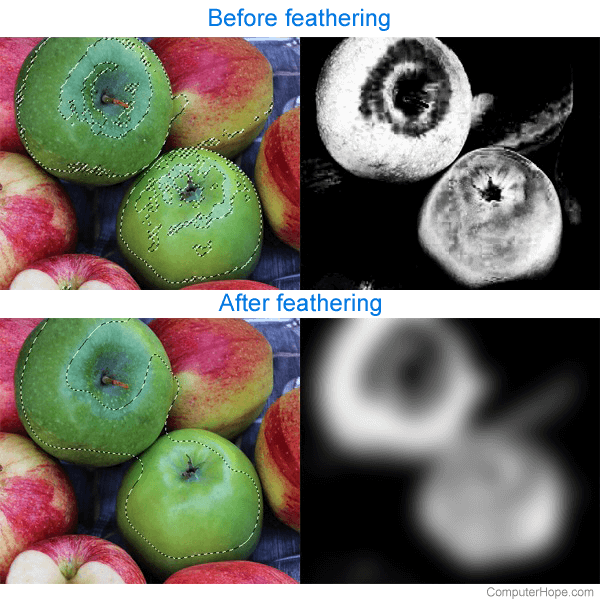
- The marquee edge changes to a smoother "blob." The marquee line indicates the general midpoint of your selection. The actual selected pixels are illustrated in the diagram below. As you can see, the feathered selection has softer edges. Color adjustments will be strongest in the bright areas, and won't be applied to the black areas at all. Pixels in the "gray area" will be affected according to how white it is.
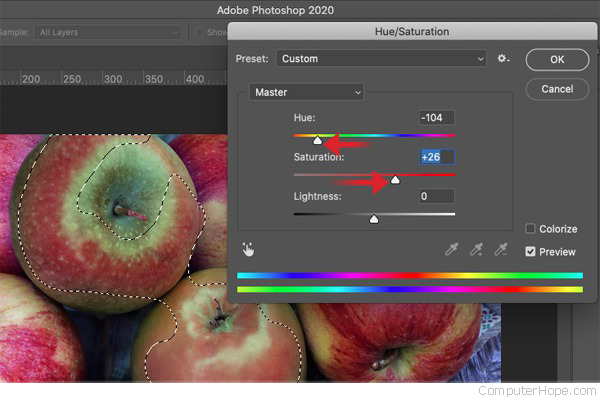
- We have a selection covering only the green parts of the apples. Now we can adjust the hue and saturation, as we did above, but only the selected area will be adjusted. Open the Image menu, and choose Adjustments, Hue/Saturation.
- Move the Hue slider towards red, and move the Saturation slider right to enhance the redness. Click OK to apply your changes.
Adjust color channels in CMYK mode
When you selectively adjust color, it can be hard to match the color temperature — "warm" (red, yellow) or "cool" (green, blue) — of the rest of the image. To make subtle adjustments to color temperature, it's useful to work in CMYK (cyan, magenta, yellow, and key) color mode.
In this example, our original image is a JPEG (Joint Photographic Experts Group) that uses RGB (red, green, and blue) color — every pixel is a combination of red, green, and blue values. These values are also called "color channels." RGB is a three-channel color mode, ideal for computer displays.
CMYK is a four-channel color mode (cyan, magenta, yellow, and the K stands for black). This color mode is ideal for printed images, such as magazines and books, because it corresponds to the four ink colors used in printing presses. CMYK is an intuitive mode for making fine-tuned color adjustments to photographs. With four channels instead of three, you can adjust the component colors with finer control.
Follow these steps to change your image color mode to CMYK, and adjust the CMYK channels individually.
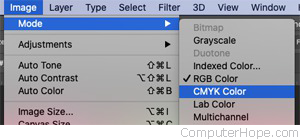
- With your image open in Photoshop, go to the Image menu, and choose Mode, CMYK Color. If you see a confirmation message about changing the color profile, click OK.
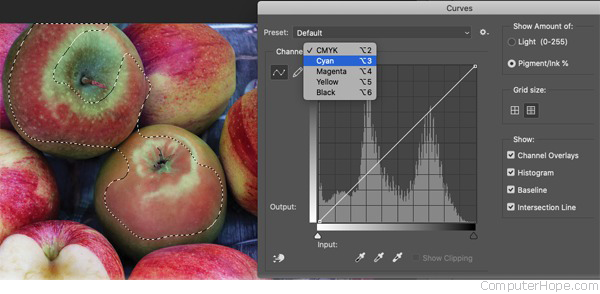
- There are several ways to modify color channels. One of the most intuitive is Photoshop's "Curves" adjustment tool. From your Image menu, choose Adjustments, Curves.

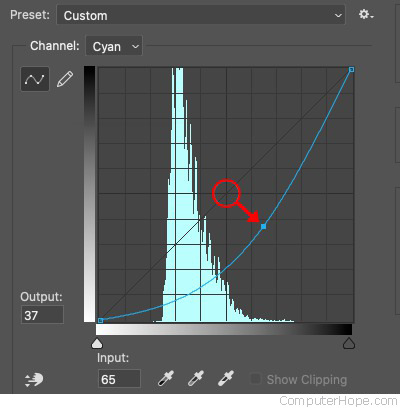
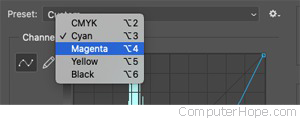
- The Curves tool shows a histogram of the intensity of colors in your image. When you first open the tool, it shows the intensity of all channels combined. Any changes you make now affect all color channels equally, effectively making the image lighter or darker. Right now, we only want to adjust individual color channels. In the Curves tool, click the Channel drop-down menu, and choose Cyan.
- The histogram now shows the intensity of the cyan channel only, and we can adjust its "curve." The curve starts as a diagonal line. There are two control points on this line: one in the lower-left, and one in the upper-right.
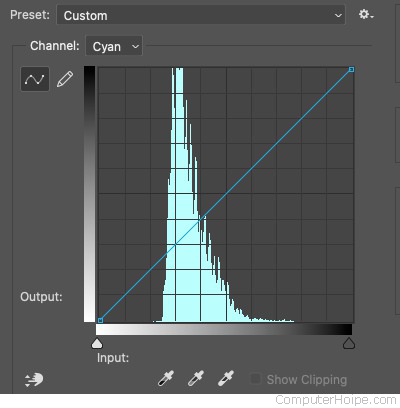
- To change the curve, you can move the control points. But we want to leave the two corner points where they are. These points represent the "extremes" of the color intensity. We don't want to affect these parts of the image: where there's no cyan or a lot of it, we don't want to make any changes. We want to affect the middle range, and have this alteration diminish gradually at the extremes. We can do this by adding a control point to the curve. Click the middle of the diagonal line to create a control point, and drag it down. You'll notice that the selected part of your image becomes less cyan; the warmth of the magenta and yellow channels, although unchanged, appears enhanced as a result. You can adjust this to better match the color temperature of the surrounding image.
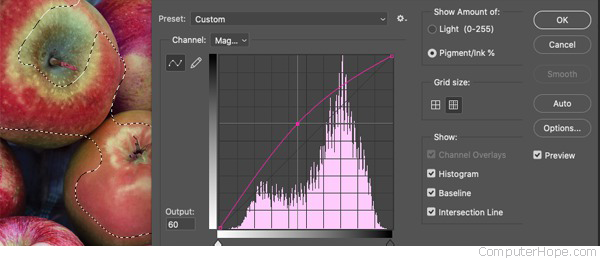
- Next, change the magenta channel. In the Curves dialog, click Channel and choose Magenta.
- The magenta histogram is displayed. This time, click the middle of the diagonal line and drag up, to increase the intensity of mid-range magentas. The redness of the apples is enhanced in your image. When it looks the way you want, click OK to apply the adjustments. You can repeat this process for the yellow and black channels, if you like.
- When you're finished adjusting the CMYK channels, change your image back to RGB color mode, to ensure maximum compatibility with apps, websites, and other devices. Go to the Image menu, and choose Mode, RGB Color. You can now save your image.
