
How to scan a document into a computer
People need to scan documents or photos to their computer for many reasons. A common reason is to send paperwork to someone across the country immediately when mail or other shipping methods are not fast enough. Another reason might be someone going paperless but still wants to keep important documents handy. Finally, someone might have printed photos that they want to transfer digitally to their phone or other devices.
While the methods vary slightly for different models of scanners and multifunction printers, the following steps walk you through how to scan a document or photo.
How to scan a document
- Turn on the scanner or multifunction printer.
- Locate the software for the scanner on your computer. If you don't have the software that came with the scanner, most versions of Windows have a Windows Fax and Scan program installed, which works with most scanners.
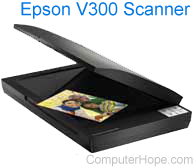
- Count the number of pages you want to scan. If you are working with only one side of the page, we recommend using the flatbed, shown in the first picture below. If you have multiple pages or one page needing both sides scanned, you need a scanner with a feeder port, as shown in the second picture below.
An example of a flatbed on a scanner
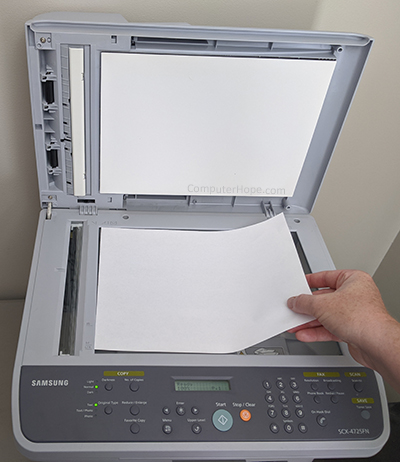
An example of a feeder on a scanner
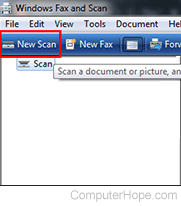
- When using the Windows Fax and Scan software, verify the Scanner is selected and not Fax.
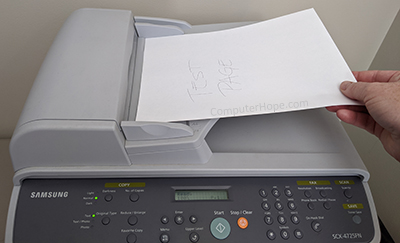
- Put the page(s) needing to be scanned on the flatbed or in the feeder. Most scanners have directions on how to insert the paper, either face up or face down. Especially when using the feeder, make sure the paper is seated correctly so it is pulled in correctly.
- In the scanner software, click the New Scan or similar option.
- In the New Scan window, you must change any settings that might apply from the available options. For example, options may include Profile, Source, Paper size (if not letter size), Color format, File type, Resolution (DPI), Brightness, and Contrast. Change each of these depending on the type of document you are scanning.

- Once those options are changed, click Scan.
Saving the document
- After all the pages are scanned, a screen pops up showing the scanned pages. Make sure all pages are showing on the screen. If not, re-scan the document.
- If using the Windows Fax and Scan program, at the top-middle of the screen, click Save as or the Save icon, or click File, then click Save as.
- In the pop-up window, choose the Save in location or similar option, then type the desired file name. Then, change the Save as type to .jpg, .bmp, .gif, .tiff, or .png, depending on your preference. We recommend saving any photos as .jpg and any documents as .tiff. Saving documents as a .tiff or .PDF reduces their size, making sending them by e-mail and similar programs easier.
- Once you've made the selections, click Save.
Once you've saved your file as one of the file extensions above, you can use a third-party PDF (Portable Document Format) program to save your file as a .pdf. For further help, see: How to save a scanned document as a PDF.