How to create a video slideshow in Adobe Premiere Pro

In Adobe Premiere Pro, you can create a video slideshow of your photographs, applying smooth transitions from one photo to the next. You can then output the slideshow to a video file, which you can share online with friends and family.
Create a new Premiere Project
- Open Adobe Premiere Pro.
- At the Home screen, click New Project.
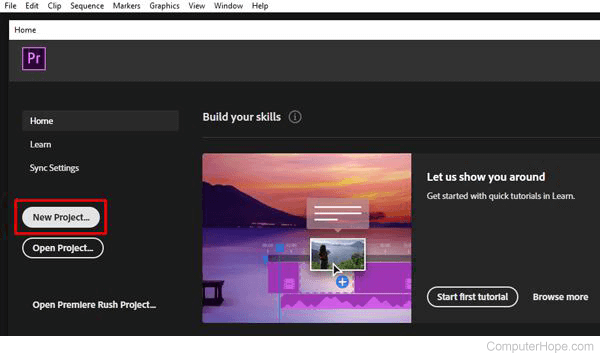
In Premiere, there are usually several ways to do the same thing. For example, you can create a new project by going to File > New > Project in the menu bar. You can also use the keyboard shortcut Ctrl+Alt+N on a Windows computer, or Command+Option+N on a Mac.
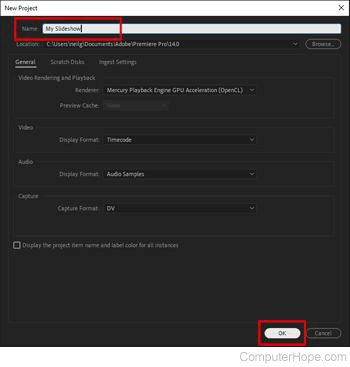
- In the New Project window, enter a descriptive Name for your project, and click OK.
About Workspaces
Your new project opens to a blank Workspace, divided into sections that contain Panels. Each panel contains a different set of buttons, options, and information to help you edit your video. The panels are organized in tabs. At the top of any workspace section, click a tab to display that panel.
The Workspaces bar is located at the top of your window, under the menu bar. Each workspace offers you a different configuration of panels, each designed to help you work with your project differently.
Click a workspace name to switch to that workspace. In this project, we start in the Editing workspace, which focuses on assembling your media objects, called clips, in the sequence timeline.
- If you are already in the Editing workspace, its name is blue. If not, click Editing in the workspace bar now. (Window > Workspaces > Editing; Windows: Alt+Shift+5; Mac: Option+Shift+5.)
Create a new sequence
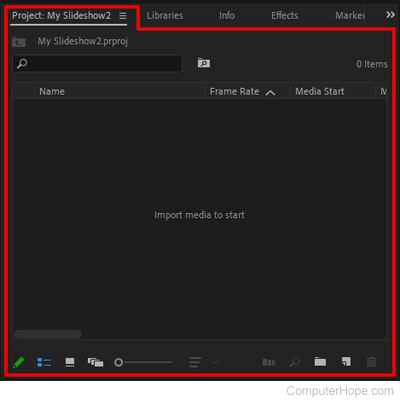
In the lower-left of the Editing workspace, you see the Project panel.
The Project panel is where you manage the source media for your project: still images, movie clips, audio files, etc. It also contains your sequences. You can think of a sequence like a scene in a movie. In Premiere, a sequence contains all the edits for a specific sequence of audio and video.
Every Premiere project has at least one sequence. In this example, we edit everything in one sequence.
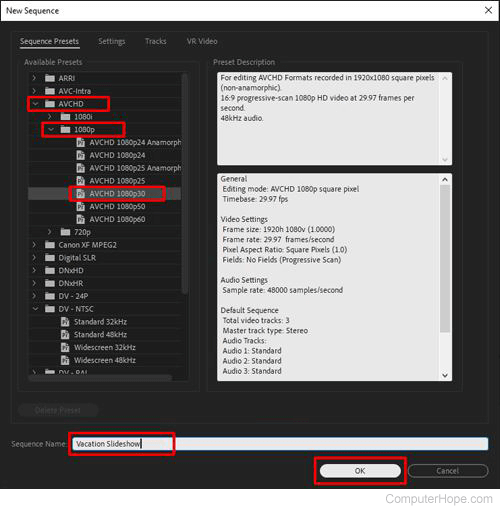
The New Sequence window opens. Here, you can configure the video and audio format of your sequence, such as video resolution, frame rate, color depth, audio quality, etc. Most often, it's best to choose one of the Sequence Presets that provide standard configurations for various formats.
- Under Available Presets, select AVCHD > 1080p > AVCHD 1080p30. This preset creates a 1080p video ideal for uploading to YouTube or Vimeo, suitable to view on any mobile device or television.
- Enter a descriptive Name for your sequence (such as "Our Vacation"). This name is used as the default file name of the final video.
- Click OK.
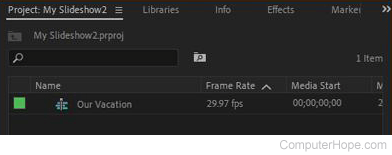
Your new sequence is displayed in the Project panel.
Set Media and Timeline defaults
Before you import your photos, edit some key preferences that affect how they're imported and displayed.
- Click Edit > Preferences > Timeline.
- Set the Video Transition Default Duration, which is the default length of transitions (such as a crossfade) from one photo to the next. In this example, we choose 30 frames (1 second) for the transition duration.
- Set the Still Image Default Duration, which is how long a single photo is shown in the video, by default. Here, we've chosen 8.00 seconds.
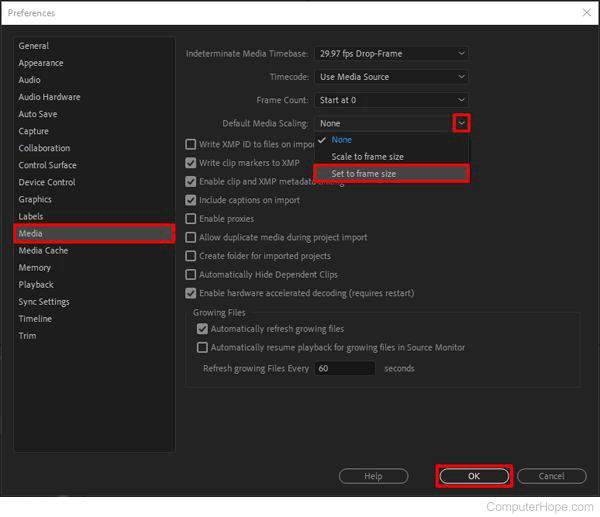
- In the left pane of the Preferences window, click Media.
- Set the Default Media Scaling to Set to Frame Size.
When you choose Set to frame size, imported images are scaled to fit the frame in Premiere, rather than being resampled to match the sequence resolution. With this setting, your photos retain all their original pixel data, which improves video quality if you decide to zoom in on an image.
- Click OK.
Import photos
When you import a still image in Adobe Premiere, it's like creating a link to the file on your computer. The image is imported as a clip (as if it were a video clip). Its duration is the value you set in step 11.
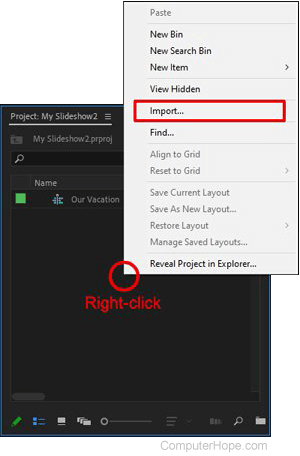
- Right-click the Project panel and click Import. (File > Import; Windows shortcut: Ctrl+I, Mac: Command+I.)
- If all your photos are organized in a single folder, click the folder once to select it, and click the Import folder.
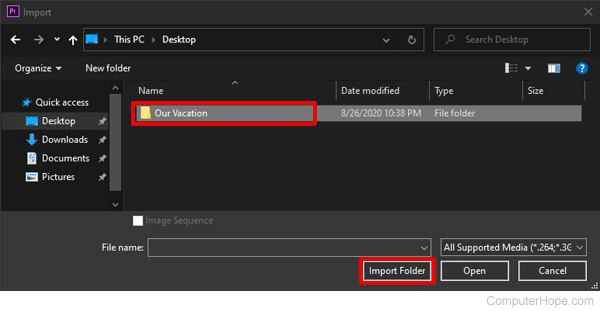
- Or, select one or more photos inside a folder, and click Open to import those photos.
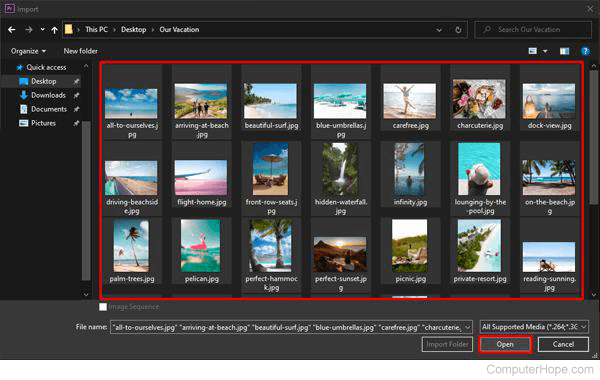
Repeat steps 15-17 as necessary until you have imported all the photos you want to use in the slideshow.
Assemble clips in the timeline
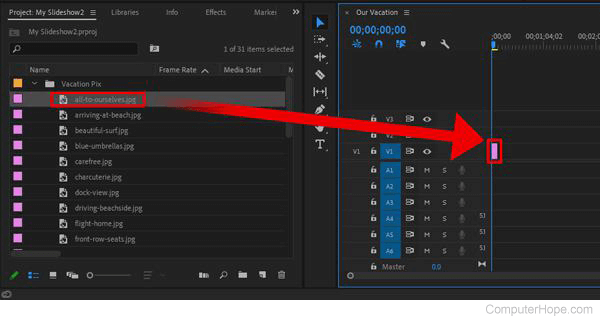
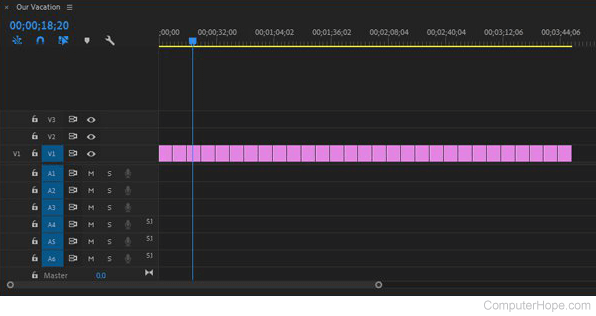
- In your Project panel, locate the first image for your slideshow. (You can double-click the clip in your Project panel to preview it in the Source Monitor panel in the upper-left.) Drag the clip from the Project panel onto the Timeline panel to the right, into the V1 ("video 1") channel. Position the clip at the beginning of the sequence, all the way to the left, at the 00;00;00;00 mark. Release the mouse button to drop the clip there.
Notice that the photo now appears in the Program Monitor panel in the upper-right. This panel shows how the video looks at the current time.
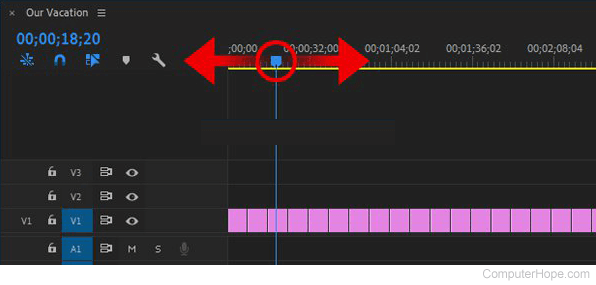
The current time is indicated visually by the playhead, which looks like a blue arrowhead ![]() in your timeline. A blue line descends from the playhead, marking the current time in all your media layers.
in your timeline. A blue line descends from the playhead, marking the current time in all your media layers.
The current time is displayed numerically as a blue time code in the upper-left corner of the Timeline panel (such as 00;00;00;00, representing hours; minutes; seconds; frames).
Zooming the timeline
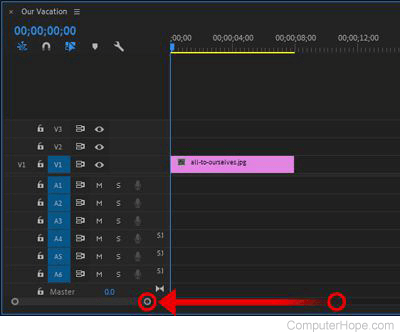
At the bottom of the Timeline panel is the Zoom Bar, a horizontal bar with a circular handle on each end. The size of the bar represents the percentage of your timeline you are currently viewing. If you drag a handle to make the bar longer, you zoom out, showing more of the timeline. If you drag a handle to make the bar shorter, you zoom in, showing greater detail for the section of the timeline at the playhead.
- Click the right handle of the Zoom Bar, and drag it left to zoom in on your clip.
Notice the clip gets longer as you zoom in on the timeline.
Moving a clip in the timeline
If you move your mouse over the clip, the mouse pointer icon changes. When you hover over the left edge or right edge of the clip, the pointer looks like a bracket, and you can click-and-drag to extend or shrink the clip duration. Hovering over the middle of the clip makes the pointer an arrow and lets you click-and-drag the clip to a different timeline position.
- In the upper-left of the Timeline panel, click the magnet icon
 to enable Snap.
![]()
When the Snap feature is enabled, the magnet icon turns blue. ![]() Now, when you work in the timeline, your edits "snap" to existing edit points, without small gaps or overlaps.
Now, when you work in the timeline, your edits "snap" to existing edit points, without small gaps or overlaps.
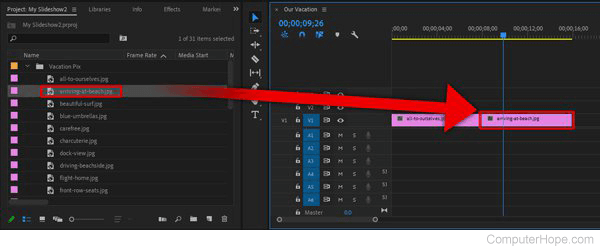
- In the Project panel, locate the next photo for your slideshow. Drag it from the Project panel onto the timeline, and position it directly after the first photo, so it "snaps" to the end of that clip.
- Repeat this process for the rest of your photos, dragging them from your Project panel, and dropping them so they snap to the end of the previous photo. If you select multiple clips in the Project panel and drag them all at once, they are inserted as a group into the timeline. Use the Zoom Bar to adjust your view of the timeline as necessary.
Preview the slideshow
- In the Timeline, press the Home key to move the playhead to the beginning of the sequence.
- Press the spacebar key to preview the sequence. Playback starts at the current position of the playhead. The playhead moves forward, and the video is displayed in the Program Monitor. Press spacebar to stop Preview playback at any time.
In the timeline, press the Up or Down arrow keys to jump to the previous or next edit point. Use these keys to quickly flip through the photos in your slideshow.
- Click-and-drag the playhead marker (the blue arrowhead) to scrub the timeline. Move the playhead marker back and forth to preview different parts of your sequence in the Program Monitor.
Remove or rearrange photos
Now is a good time to make a final decision about which photos to keep in your slideshow, and in what order. Right now, all your clips are the same duration, which makes it easier to move them around like puzzle pieces. (When you move one, you know another fits exactly in its place on the timeline.)
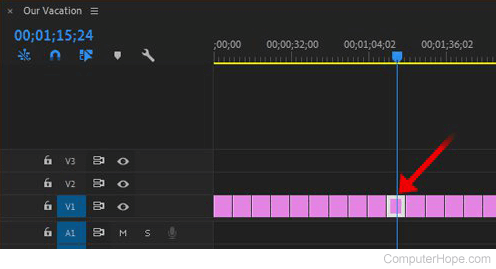
- To select a clip, click the middle of the clip once. When selected, the clip displays a white border on the timeline.
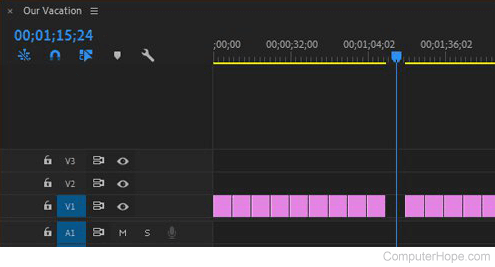
- To remove the selected clip, press the Delete key on your keyboard. (If you make a mistake, press Ctrl+Z to undo the change.)
- To move a clip, click the middle of the clip and drag it to a gap in the timeline. Make sure it snaps to the end of the previous clip and start of the next clip, then release the mouse button to drop it there.
Repeat this process, rearranging and removing clips as necessary until the photos are assembled as you want them.
Apply video transition
Apply a transition to your clips, so they smoothly dissolve from one to the next.
- In the Timeline panel, select all clips. (Edit > Select All; Windows: Ctrl+A; Mac: Command+A.)
- In the menu bar, click Sequence > Apply Video Transition. (Windows: Ctrl+D; Mac: Command+D.) The default video transition is a crossfade, which smoothly dissolves from the end of one clip to the beginning of the next. Its duration is the value you set in step 10.
- Preview your slideshow. Notice the first clip fades in from black, each clip dissolves into the next, and the last clip fades out to black.
- Save your project. (File > Save; Windows: Ctrl+S, Mac: Command+S.)
Export video file
- To create a video file of your slideshow, click File > Export > Media. (Windows: Ctrl+M; Mac: Command+M.)
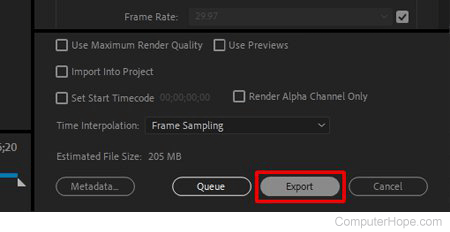
- The Export Settings window opens. Leave all settings at their defaults, and click Export.
Premiere encodes your video and writes it to disk. The default location of the video file on your computer is Documents > Adobe > Premiere Pro > version. The default video file format is H.264-encoded MP4.
If preferred, you can upload your video to YouTube. If you do, you can send the YouTube link to friends and family by e-mail, text message, or on social media. For more information, see: How to upload a video to YouTube.

