
How to add a header or footer in a Microsoft Excel spreadsheet

In Microsoft Excel 2007 and newer versions, you can insert a header or footer in your spreadsheets. These elements stay at the top or bottom of the page and are edited separately from the worksheet body. They may include graphics, like a company logo, the author's name or contact information, the page number, or the date the worksheet was created or published. Headers appear at the top of the page, footers appear at the bottom, and they can be used simultaneously.
These instructions apply to Excel 2019, Excel 2016, Excel 2013, Excel 2010, and Excel 2007.
How to add a header or footer
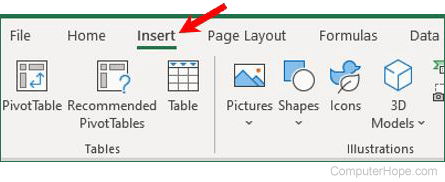
- In the Ribbon, click the Insert tab.
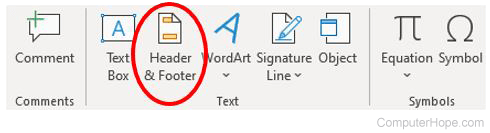
- In the Text section, click Header & Footer.
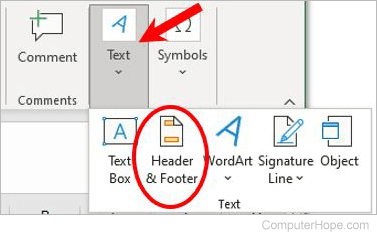
If your Excel program window is not maximized, click the Text option, then click Header & Footer.
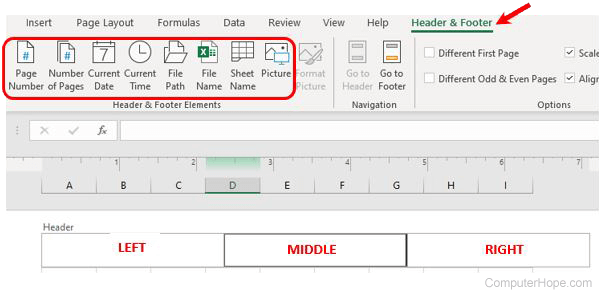
- The Page Layout view for the worksheet is displayed, with the header showing at the top of the worksheet. The header is split into three sections: left, middle, right. Click the desired header section and add the desired text or options from the Header & Footer tab in the Ribbon.
- To add a footer, click anywhere in the worksheet below the header. Scroll down the page until you see the Add footer text at the bottom of the page, and click the Add footer text.
- Like the header, click the desired footer section (left, middle, or right) and add the desired text or options from the Header & Footer tab in the Ribbon.
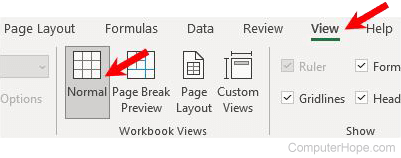
- When you're done editing, click anywhere in the worksheet between the header and footer. Click the View tab, and click the Normal option in the Workbook Views section of the Ribbon to return to normal edit mode for the worksheet.
- To make additional edits to the header or footer, click the View tab in the Ribbon, and click the Page Layout option in the Workbook Views section.

- Click the header or footer to modify the text or options.

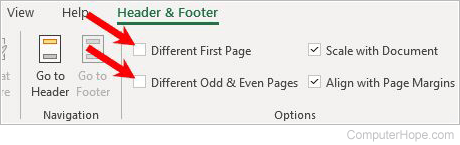
By default, the header appears on every page of your worksheet. If you want the header and footer of the first page to look different, check the Different First Page box in the Options section on the Header & Footer tab. You can also click the Different Odd & Even Pages option if you want the header and footer to appear differently on odd and even pages.
How to remove a header or footer
To remove a header or footer, follow these steps.
- In the Ribbon, click the View tab, and click the Page Layout option in the Workbook Views section.
- Click the header or footer you want to remove.
- Highlight the text or options, and press the Delete key to remove the header or footer details.
- Click anywhere in the worksheet between the header and footer. Click the View tab, and click the Normal option in the Workbook Views section of the Ribbon to return to normal edit mode for the spreadsheet.