
How to use each of the Adobe Photoshop tools
One of the essential parts of the Photoshop interface is the Tools panel. Understanding the basics of the provided tools is essential for beginners to grasp the concepts of the program. Doing so can open the door for many more design techniques and help you solve design problems more efficiently. Below is a breakdown of each tool found in the Tools panel and how it can manipulate an image.
On the default Essentials workspace, the Tools panel appears on the left side of the interface. If you can't see the Tools panel, you can display it by selecting Window, then Tools in the menu bar or press the "F" key one or two times.
Navigation tools
Navigation tools help you orient yourself on the document. Since you may want to go into extreme detail, it can sometimes be difficult to control the canvas's scale, rotation, and position.
Zoom tool
![]() Click-and-drag to zoom in and out your image.
Click-and-drag to zoom in and out your image.
Zoom can also be done by holding Ctrl (Windows) or Command (macOS) and pressing the + (zoom in) or - (zoom out) keys.
Rotate View tool
![]() Rotate the canvas around by clicking-and-dragging. Rotating the canvas makes it easier to draw certain angles.
Rotate the canvas around by clicking-and-dragging. Rotating the canvas makes it easier to draw certain angles.
Pressing R selects the rotate tool in Adobe Photoshop.
Hand tool
![]() Click-and-drag to pan across your image. To find this tool, click-and-hold the Rotate View tool icon.
Click-and-drag to pan across your image. To find this tool, click-and-hold the Rotate View tool icon.
Pressing H selects the hand tool in Adobe Photoshop.
Selection tools
Selection tools make groups of pixels that can be edited independently from the entire layer. When making a selection, any brush or eraser strokes, color adjustments, and other changes only affect the selected part of the image, indicated by a dashed line around the perimeter.
Marquee tool
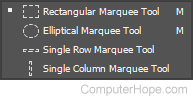
![]() Selects pixels in a rectangle, elliptical, or line. Click-and-drag with the mouse, moving from corner to corner. To select a different shape, click-and-hold on the Marquee tool and select one of the alternate tool options.
Selects pixels in a rectangle, elliptical, or line. Click-and-drag with the mouse, moving from corner to corner. To select a different shape, click-and-hold on the Marquee tool and select one of the alternate tool options.
Pressing M selects the move tool in Adobe Photoshop. Holding down the Shift while pressing M cycles through all move options.
Lasso tool
![]() Selects pixels within a hand-drawn shape. Click-and-drag with a mouse, drawing a shape that encloses the area you want to select. When your endpoint reaches the start of your stroke, let go of the mouse to close the selection.
Selects pixels within a hand-drawn shape. Click-and-drag with a mouse, drawing a shape that encloses the area you want to select. When your endpoint reaches the start of your stroke, let go of the mouse to close the selection.
Pressing L selects the lasso tools in Adobe Photoshop. Holding down the Shift while pressing L cycles through all lasso options.
Magic Wand tool
![]() Selects pixels in a particular color range. Click an area in your image, and the tool finds similar ones based on your Tolerance value in the tool properties.
Selects pixels in a particular color range. Click an area in your image, and the tool finds similar ones based on your Tolerance value in the tool properties.
Pressing W selects the wand tools in Adobe Photoshop. Holding down the Shift while pressing W cycles through all wand options.
Pen tool
![]() To make a selection using the Pen tool, add anchor points until the path is closed. Once you have an enclosed area, right-click anywhere on the screen, and select Make Selection in the context menu.
To make a selection using the Pen tool, add anchor points until the path is closed. Once you have an enclosed area, right-click anywhere on the screen, and select Make Selection in the context menu.
Once a selection is made, you can click-and-drag inside the selection to move it. While using a selection tool, you can add to your current selection by holding Shift or subtract from it by holding Option (macOS) or Alt (Windows).
Transformation tools
Transformations can scale or otherwise edit parts of your image or the canvas itself.
Move tool
![]() Change the position of any layer or selection by clicking-and-dragging. When selecting an element with the move tool, you can also use Ctrl+T to resize or rotate the selection using the bounding box.
Change the position of any layer or selection by clicking-and-dragging. When selecting an element with the move tool, you can also use Ctrl+T to resize or rotate the selection using the bounding box.
Pressing V selects the move tool in Adobe Photoshop. Holding down the Shift while pressing V cycles through all move options.
Crop tool
![]() Crop the entire canvas by dragging the edges in or out. The aspect ratio can be defined by the Ratio drop-down menu in the Tool options panel.
Crop the entire canvas by dragging the edges in or out. The aspect ratio can be defined by the Ratio drop-down menu in the Tool options panel.
Pressing C selects the crop and slice tools in Adobe Photoshop. Holding down the Shift while pressing C cycles through all options.
Frame tool
![]() Click-and-drag to create a rectangle or circle containing another image. When you drag-and-drop an image file from your computer into a frame, it will not extend past the boundary you have created. To change the frame's shape, click the ellipse or rectangle icon in the Tool options panel.
Click-and-drag to create a rectangle or circle containing another image. When you drag-and-drop an image file from your computer into a frame, it will not extend past the boundary you have created. To change the frame's shape, click the ellipse or rectangle icon in the Tool options panel.
Brush tools
Brush tools add, remove, or change pixels by drawing on a layer or selection. The shape, size, and hardness of your brush can be highly customized in the Brush settings panel. To quickly adjust the brush size while using a brush-based tool, use the square bracket keys to scale it up and down while drawing.
Brush tool
![]() The basic brush tool adds pixels when you draw. The color of these pixels will be your current foreground color, which can be changed in the color picker.
The basic brush tool adds pixels when you draw. The color of these pixels will be your current foreground color, which can be changed in the color picker.
Pressing B selects the brushes in Adobe Photoshop. Holding down the Shift while pressing B cycles through all brushes.
Eraser tool
![]() The eraser tool erases any existing pixels you draw over.
The eraser tool erases any existing pixels you draw over.
Pressing E selects the eraser tools in Adobe Photoshop. Holding down the Shift while pressing E cycles through all erasers.
Blur tool
![]() Selectively adds a blur effect to reduce detail in your brush strokes.
Selectively adds a blur effect to reduce detail in your brush strokes.
Pressing O selects the dodge, burn, and sponge tools in Adobe Photoshop. Holding down the Shift while pressing O cycles through all options.
Dodge tool
![]() Lighten pixels in your image. The intensity of the highlights created can be defined by the Exposure value in the Tool options panel.
Lighten pixels in your image. The intensity of the highlights created can be defined by the Exposure value in the Tool options panel.
Pressing O selects the dodge, burn, and sponge tools in Adobe Photoshop. Holding down the Shift while pressing O cycles through all options.
Burn tool
![]() Darkens pixels in your image. The intensity of the shadows created can be defined by the Exposure value in the Tool options panel. Find this tool by clicking and holding the Dodge tool.
Darkens pixels in your image. The intensity of the shadows created can be defined by the Exposure value in the Tool options panel. Find this tool by clicking and holding the Dodge tool.
Pressing O selects the dodge, burn, and sponge tools in Adobe Photoshop. Holding down the Shift while pressing O cycles through all options.
Clone Stamp tool
![]() The Clone Stamp tool - Copies pixels from one area of the image to another. To define the source, hold Alt (Windows) or Option (macOS) and click an area. Once an area is defined, click-and-drag to copy pixels from that area.
The Clone Stamp tool - Copies pixels from one area of the image to another. To define the source, hold Alt (Windows) or Option (macOS) and click an area. Once an area is defined, click-and-drag to copy pixels from that area.
Pressing S selects the stamp tools in Adobe Photoshop.
Healing Brush tool
![]() Like the Clone Stamp tool, the Healing Brush tool copies pixels from one area to another. However, it also copies the texture of the image and calculates realistic colors for the area. This tool helps fix small blemishes or imperfections.
Like the Clone Stamp tool, the Healing Brush tool copies pixels from one area to another. However, it also copies the texture of the image and calculates realistic colors for the area. This tool helps fix small blemishes or imperfections.
Pressing J selects the healing brush tools in Adobe Photoshop.
History Brush tool
![]() Undoes changes to an image. Think of this as the undo command, but specific to the area you draw. Each stroke will undo a previous action performed on an image.
Undoes changes to an image. Think of this as the undo command, but specific to the area you draw. Each stroke will undo a previous action performed on an image.
It is a common mistake to draw or erase pixels on the wrong layer. When using brush tools, ensure that the correct layer is selected to avoid destructive editing.
Pressing Y selects the history brush tools in Adobe Photoshop.
Vector tools
While Photoshop is raster-based, some functions use vector graphics, which can scale without losing quality and can be edited easier at any point. These objects behave differently than other elements of your image until they are rasterized.
Type tool
![]() Creates editable text boxes. Text can be created by clicking anywhere in the canvas and typing or clicking and dragging to create a textbox. To edit the text, use the type tool and double-click in the textbox. All text properties, including font, size, kerning, and leading, can be changed in the Properties panel.
Creates editable text boxes. Text can be created by clicking anywhere in the canvas and typing or clicking and dragging to create a textbox. To edit the text, use the type tool and double-click in the textbox. All text properties, including font, size, kerning, and leading, can be changed in the Properties panel.
Pressing T selects the text tools in Adobe Photoshop.
Shape tools
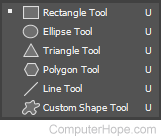
![]() Create vector shapes with a customizable fill and stroke color by clicking and dragging from one corner to the other. These can be rectangles, ellipses, triangles, lines, polygons, or other custom shapes. To change the shape, hold your mouse down on the Rectangle tool and select the shape of your choice.
Create vector shapes with a customizable fill and stroke color by clicking and dragging from one corner to the other. These can be rectangles, ellipses, triangles, lines, polygons, or other custom shapes. To change the shape, hold your mouse down on the Rectangle tool and select the shape of your choice.
Pressing U selects the shape tools in Adobe Photoshop.
Pen tool
![]() To create vector paths with the Pen tool, draw each anchor point to create an enclosed shape. From here, the shape's fill and stroke can be defined in the Tool options panel.
To create vector paths with the Pen tool, draw each anchor point to create an enclosed shape. From here, the shape's fill and stroke can be defined in the Tool options panel.
Pressing P selects the pen tool in Adobe Photoshop.
Path Selection tool
![]() Select a vector path in your project by clicking inside the stroke or fill. From here, it can be resized or otherwise transformed.
Select a vector path in your project by clicking inside the stroke or fill. From here, it can be resized or otherwise transformed.
Color tools
These tools help you define and transition between colors.
Eyedropper tool
![]() Click anywhere in your image to copy the pixel's color, or average color of a group of pixels, depending on the tool's Sample Size. The color you select becomes your foreground color.
Click anywhere in your image to copy the pixel's color, or average color of a group of pixels, depending on the tool's Sample Size. The color you select becomes your foreground color.
Pressing I selects the eyedropper tool in Adobe Photoshop. Holding down the Shift while pressing I cycles through all options.
Gradient tool
![]() Click-and-drag to fill your layer or selection with a gradient fill. This transitions between two or more colors. The default gradient will be between your foreground and background colors, but it can be changed in the Tool options panel.
Click-and-drag to fill your layer or selection with a gradient fill. This transitions between two or more colors. The default gradient will be between your foreground and background colors, but it can be changed in the Tool options panel.
Color selector
![]() The foreground color and background color can be managed through the color swatches in the tools bar. As seen in the picture, this icon is represented by two boxes showing the current selected colors. In this example, blue is the foreground color and black is the background color. To change the either color, click either box. You can also click the small arrows to switch the foreground with the background color.
The foreground color and background color can be managed through the color swatches in the tools bar. As seen in the picture, this icon is represented by two boxes showing the current selected colors. In this example, blue is the foreground color and black is the background color. To change the either color, click either box. You can also click the small arrows to switch the foreground with the background color.