
How to adjust or disable the Windows Lock screen

The Lock screen in Windows is a great security feature, helping protect your data and privacy if you need to step away from your computer. The default settings automatically select an image to display on the lock screen, but you can change that image or choose to display a slideshow of images. If desired, you can also disable the lock screen feature, preventing Windows from locking your computer altogether.
Select from the list below and follow the instructions to learn how to adjust or disable the Windows Lock screen.
How to adjust the Windows Lock screen
To adjust the lock screen settings on a Windows computer, follow the steps below for your version of Windows.
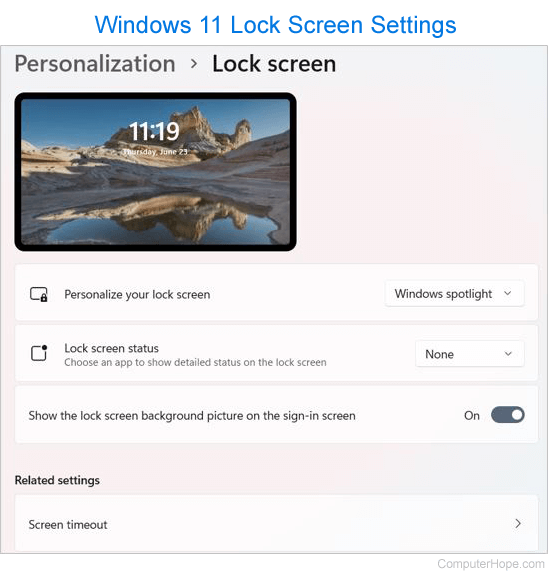
Windows 10 and Windows 11
- Press Windows key, type Lock screen settings and press Enter.
- In the Lock screen settings, you can change the displayed image or switch to a slideshow of images, adjust what apps show on the lock screen, and adjust the screen timeout.
Windows 8
- Open the Charms by moving the mouse to the right side of the screen or pressing Windows key+C on the keyboard.
- In Charms, click Settings.
- In the PC settings menu, click Change PC settings at the bottom.
- In Personalize, under Lock screen, select the picture you want to use for the Lock screen.
At the bottom of the Lock screen section is Lock screen apps, which lets you add and remove apps on the Lock screen.
How to disable the Windows Lock screen
To disable or remove the lock screen on a Windows computer, follow the steps below for your version of Windows.
Windows 10 and Windows 11
- Open the Windows Registry Editor.
- Navigate to the following registry folder.
HKEY_LOCAL_MACHINE\SOFTWARE\Policies\Microsoft\Windows
- Right-click the Windows folder, select New, and select Key in the pop-up menu.
- Type Personalization to name the new key, and press Enter.
- Right-click the new Personalization key, select New, and select DWORD (32-bit) Value.
- Type NoLockScreen to name the new DWORD value and press Enter.
- Double-click the NoLockScreen DWORD value, type the number "1" in the Value data field, and click OK.
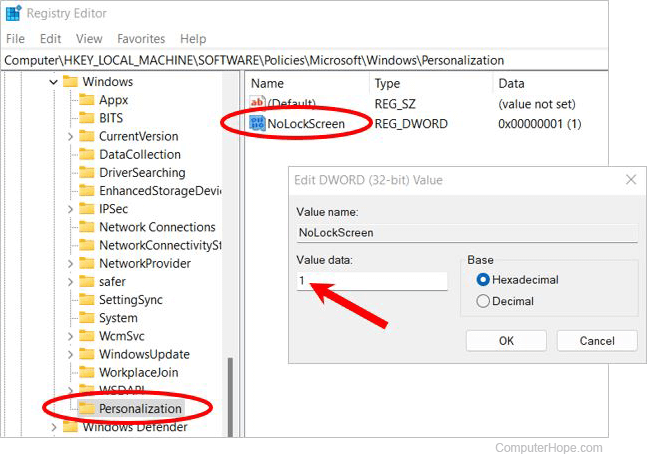
Now, instead of a lock screen when pressing Windows key+L, a login screen is displayed.
Windows 8
- Open the Charms by moving the mouse to the right side of the screen or pressing Windows key+C on the keyboard.
- In Charms, click Settings.
- In the PC settings menu, click Change PC settings at the bottom.
- Select the Users option under PC settings.
- Under Sign-in options, click the Change button below the text "Any user who has a password must enter it when waking this PC."
- In the pop-up message that appears, click OK.
The text under Sign-in options changes to "Any user who has a password doesn't need to enter it when waking this PC."