
Linux shell tutorial
The command-line shell is a text-based user interface for your operating system. Unlike a GUI (graphical user interface) shell, which uses a graphical representation of the system's services and resources, the command-line shell uses only text. It is the fundamental interface between you and the operating system, and in many cases offers you more direct control over the system processes.
What is the shell used for?
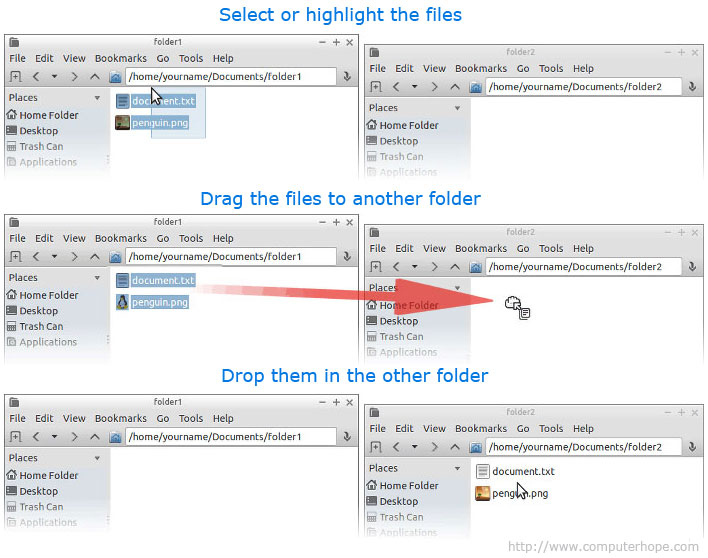
When communicating with your operating system, anything you can do with a GUI can be done at the command line. For example, let's take something you must do all the time: move files around in your file system. Using a GUI, you could select the icons representing your files, drag them to another folder, and drop them there to move them.
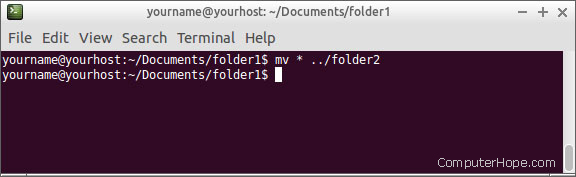
However, using the command line, this operation can be performed using a single command:
The command line, once you get used to it, lets you control your system with greater efficiency and precision than with a GUI.
Why is it called a "shell"?
The user interface is known as a "shell" because it's the outer layer separating you from the innermost parts of the operating system, called the kernel. Technically, your operating system's GUI is also a "shell," but the command line is frequently referred to casually as "the shell."
How do I get into the command-line shell?
The most common way to access the command-line shell uses a terminal emulator.
If you are using a Linux distribution, it may boot into X Window System (or "X"), which lets you run programs in separate windows and interact with them using the mouse. In X, there are different ways to launch a terminal emulator, but here are the most common:
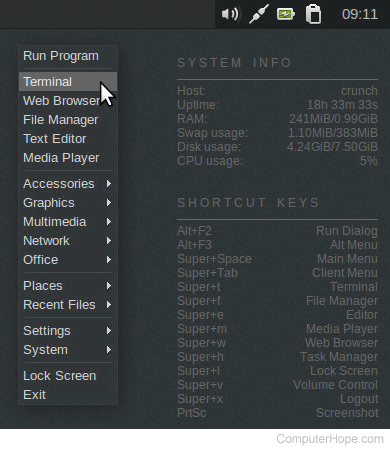
- Many Linux distributions use a desktop environment similar to Microsoft Windows, which has a "Start Menu." From this menu, your terminal application is usually located in under "Accessories." For example, Lubuntu comes with the LXTerminal terminal emulator already installed, and the shortcut is located in the Accessories menu.
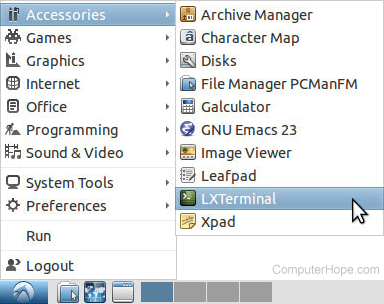
Selecting the terminal menu item launches the terminal emulator and places you at a command line. - Different versions of Linux use different kinds of window managers, each with a slightly different interface. With many window managers, right-clicking the desktop shows a menu with a terminal option. For instance, the right-click menu in Crunchbang Linux has a "Terminal" option. Below is what that menu looks like, after right-clicking anywhere on the desktop.
Here, the Accessories menu would also have an option for running the terminal. - On many versions of Linux, pressing the Super Key and T at the same time is the default hotkey for launching a terminal. (The Super Key is usually the first key to the left of the spacebar, also known as the Windows key).
If you cannot figure out how to launch your terminal emulator, see the documentation for your particular operating system, and search for "terminal".
The command prompt
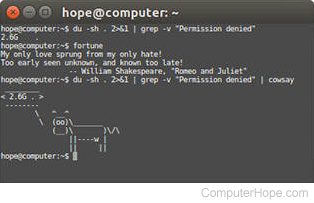
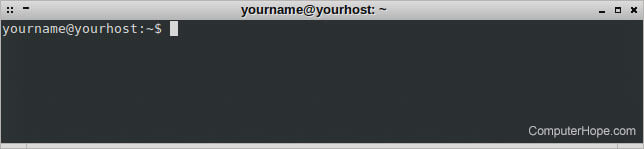
When you launch the terminal emulator, you are presented with a command prompt.
These examples are all performed using the Bourne-Again Shell (bash), which is the default command-line shell on Linux.
Let's look at this command prompt closely. The prompt can be anything you like, but by default, it looks like our example.
Specifically, it tells us who we are (username) and where we are (what system we are using and our working directory). Here are what the individual parts of the prompt mean:
| yourname | Your username. |
| @ | An at symbol separates the username and hostname. |
| yourhost | The system hostname. |
| : | The colon is the character that separates the hostname and the working directory. |
| ~ | Our current ("working") directory. The tilde ("~") is a special character which represents our home directory. When you start a shell session, this is the directory you begin working, by default. |
| $ | A special character which indicates that we do not have superuser privileges. If logged in as root (the superuser), this character changes to a #. |
Entering commands
Let's type our first command. We should start by listing the files are in our home directory. The most basic way to see all of these files is with the ls command; type ls at the command prompt and press Enter.
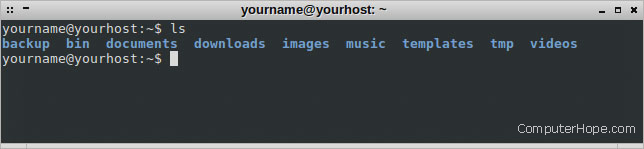
As shown above, the ls command lists the contents of the directory and places us at another command prompt.
All commands and file names in Unix and Linux are case-sensitive. The ls command, for example, must be typed in lowercase letters, as shown above.
For a more detailed listing of the directory contents, we can specify command-line options, also known as switches. These are additional arguments to the command that modify the way it operates. Here, we use the -l (use long list format) option to get more information from our listing.
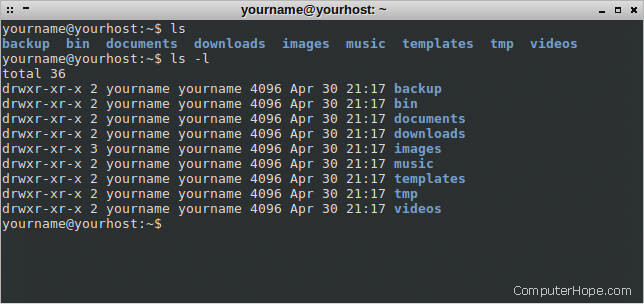
As shown above, the ls -l command provides us with additional information about the contents of our home directory. We should first notice that the first letter of each listing is a d, meaning that each of those directory contents is itself a directory.
Clearing the screen
Before we do anything else, let's clear the screen, to remove the clutter produced by the output from our previous commands. Use the clear command by typing clear at a new command prompt and press Enter.

After pressing Enter, the screen clears and places you at a new command prompt at the top of your terminal screen.
Changing directory
Let's move into our documents folder using the cd ("change directory") command. To change the current directory, type "cd" and then a space, then the name of the directory you want to change to and press Enter.
The cd command assumes that the name of any directory you specify is relative to your current directory. Therefore, to change into the documents directory, which exists in our current directory, type "cd documents".

The command prompt now reflects the new working directory: ~/documents, which is equivalent to the full pathname: /home/yourname/documents. No matter what user you are logged in as, "~" always represent your home directory. In the example, the new working directory is also seen in the title bar of our terminal window.
Unlike MS-DOS and Microsoft Windows, hierarchical directory names in Linux are separated by a forward slash ("/") rather than a backslash ("\"). This change of symbols is a fundamental difference between these various operating systems.
At any time, you can verify your current directory with the pwd ("print working directory") command.

The command prints the name of the current directory to the terminal, in this example: "/home/yourname/documents". Again, with "~/documents" the "~" represents our home directory, which is /home/yourname. So if we are in our home directory, typing "cd documents," "cd /home/yourname/documents," or "cd ~/documents" would all place us in the same directory.
Now let's move up one directory, back into our home directory. The special directory name ".."(the double-dot) means "one directory up".

We are now back in our home directory.
If you are more familiar with MS-DOS, realize that there must be a space between cd and the two periods.
Moving files
Now let's get familiar with how to move files around.
Let's say we downloaded two images with a web browser, and they saved into our downloads folder. Let's go in there and take a look. First, we change directory into the downloads directory.

Then list the files in the directory with the ls command.

Here we see two JPEG (Joint Photographic Experts Group) files. Let's get them out of the downloads folder, and put them someplace more appropriate, like the images folder. To move the these files, we'll use the mv ("move") command.
The mv command takes the following general form.
mv [OPTIONS...] SOURCE DESTINATION
OPTIONS is enclosed in brackets because you are not required to specify any options to complete the command. The SOURCE and DESTINATION arguments are both required.
SOURCE is the name of the file or files that you want to move. DESTINATION is where to move them. If DESTINATION is a directory name, the file or files are moved into that directory.
We are currently in the directory /home/yourname/downloads and we want to move the files into /home/yourname/images. We could specify our DESTINATION using the full pathname ("/home/yourname/images"), or as a relative path to our current directory ("../images"), or using a tilde to abbreviate our home directory ("~/images"). These are equivalent and give the same result. Let's use the relative pathname for our DESTINATION: ../images.
So, how will we specify our SOURCE?
We want to move both of the files, and they are the only files in the directory. So, the simplest way to specify them would be to tell mv "move all the files in this directory into ../images." We can do this with a wildcard.
A wildcard is a special character that represents more than one file name (or more than one part of the file name). Here, we are going to use the asterisk wildcard ("*"). If we use * as our entire file name, the shell applies our command to every file in our working directory.
So, our command reads as follows: "mv * ../images". Let's enter it now.

It looks like nothing has happened, but that is the shell's way of telling us no errors occurred. If there was a problem, it would display an error message or warning of some kind.
Let's verify that the files have moved. We can list the contents of another directory by running ls and specifying a pathname. In this case, our pathname is "../images."
![]()
The images are both there with another directory that already existed ("wallpapers"). We should make a new directory of our own, to better organize our images and keep the main images directory from getting cluttered. Let's do that now.
Making directories
Let's change into the images directory where our two penguin images now reside.
![]()
Now let's make a new directory for our penguin images. Creating new directories is accomplished with the mkdir command.
The simplest form of the mkdir command is to give it one argument: the name of the new directory. Using one argument without a pathname is possible when creating a directory in the current directory. Let's call our new directory penguin-pix.
So, the command we are going to enter is "mkdir penguin-pix" to make a new directory.
![]()
Now let's verify it is there, by listing the directory contents.
![]()
You can see that when we list the directory contents, file names and directory names are different colors to help identify the different files and directories. Although color highlighting is common with most shells, not all shells do this by default.
If we could not tell by the color of the names, we could use the ls with the -l (long list) option.

The additional information includes the following.
- Permissions - who has access to the file and what kind of access.
- Ownership - who is the file's owner.
- Authorship - who created the file.
- File size - size of the file in bytes.
- mtime - date and time the file was last modified.
The first letter on the lines for penguin-pix and wallpapers is a "d," indicating that those are directories. For more information about file listings, see the documentation of the chmod command.
We can now move our images into the new directory. To tell mv what files to move, we can use a wildcard again, but this time let's make sure it knows to move only the image files, not the directories. Since both image files end with the JPEG extension .jpg, we can specify the file name "*.jpg": this tells the shell "the files I want to move are any files in the current directory that end with .jpg". So our command looks like this: "mv *.jpg penguin-pix."
![]()
No error message was given, meaning the command completed successfully. Let's verify the files were moved by listing the contents of penguin-pix.
![]()
Removing files
We have two penguin pictures, but perhaps we decided that we only need real-penguin.jpg, and we do not need tux-the-penguin.jpg anymore. We can delete this file with the rm ("remove") command.
We need to provide rm with the file name to delete. We are currently in the images directory, but our image is now in the penguin-pix subdirectory. We could change our working directory to penguin-pix and then run the command, but that's only extra work, we can skip that step using the directory as part of the path.
Our command looks like this: "rm penguin-pix/tux-the-penguin.jpg."
![]()
Once again, the shell executes our command without giving any feedback. The command executed successfully, so the shell returns us to the command prompt, letting us know that it is ready for another command.
Unlike dragging a file to the trash or the Microsoft Windows recycle bin, there is no way to undo a file deletion with rm. Remove your files with care! Once gone, it is (virtually) impossible to get them back.
Let's verify that the file is really gone.

Removing directories
That is great for files, but what about directories? By default, rm only removes files and not directories.
The rmdir ("remove directory") command removes a directory, assuming that it is empty. Let's test it by creating a new, empty directory, using the "mkdir test-directory" command.
![]()
Let's verify it is there with "ls -l" command.

We can now remove our brand new directory using the command "rmdir test-directory," and check that it is gone by running the "ls -l" command again.

Yup, it is gone.
However, what would happen if we tried to "rmdir penguin-pix"?
![]()
We cannot rmdir that directory because it is not empty.
To remove penguin-pix and everything inside it (including all files and any directories it might contain), you can use the rm command with the -r option.
Normally, rm will not operate on a directory. However, using the -r option removes a directory recursively, which means it travels into the directory and any subdirectory, deleting everything including the directory. So, if we run the command "rm -r penguin-pix," it removes the directory and the file that was inside. If there were any directories inside, they would also be deleted.
![]()
Once again, there is no undo for this command. When you rm -r a directory, that directory and everything inside it is removed forever! Like most Linux commands, rm is very powerful and should be used with care.
Copying files
To copy a file, use the cp command.
cp SOURCE DESTINATION
SOURCE is the name of the file you want to copy, and DESTINATION is the pathname specifying the destination of the new file. The destination can be a new file name or the name of the directory where you want a copy to be located.
Let's say we have a text file in our documents folder called orig.txt, and we want to make a copy of it called copy.txt. The command we should use is "cp orig.txt copy.txt."

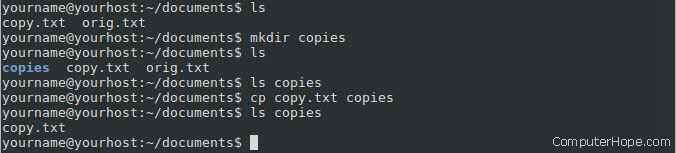
However, if a directory is added to the cp command, it makes a copy in the destination directory. In the next example, we do six things.
- List the contents of the working directory.
- Make a new directory, called copies.
- List the contents of the working directory, which now includes the copies directory.
- List the contents of the copies directory (there are none. It is empty).
- Copy copy.txt into the copies directory.
- List the contents of the copies directory, which now contains a copy of copy.txt.
Renaming a file
The mv command can also be used to change the name of a file. For example, the command "mv orig.txt original.txt" renames the file orig.txt to original.txt.

Renaming a directory
Renaming directories works exactly like renaming files, with the mv command. Here, we create a directory named "copy," but rename it to "copies" using the command "mv copy copies."

If the copy directory contained any files or directories, they would be unchanged. The only thing that would change is the name of the directory that contained them.
Auto completion
Most Linux command-line shells automatically complete the word you have started typing if you press Tab. Auto-completion helps save you time, especially with long file names. For example, let's say you have three files in your documents folder: penguin-diving.jpg, penguin.jpg, and penguins.jpg.

If you type a command, then type "p" and press Tab, the shell completes the word "penguin" for you.
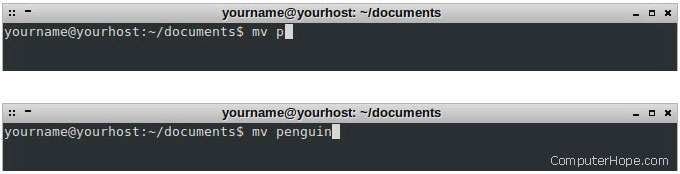
It stops there because all the files start with the word penguin, but after that it's unsure which file you want.
When there's more than one autocomplete match for what you have already typed, pressing Tab twice prompts the shell to list all the possible matches. So in the situation above where you typed p and Tab and the shell autocompletes penguin for you. Press Tab two more times would give you all possible options, and place you back at the prompt, with your command filled in where you left off.

Autocompletion also works for completing path names and command names.
Exiting the shell
Typing the exit command exits the command shell, and either close the terminal window, or prepare the terminal window to be closed manually.