
Why is my dial-up networking password not saved in Windows?
If you are using an older version of Windows with dial-up networking, and your password is not saving correctly, it's a major inconvenience. Follow these instructions to configure Windows dial-up networking to correctly save your password, so you don't have to type it in every time you connect to the Internet.
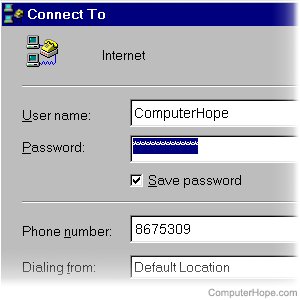
Windows 2000
Client for Microsoft Networks not installed
Verify the Client for Microsoft Networks is installed by right-clicking Dial-up networking and selecting Properties. In properties, click the Network tab and ensure that Client for Microsoft Networks is installed and selected.
Windows 95/98 or Windows Me
Password .pwl file corrupt
If a pwl file is corrupt on the computer hard drive in the Windows folder, it can cause issues with the dial-up networking. To resolve the issue, find all files ending with .pwl and rename them to a different extension, like file.ch instead of file.pwl, or delete the file.
Once the files are renamed or deleted, reboot the computer and determine if the issue is resolved or not.
Rna.pwl corrupt
If rna.pwl is present on the computer, it could be potentially causing the issue with dial-up networking. To resolve the issue, find a file named rna.pwl and temporarily rename that file to rna.ch.
Once the file is renamed, reboot the computer and determine if the issue is resolved or not.
Automatic logon is enabled
The information below contains information relating to the system registry. If you are unfamiliar with the system registry and it's potential dangers, see the registry help page before following the information below.
To disable or ensure that automatic logon is disabled, follow the steps below:
- Click Start, Run, type regedit, and click OK.
- In the Registry Editor, navigate to this key:
HKEY_LOCAL_MACHINE\Software\Microsoft\Windows\CurrentVersion\Network\Real Mode Net\
- Open the key, locate the AutoLogon value, and delete it.
Once the above is complete, reboot the computer to determine if the issue is resolved.
Password caching is disabled
The steps below contain information relating to the system registry. If you are unfamiliar with the system registry and it's potential dangers, see the registry help page before following the below information.
To enable password caching, follow the steps below:
- Click Start, Run, type regedit, and click OK.
- In the Registry Editor, navigate to this key:
HKEY_LOCAL_MACHINE\Software\Microsoft\Windows\CurrentVersion\Policies\Network
- Open the key, and change the DWORD value of DisablePwdCaching to 0. (If DisablePwdCaching is not present, add a new DWORD with DisablePwdCaching as the DWORD name, and 0 as the value.)
Once the above is complete, reboot the computer to determine if the issue is resolved.
Dial-up networking is corrupt
If you've followed each of the suggestions above, your Dial-up networking system files may be corrupt, and we recommend reinstalling it by following the steps below.
- Open the Control Panel.
- Double-click Add/Remove programs.
- In Add/Remove programs, click the Windows Setup tab.
- In Windows Setup, highlight communications and click details.
- Uncheck Dial-up networking, then click OK and Apply.
- Reboot the computer.
- Once the computer reboots, follow the steps above again, but this time check Dial-up networking instead of un-checking it to install it.
File and print sharing not installed
If you completed all steps above and continue to experience the same issue, Windows or a third-party computer program is causing issues. We recommend you reinstall Windows.