
How to rip an audio CD with Windows Media Player
Updated: 02/01/2021 by Computer Hope

In Microsoft Windows, follow these steps to rip audio or music CDs (copy the audio to your computer) with Windows Media Player.
Note
The steps below are for users who are running Microsoft Windows Media Player versions 10 higher. If you're unsure which version is on your computer, see: How to determine the version of Windows Media Player.
Windows Media Player version 12
Follow these steps to rip audio CDs in Windows Media Player 12.
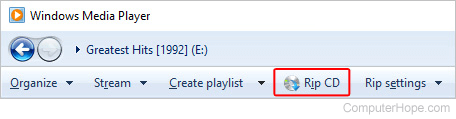
- Open Windows Media Player.
- Insert the audio CD you want to rip.
- Near the top of the window, on the left side, click the Rip CD button.
Tip
If you only want specific songs, uncheck the boxes next to those that you don't.
Windows Media Player version 10 and 11
Follow these steps to rip audio CDs in Windows Media Player 10 or 11.
- Open Windows Media Player.
- Insert the audio CD you want to rip.
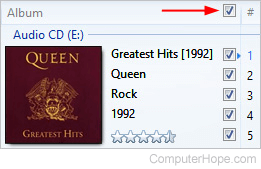
- Check the boxes next to the songs you'd like to rip. If you want the entire CD, click the "check all" box above the track listing so that every song is selected.
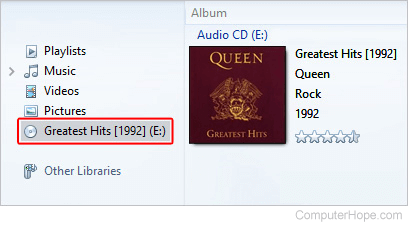
- Locate your CD in the menu on the left side of the window.
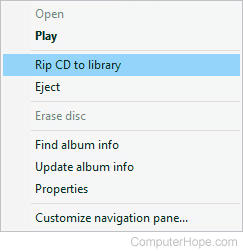
- Right-click the CD and select Rip CD to library from the drop-down menu.
CD ripping tips
The following features help make ripping and organizing your audio more convenient.
- Internet connection - If you want Windows Media Player to automatically fill in the CD name, the artist who created it, and the names of the tracks, you must be online. Although not every CD (compact disc) is listed in the CDDB (compact disc database), this feature can save you a lot of time instead of entering the information manually.
- Automatically rip - Windows Media Player has the option to rip audio CDs automatically when you insert them. Choosing this option can save you some time when you are ripping multiple CDs.