
How to transfer pictures from an iPhone to a computer

Apple iPhone users often take pictures with their phones and eventually use up all the storage. When there is no more space available, it's necessary to either delete some pictures or move them to an alternative storage medium, such as a computer. After the pictures are copied to a computer, they can be deleted from the iPhone, freeing up space to take more pictures.
These instructions also apply to transferring videos from your iPhone to a computer, as they're in the same place as the pictures.
To copy or send pictures on your iPhone to a computer, select your computers operating system and follow its provided steps.
Transfer iPhone pictures to a Microsoft Windows computer
The steps below also work with an iPad.
- Turn on your iPhone, so the Home screen is displayed.
- Connect the iPhone to the computer using the USB cable that came with the iPhone.
- On the iPhone screen, a message asking "Allow this device to access photos and videos?" should appear. Tap the Allow option.

- On the computer, open File Explorer.
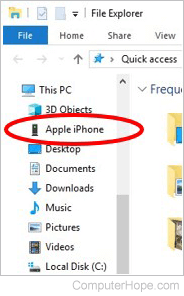
- In the left navigation pane in File Explorer, click the Apple iPhone entry under This PC.
- In the main section of File Explorer, double-click the iPhone storage drive named Internal Storage or something similar.
- Double-click the DCIM folder.
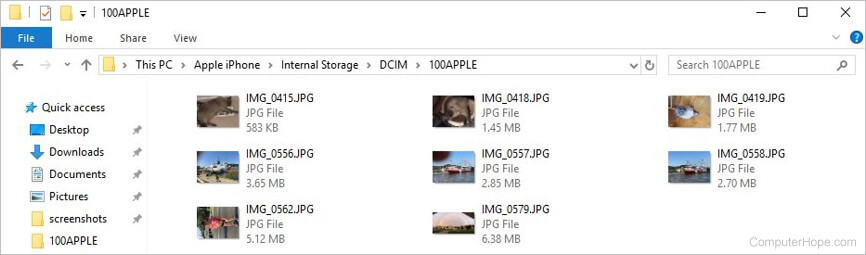
- Double-click the 100APPLE folder.
The "DCIM" and "100APPLE" folder names might be different for your iPhone. See the DCIM (digital camera images) page for further information about this folder.
- The pictures currently stored on your iPhone in File Explorer are found under the 100APPLE folder. You can copy and paste the pictures from the File Explorer window to any folder on the computer.
- After copying the pictures from the iPhone to the computer, you can safely delete them from your phone.
Transfer iPhone pictures to an Apple macOS computer
The steps below also work with an iPad.
- Turn on your iPhone, so the Home screen is displayed.
- Connect the iPhone to the computer using the USB cable that came with the iPhone.
- On the iPhone screen, a message to trust the computer or allow the computer to access data on the iPhone should appear. Tap the Trust or Allow option.
- On the computer, open the Photos app if it does not open automatically after connecting the iPhone.
- The Import screen should appear. If not, click the Import tab near the top of the Photos app window. You can also click the iPhone device name displayed in the left navigation pane.
- Select the pictures you want to copy to the computer.
- Click the Import Selected button near the top-right of the Photos app window to copy the pictures to the computer.
- After copying the pictures from the iPhone to the computer, you can safely delete them from your phone.