
How to create check boxes in an Excel spreadsheet
Updated: 01/24/2018 by Computer Hope
A check box can be very useful in a spreadsheet for many reasons. Adding a check box to an Excel spreadsheet takes only a few steps, but requires you to change a setting in Excel to view the option for adding a check box.
Follow the steps below to enable the Developer tab in Excel and add a check box to a spreadsheet.
Enable the Developer tab
If the Developer tab is already visible in your Excel program, skip to the next section to add a check box.
Excel 2010 and later
- Open Microsoft Excel.
- Click the File tab at the top-left of the Excel window.
- Select Options in the left navigation pane.
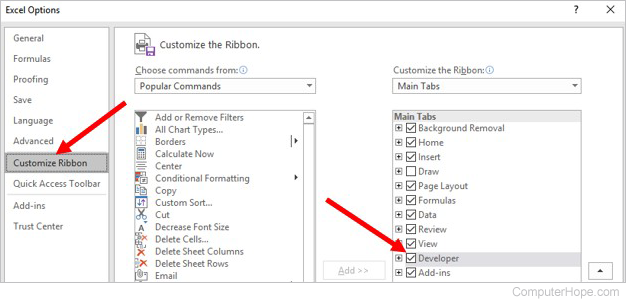
- In the Excel Options window, click the Customize Ribbon option on the left.
- Under the Customize the Ribbon section on the right, check the box for Developer and click OK.
Excel 2007
- Click the Office button (looks like an orb) at the top-left of the Excel window.
- Click the Excel Options button near the bottom right of the pop-up window.
- In the left navigation pane, select Popular.
- On the right side, check the box for Show Developer tab in the Ribbon.
Add a check box to the spreadsheet
Repeat the following steps to add multiple check boxes to a spreadsheet.
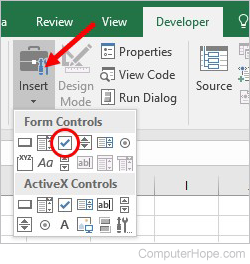
- In the Ribbon bar, click the Developer tab.
- In the Controls section, click the Insert option.
- In the pop-up menu, under Form Controls, click the check box icon.
- Click in the spreadsheet where you want to add the check box. You can also move it to another location by dragging and dropping it.
- After adding the check box, you can change the text of the check box. To change the text later, right-click the check box and select Edit Text.
- To change the properties of the check box, right-click the check box and select Format Control. You can change the line and fill color, the size, and the alternative text for the check box.