How to remove a printer from a computer
Updated: 10/18/2022 by Computer Hope

If you are installing a new printer to use with your computer, you may want to remove any printers previously installed and no longer in use. While there is no harm in leaving old printers installed, removing them helps keep the list of devices cleaned up on your computer.
To learn how to remove or delete a printer from your computer, including the printer's software, follow the steps below.
Removing a printer from your computer
- Access the Windows Control Panel.
- In the Control Panel, click the Devices and Printers utility.
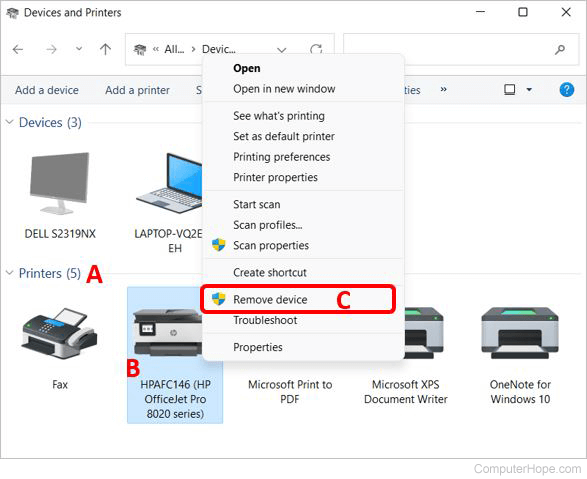
- In the window that opens, under the Printers header (A), locate the printer you want to remove (B).
- Right-click the printer and select the Remove device option (C) in the pop-up menu.

- When prompted, click Yes to confirm the removal of the printer.
After removing the printer, you'll need to uninstall any software on your computer that was installed specifically for that printer.
- Go back to the Control Panel window and click the Programs and Features utility.
- Locate and select the printer software in the list, and then click the Uninstall option in the menu bar above.
- Proceed through the uninstall process, clicking Yes if prompted to confirm the uninstallation of the printer software.
