
White balance
Updated: 12/06/2024 by Computer Hope

White balance is a common feature included in digital cameras and image editing software that allows users to adjust colors to achieve a realistic look. To use white balance, select something in the photo that is supposed to be white, or the lightest part of the photo. The other colors in the photo automatically be adjusted proportionally based on the selection.
How to adjust the white balance in Photoshop

The best way to adjust the white balance in Adobe Photoshop is to use the Curves tool.
- Open Adobe Photoshop and the image you want to adjust.
- Press Ctrl+M to open the Curves tool, or click Image, Adjustments, and then Curves.
- At the bottom of the Curves window are three eyedroppers to sample: the black, gray, and white of the image. Click the third eyedropper to Sample in image to set white point.
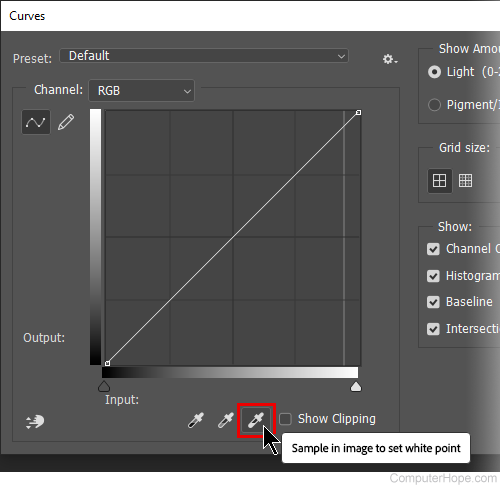
- Once the white eyedropper is selected, click the part of your image that is whitest. The color temperature of that location is analyzed, and the entire image is balanced so that area appears truly white.
- If the changes look good, click OK.
Camera terms, Gamma correction, Photo editing, Photoshop terms, Software, Software terms