
How to install a floppy disk drive
Buying tips and help
If you have not already purchased a floppy drive, see the floppy buying tips section help before continuing.
This page is written for computers that have had an internal floppy disk drive. Newer computers and operating systems no longer support internal floppy disk drives.
If you still need access to a floppy disk drive, we suggest purchasing an external USB (universal serial bus) floppy disk drive that is compatible with your version of Windows or Mac.
How to determine the floppy drive type
Before getting started
- Write down important information from the top or bottom of the floppy disk drive, such as the Model Number, Serial Number, and specifications.
- Ensure you are familiar with ESD (electrostatic discharge) and its potential dangers.
- When physically installing the standard floppy disk drive, ensure the computer is powered down and unplugged.
Remove existing floppy drive
If you are installing a floppy disk drive to replace a faulty one, disconnect all cables from the current floppy drive and then remove it from the system. Most systems require that a screw or set of screws be removed before the drive can be extracted. Other drives are attached to a removable bracket that can be pulled out by pressing and holding two tabs.
If you do not see any screws, some systems may hold the drive with a screw on the front of the case.
Install
Open the computer case and connect the floppy drive to the computer using screws or a bracket.
Connect cables
After installing the floppy drive, connect the floppy interface cable (small gray flat cable) to the back of the floppy drive. The floppy cable has a side with a blue or red line indicating pin number one. This side of the cable points to the power connection. If your computer floppy cable has three connections or a twist in the cable, verified it's connected correctly by referring to the picture below.
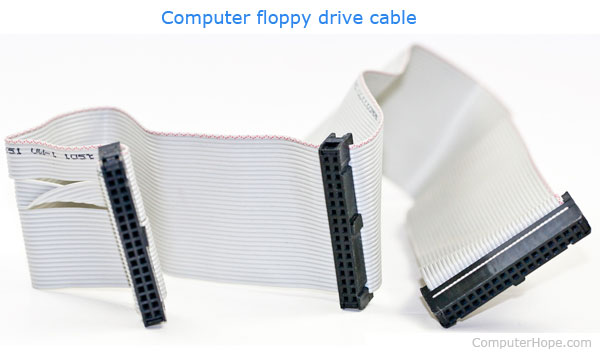
Today, most computers and computer floppy disk drives have cables that only have two connections: one for the motherboard and one for the floppy disk drive. If your cable only has two connections, the above picture does not apply.
After connecting the floppy interface cable, connect the drive power cable to the back of the floppy disk drive. This cable is relatively small, compared to most power cables coming from the power supply.
Setup BIOS
Once the floppy drive is fully connected to the computer, put the case back on the computer. Then, connect the keyboard, monitor, and power to the computer. (We recommend you do not reconnect the rest of your cables yet. If you experience problems, you may have to disconnect all the cables again.)
Once connected, turn on the computer and enter the BIOS setup. Verify the floppy drive is recognized and properly configured in BIOS, most likely as a 1.44 MB 3.25" floppy.
Troubleshooting
If additional issues are encountered during or after the installation of the floppy disk drive, see our floppy drive help and support page for additional help and information.