How to print envelopes in Microsoft Word
Updated: 07/13/2023 by Computer Hope
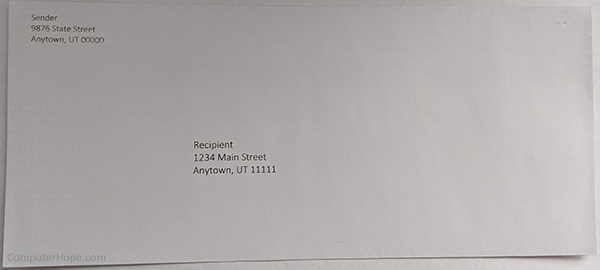
A printed envelope gives a professional-looking experience for the recipient of the mailing. The following steps show you how to print both the return address and the delivery address directly on an envelope without using labels.
Note
Printing directly on envelopes is only possible in the Microsoft Word desktop application. It's currently not possible to print on envelopes using Microsoft Word Online (the web version).
Steps for Microsoft Word
- Open a new blank Word document.
- Click the Mailings tab, then click Envelopes.
- In the Envelopes and Labels window that pops up, make sure you're in the Envelopes tab.
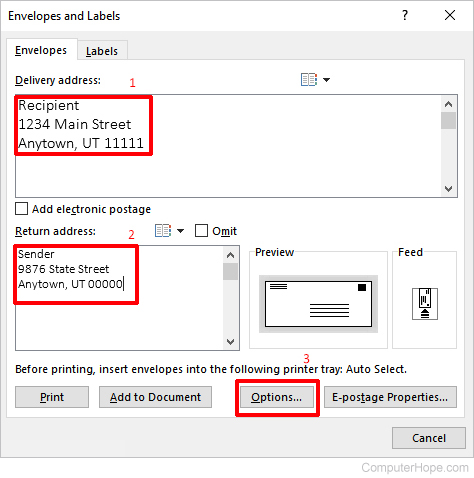
- Type in the Delivery address in the first box.
Tip
If you have Outlook, you can enter an Outlook profile in Word, and use the contacts to fill in the delivery address(es).
- Next, type in the Return address in the second box.
Tip
If you have a Stamps.com or similar account, which lets you print postage from your home or business, you can add postage to the printing.
- Click Options to set up the correct size of the envelope you are using for the printer.
- In the Envelope size drop-down, select the envelope size you are using.
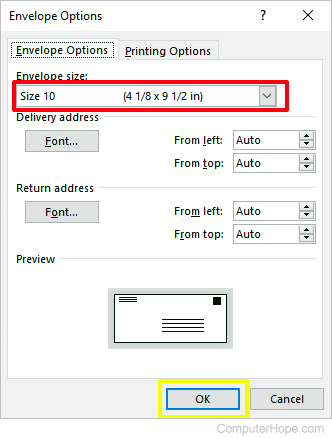
- You can change both the delivery and return address fonts and placement or leave the default options.
- Once you've made the necessary changes, click OK.
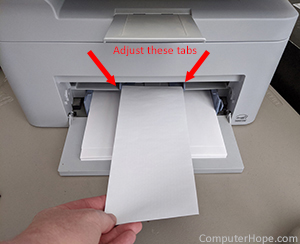
- Next, set up the printer. There's a slot on the printer that adjusts for the insertion of envelopes. Two tabs expand out and in (shown in the picture.) Expand these to the width of the narrowest part of the envelope, and insert the envelope into the printer. Consult your printer's owner's manual to see which direction to insert the envelope, so it prints correctly. Generally, this is with the glue side face down on the left side.
- Once you have everything set up the way it should be, click Print.