How to scan a drive for errors in macOS
Updated: 02/04/2024 by Computer Hope

On Apple desktop and laptop computers, there is a disk utility called First Aid. This feature can scan for and repair errors on storage devices such as an HDD (hard disk drive) or SSD (solid-state drive). To learn how to find and correct errors on your storage devices in macOS, follow the steps below.
How to scan a drive for errors in macOS
- In the Utilities window that opens, double-click the Disk Utility icon.
![]()
- In the window, on the left side, under Internal, select a device or volume to scan. Then, click the First Aid icon located at the top of the right section.
![]()
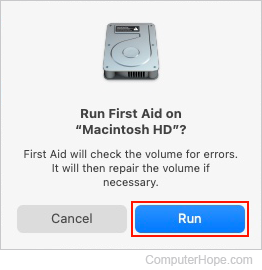
- In the prompt, click the Run button to confirm your choice.
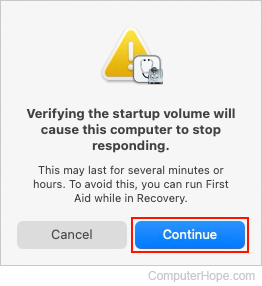
- Click the Continue button in the next prompt.
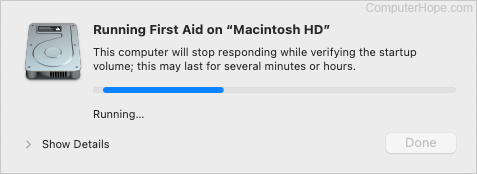
- Another prompt appears showing the progress of the First Aid scan on the device or volume.
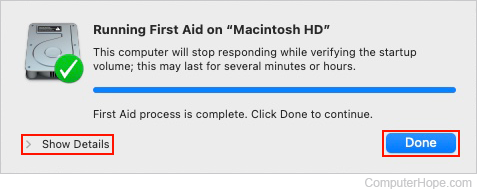
- When finished, click Show Details to see more information about the scan. If nothing is wrong with the drive or volume, click the Done button to exit the scan.