
How to view files on a flash drive or memory card
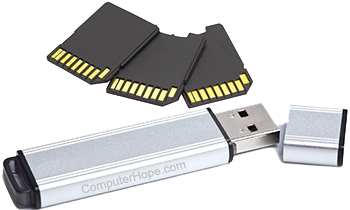
Flash drives and memory cards are useful storage methods for the transport (sneakernet) of files and pictures. For example, if you have a file or picture that you want to share with someone else, you can save it to a flash drive or memory card.
Select your operating system from the list below and follow the steps for viewing files and folders stored on flash drives and memory cards.
If you don't have a memory card reader on your computer, you must purchase one to view files saved on a memory card. The steps on this page assume you have a memory card slot on your computer or a memory card reader connected to your computer through USB (universal serial bus).
Viewing flash drives and memory cards on Windows
To read the contents of your flash drive on a Windows computer, follow the steps below.
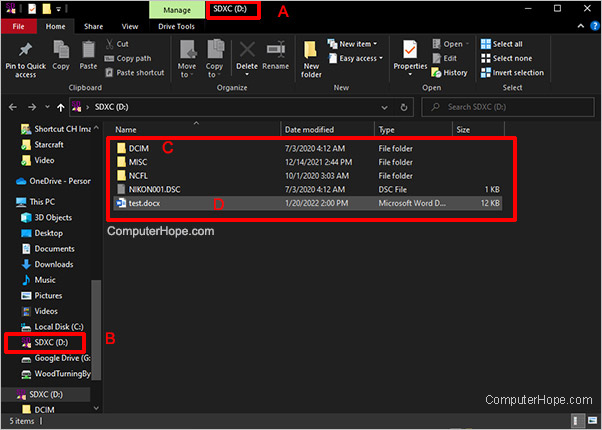
- If you haven't already, connect the flash drive to the computer, or insert the memory card in the memory card slot or reader. After a few seconds, a window should open showing the new drive and its contents (A).
- If a new window doesn't pop up, you can access the drive by pressing Windows key+E to open File Explorer. Select the drive letter for the flash drive or memory card. The drive letter is usually labeled with the name of the drive's manufacturer, or similar initials (B). For example, in the image below, the drive is called SDXC because it is an SDXC (secure digital extended capacity) card from Lexar.
When reading files from a camera's memory card, pictures are generally saved in a DCIM (digital camera images) folder (C). Double-click this folder to view the pictures.
For documents, spreadsheets, or text files saved to the drive or card, they should be listed on the main screen of the drive. For example, "test.docx" is a Word document (D), shown in the image below.
After you're done, eject your removable drive by right-clicking its name in File Explorer and selecting Eject.
Viewing flash drives and memory cards on macOS

To read the contents of your flash drive on a macOS computer, follow the steps below.
- If you haven't already, connect the flash drive to the computer, or insert the memory card in the memory card slot or reader. After a few seconds, a USB icon should appear on the desktop.
Most recent Macbooks do not feature USB ports. Instead, they feature USB-C (Thunderbolt 3) ports. To connect a traditional USB flash drive or memory card reader to these Macbooks, you must use a USB-C to USB adapter.
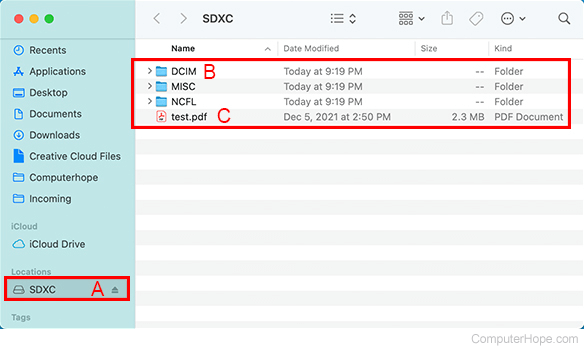
- Click the storage device's icon on your desktop to open the Finder window. The icon is usually labeled with the name of the drive's manufacturer, or similar initials (A). For example, in the image below, the drive is labeled SDXC because it is an SDXC card from Lexar.
When reading files from a camera's memory card, pictures are generally saved in a DCIM folder (B). Double-click this folder to view the pictures.
For documents, spreadsheets, or text files saved to the flash drive or memory card, they should be listed on the main screen of the drive. For example, "test.pdf" is a PDF (C), shown in the image below.
After you're done, eject your removable drive or memory card by right-clicking its name in Finder and selecting Eject, or dragging its desktop icon to the Trash bin.