
How to wrap text around an image in Microsoft Word

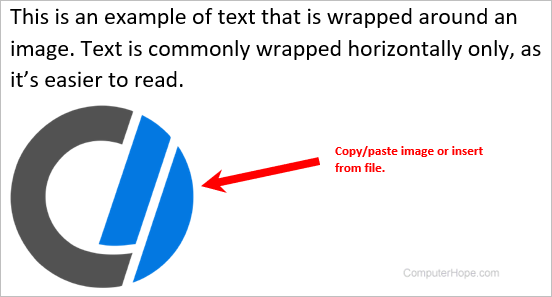
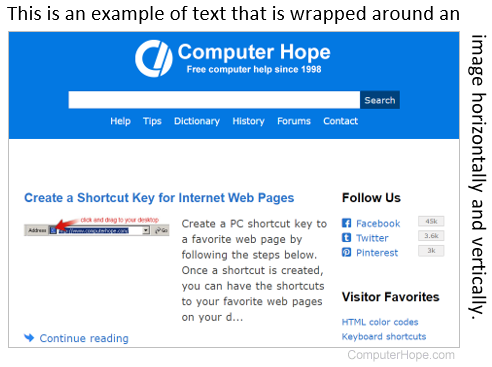
In Microsoft Word, the practice of wrapping text around an image is used with newsletters and marketing content, but can make any document more eye-catching and appealing to read. In most cases, text is wrapped around an image horizontally only, continuing a sentence from the left to the right side of the image. However, it's also possible to wrap text around an image so that it surrounds the edges horizontally and vertically.
To learn how to wrap text around an image, select from the list below and follow the instructions.
How to wrap text horizontally only
To wrap text around an image horizontally only, where sentence text is continued on the left and right sides of the image, follow the steps below.
- Open a new or existing document in Microsoft Word.
- Type the text you want to wrap around an image.
- Place the text cursor on the next line after the sentence or paragraph you entered.
- Copy and paste an image at the text cursor's location, or insert an image using the Microsoft Word Ribbon.
- Right-click the image and select Size and Position from the pop-up menu.
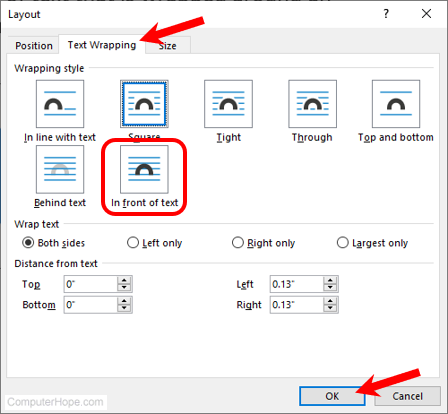
- In the Layout window that opens, click the Text Wrapping tab.
- In the Wrapping style section, select a text wrapping option. For easier reading of wrapped text, the best options are In line with text, Square, Tight, or Top and bottom. Click OK after selecting the desired option.

- Press and hold the left mouse button on the image, and then drag the image into the text. Move the image until the text wraps around the image in the desired way.
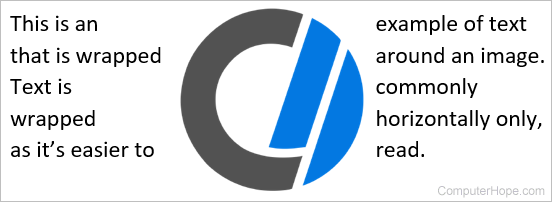
How to wrap text horizontally and vertically
To wrap text around an image horizontally and vertically so the text follows the sides of the image, follow the steps below.
These steps require you to add a text box. For help inserting a text box in Microsoft Word, see: How to add or remove a text box in Microsoft Word.
- Open a new or existing document in Microsoft Word.
- Add an image to the document using the Microsoft Word Ribbon or copy and paste one from another document, web page, or file.
- Begin typing text on the line above the image.
- After typing some text, adjust that text's font, size, and format (bold, italic, etc.) as desired.
- Type more text until its length spans the top edge of the image.
- To add and wrap text vertically along the right edge of the image, insert a text box into the document.
- Type the text you want to place vertically in the new text box on the image's right edge.
- Select the text in the text box and adjust the font, size, and format to match the text along the top edge of the image.
- Adjust the height and width of the text box so all the text is on one line.
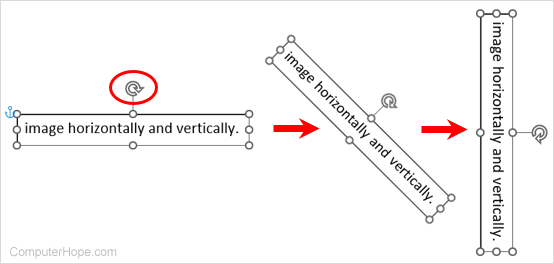
- Press and hold the left mouse button on the circular arrow above the text box. Drag the mouse down and to the right to rotate the text box 90 degrees. The text in the text box should now be aligned vertically.
- Right-click the text box and select Size and Position in the pop-up menu.
- In the Layout window that opens, click the Text Wrapping tab.
- In the Wrapping style section, select the In front of text option and click OK.
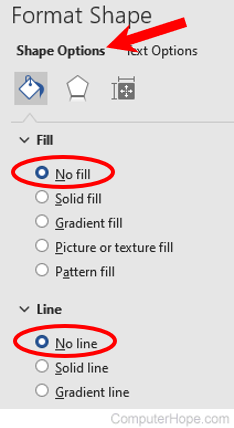
- Right-click the text box and select Format Shape.
- In the Format Shape section that opens on the right side of the Word program window, click the Shape Options tab.
- Under the Fill section header, click the No fill option, and under the Line section header, click the No line option. These options remove the line around the text box and make it transparent.
- Click-and-drag the text box to the right edge of the image. Line up the beginning of the text with the top edge of the image.
- If the image moves down the page as you move the text box into place, right-click the image and select Size and Position. Click the Text Wrapping tab, select the In front of text option, and click OK. Then, click-and-drag the image to align it with the horizontal and vertical text again. You may also need to move the text box closer to the right edge of the image to match the white space between the image and text.
To wrap text around an image on the bottom and left edge, repeat the steps above and adjust the text box rotation and text alignment accordingly.