
How to edit and clear scratch disks in Adobe Photoshop
While computers today come with more memory than ever, there are a few programs that may use an excessive amount. Luckily, some applications can utilize scratch space (referred to as a scratch disk by Adobe) as "overflow" to help share the load. This virtual memory essentially works as extra temporary storage area when your current project wants to use more of your system's RAM (random-access memory) than is allotted.
The sections below show you how to edit scratch disks in Adobe Photoshop. To proceed, choose a section from the list below and follow the instructions.
How to choose or change a scratch disk
Use this method if you can access and load Photoshop normally (the scratch disk isn't full).
- Open Adobe Photoshop.
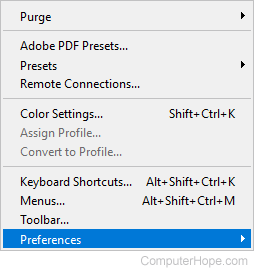
- At the top of the screen, click Edit on the menu bar.
- Select Preferences from the drop-down menu.
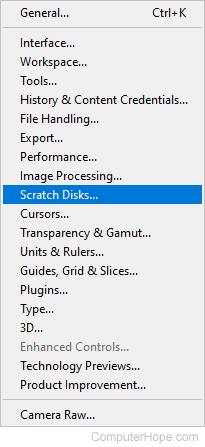
- Select Scratch Disks from the pop-out menu.
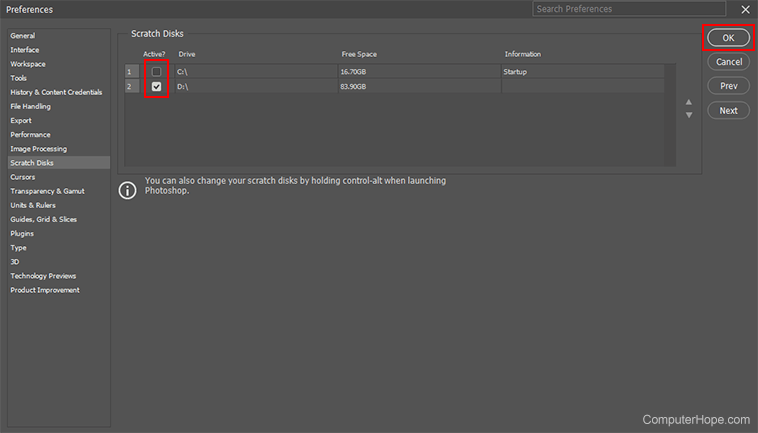
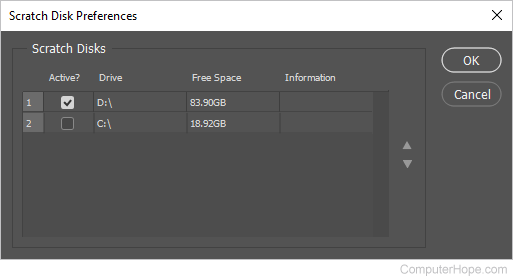
- In the new window, check the box next to the drive(s) that you want to use as a scratch disk, and then click OK.
How to choose or change a full scratch disk
If you cannot open Photoshop due to a full scratch disk, use this method.
- Attempt to open Adobe Photoshop.
- While the program is loading, press and hold the Ctrl+Alt keys (or Command+Option keys on a Mac) until the following menu appears.
- From here, you can choose to add or change a scratch disk by clicking a check box, and then click OK.
- You should now be able to load Photoshop.
How to clear a scratch disk
These steps show you how to clear the data temporarily stored on a scratch disk.
Be sure to save your work before performing the steps below as anything you're currently editing is lost in the process.
Clear scratch in Photoshop
In Photoshop, you can clear the scratch disk from the Edit menu by selecting Purge > All.
Manually delete scratch in Windows
Follow these steps to manually delete Photoshop scratch in Windows.
- Open Windows Explorer by pressing the Windows key+E.
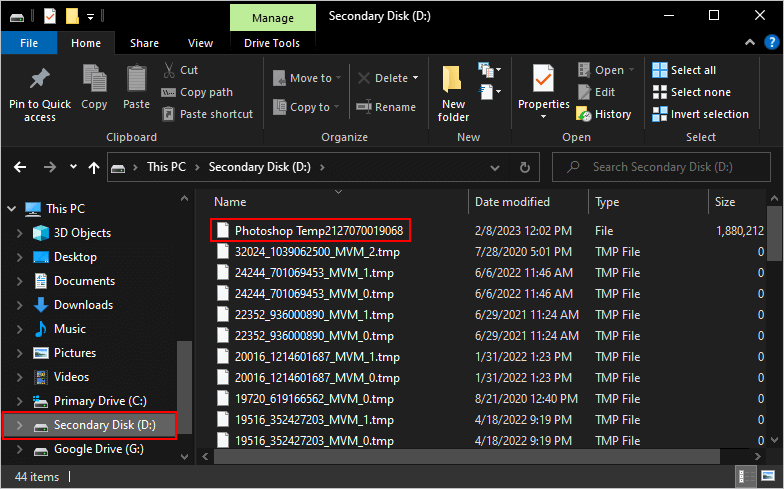
- Locate the Photoshop Temp file for your scratch disk.
- Local Drive - If your scratch disk is on a local drive, the path is:
C:\Users\AccountNameHere\AppData\Local\Temp
You need to replace "AccountNameHere" with the name of your local user account name.
- Secondary Drive - If your scratch disk is on a secondary drive (see the images from the previous sections), the temp file should be in the root directory. In our example below, the D: drive.
- Once you locate the file, click it and press the Delete key.
- When you restart Photoshop, the scratch disk associated with that drive is cleared.