
How to create a boot disk
This page provides details about creating a boot diskette, or floppy disk, for Windows and not how to create a bootable CD. If you're looking for steps for newer versions of Windows (e.g., Windows 7, 8, or 10), see: How to create a recovery disk in Windows.
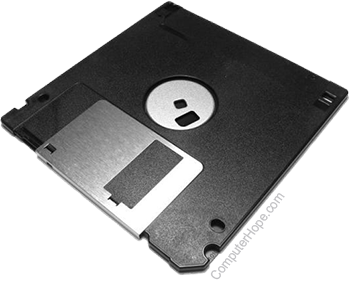
A boot disk lets you boot from a diskette instead of your hard drive. This diskette can fix issues that may arise during the lifetime of your computer or help load older MS-DOS games. Realize this diskette is completely different than a restore CD or disc that may have been included with your computer.
After creating a boot diskette, it's highly recommended you write-protect the diskette to prevent any virus from infecting the disk or the disk getting erased.
Creating an MS-DOS boot disk
These steps are for users who have MS-DOS installed on the computer. Find your version of Windows in the next section and follow the steps.
To create an MS-DOS diskette, begin by getting to the DOS directory by typing:
cd\dos
Once at the C:\DOS directory, skip to copying files.
Creating a Windows 3.x boot disk
These steps are for users who have Windows 3.x installed on the computer.
To create a Windows 3.x diskette, from Windows Program Manager, click File and then choose the option to Exit Windows, which gets you to a prompt; at the prompt, type:
cd\dos
Once at the C:\DOS directory, skip to copying files.
Creating a Windows 95 boot disk
These steps are for users who have Windows 95 installed on the computer.
In Windows 95, Microsoft has created a new method of creating a bootable recovery diskette. Unfortunately, however, this diskette does not support CD-ROM support and is missing a few recommended files. To do this, click Start, Settings, Control Panel, double-click the Add/Remove program's icon, click the startup disk, and create the disk.
Alternatively, to create a Windows 95 boot diskette manually from Windows, click Start, Shutdown, and choose the option to restart the computer in an MS-DOS prompt. At the prompt, type:
cd\windows\command
Once at the C:\DOS directory, skip to copying files.
Creating a Windows 98 and Me boot disk
These steps are for users who have Windows 98 or Windows Me installed on the computer.
An excellent feature of Windows 98 and Me is its boot diskette. Using Windows to create a Windows 98 boot diskette gets all the needed boot files and CD-ROM support. To create a Windows 98 boot diskette, click Start, Settings, Control Panel, double-click the Add Remove program's icon, click the startup disk, and create the disk.
Alternatively, to create a Windows 98 boot diskette manually from Windows, click Start, Shutdown, and choose the option to restart the computer in an MS-DOS prompt. At the prompt, type:
cd\windows\command
Once at the C:\DOS directory, skip to copying files.
Copying additional files
When making a boot disk, if you are running "Stacker," DoubleSpace, or drive swapper program, this could not work.
Once in DOS and in the correct directory (mentioned earlier), you're ready to create your bootable diskette. Insert a diskette containing no important information since it will be erased.
At the prompt, if you have MS-DOS 6.2, Windows 3.x, Windows 95, or Windows 98, type:
FORMAT A:/S
If you have MS-DOS 5.0 Type using double-density 5.25" diskettes, type:
FORMAT A: /360 /S
If you have MS-DOS 3.11 through 4.0 using double-density 5.25" diskettes, type:
FORMAT A: /4 /S
Once the diskette is formatted and the system is transferred, you'll be returned to your original directory. In this directory, type:
copy format*.* a: [press Enter]
copy fdisk*.* a: [press Enter]
copy mscdex*.* a: [press Enter]
copy sys*.* a: [press Enter]
copy edit*.* a: [press Enter]
copy qbasic*.* a: [press Enter] (Win 95/98 users skip this line)
copy debug*.* a: [press Enter]
copy himem*.* a: [press Enter]
copy emm386*.* a: [press Enter]
If you plan to use this diskette to load games or you feel that you need mouse support, copy the mouse driver onto the boot diskette. The MS-DOS mouse driver is mouse.com or mouse.sys. Locate this file and copy it to your bootable diskette.
For CD-ROM support, visit our CD-ROM drivers page for information on loading your CD-ROM driver.
Once you have copied the above files, create an autoexec.bat and a config.sys. Get to the floppy drive by typing A:, once at the floppy drive, type:
copy con autoexec.bat [press Enter]
@echo off [press Enter]
LH A:\MSCDEX.EXE /D:CDROM [press Enter] (this line is used for your CD-ROM drive).
LH A:\MOUSE.* [press Enter] (skip line if you did not copy mouse file, the * is either sys or com).
Press and hold Ctrl+Z to return ^Z. Once this is displayed, press Enter to copy the file.
copy con config.sys [press Enter]
device=a:\himem.sys
dos=high,umb
device=a:\emm386.exe noems
files=30
buffers=20
devicehigh=a:\oakcdrom.sys /d:CDROM (this line is used for your CD-ROM drive).
Press and hold Ctrl+Z to return ^Z. Once this is displayed, press Enter to copy the file.
Congratulations, after completing the above steps, you have a bootable floppy diskette.
Creating a Windows NT boot disk
To create a boot diskette, open the i386 directory on your Windows NT CD or your hard drive.
Format the floppy diskette you want to make a bootable Windows NT boot disk using the Windows NT machine.
Copy boot.ini, ntdetect.com, and ntldr to the floppy diskette.
If you are using any SCSI devices that you need access, load those drivers onto the diskette.
Creating a Windows 2000 boot disk
To create a Windows 2000 Professional bootable diskette, you need four 1.44 MB diskettes and the Windows 2000 Professional CD.
Click Start, Run, browse to the CD-ROM drive.
Open the "BOOTDISK" folder and double-click makeboot.exe, and click ok to launch the program to create the diskette.
Users can also create an Emergency Repair Disk by clicking Start, Programs, Accessories, System Tools, and opening backup. From the backup window, click the button for Emergency Repair Disk and follow each of the steps.
Creating a Windows XP boot disk
The Microsoft Windows XP CD is a bootable CD and doesn't need a bootable floppy diskette. Booting from the Windows XP CD lets you install, reinstall Windows XP, and troubleshoot.
Create MS-DOS bootable diskette
When formatting a floppy diskette, users have the option of creating an MS-DOS startup disk, follow the steps below to do this.
- Place the diskette in the computer.
- Open My Computer, right-click the A: drive, and click Format.
- In the Format window, check Create an MS-DOS startup disk.
- Click Start.
Create Windows XP setup diskettes
Microsoft has phased out bootable floppy diskettes in favor of bootable CDs and has not included a method of creating a bootable floppy diskette in Windows XP or from the CD.
How to use a boot disk
Once the bootable diskette is successfully created, follow the steps below to use the boot disk.
- Place the diskette into write-protect mode (in case the computer has a virus).
- Insert the diskette into the computer and reset or turn on the computer to begin the boot process.
- As the computer is booting, answer the questions prompted (if any).
- Once at the A:\> prompt, take the appropriate actions depending on the situation of the computer.
Troubleshooting
- How to create a bootable Windows USB drive.
- How to make a bootable CD.
- How to create a Windows ERD or ASR.
- How do I get a boot diskette?
- Can an NTFS partition be accessed using a bootable diskette?
- Why am I unable to restore my computer using restore disc?
- What files are needed to boot a computer?
- How to fix the error 'missing command interpreter'.
- Floppy drive help and support.
- CD-ROM help and support.
- USB help and support.